What catches your attention while browsing online? Is it an attractive image or a catchy headline?
Out of all the images on your website, your featured image is one of the most important.
Coupled with an engaging headline, the featured image helps grab visitor’s attention and those necessary clicks to your pages. And if you are running an online store, good quality images really do the trick!
What would you make of an image that is blurry, stretched, and poorly designed? Would you click on the image or skip to the one that’s been formatted better?
Your featured image sets the tone from the outset. It indicates to the reader what’s to be expected and provides an expectation of the quality of the content, product or service you offer.
Considering all the above, doesn’t it make sense to put that extra effort into creating your featured images?
Getting all those little things right, such as the perfect image dimension or optimizing the image size, helps bring out the perfect featured image.
The sections we’ve covered in this article are the commonly asked questions by our readers. What is a WordPress featured image? Why have one in the first place? How do I change the default featured image? What are the best practices to be followed, and many more.
Let’s jump right into the first question.
- What Is a WordPress Featured Image?
- Why You Need a Featured Image on Every Page
- What Is the Ideal WordPress Featured Image Size?
- What Type of Thumbnail Image Should You Use?
- WordPress Default Image Sizes
- How to Change Default WordPress Image Size
- How to Add a Custom WordPress Image Size
- Optimizing WordPress Post Thumbnails for Social Sharing
- How to Optimize WordPress Featured Images for Search
- WordPress Featured Image Best Practices
- What’s Your WordPress Featured Image Size?
What Is a WordPress Featured Image?
A featured image is an image representation of your post or a page on your WordPress site. They typically appear at the top of your posts, the post archive page, and the related posts section. A featured image also appears when you share a post on social media.
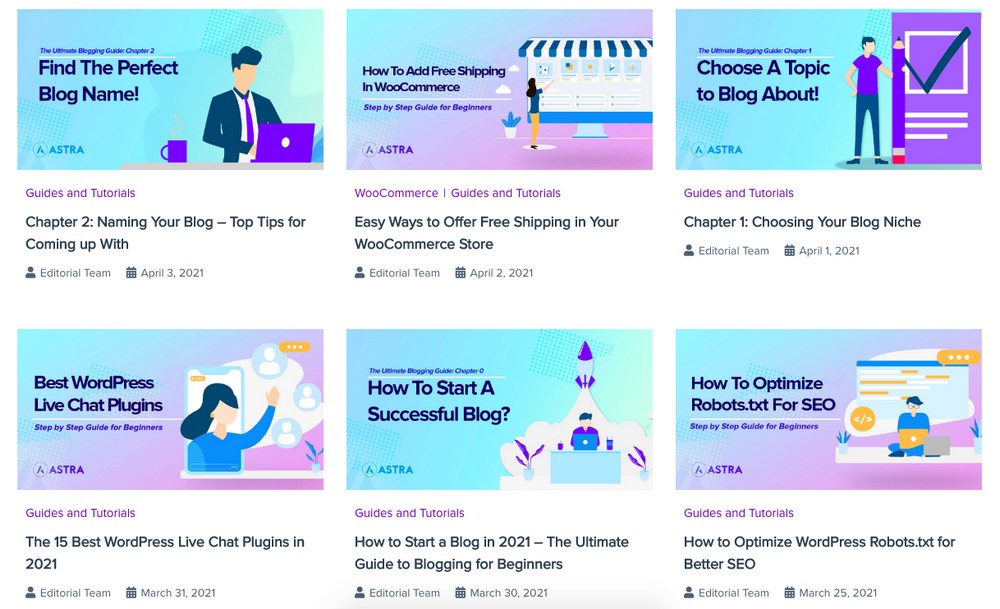
The featured image draws the visitor’s attention to your content and indicates what your posts are about.
Your active WordPress theme also determines how the featured images will be displayed on your site. While they may look different across themes in terms of size and placement, most WordPress themes have them enabled.
Notice how the featured images appear on the social media channels?

Among all the noise and stuff happening on social, does your featured image stand out?
Why You Need a Featured Image on Every Page
You should follow a theme, maintain a certain consistency and use common elements across the images. Not only does this give a more professional look to your pages, but it also helps eventually build a brand too.
Have you stopped scrolling through your social media feed by just noticing a featured image that includes your favorite brand’s colors or elements?
Featured images shared on social media have an easy and distinguishable look and help build brand awareness and customer engagement.
With a consistent approach, your users begin to take notice and recognize your brand. This helps garner more clicks from your existing readers and also helps attract new ones.
What Is the Ideal WordPress Featured Image Size?
While different themes have different featured image sizes, we recommend going with an image size of 1200 pixels by 628 pixels if you want to play it safe.
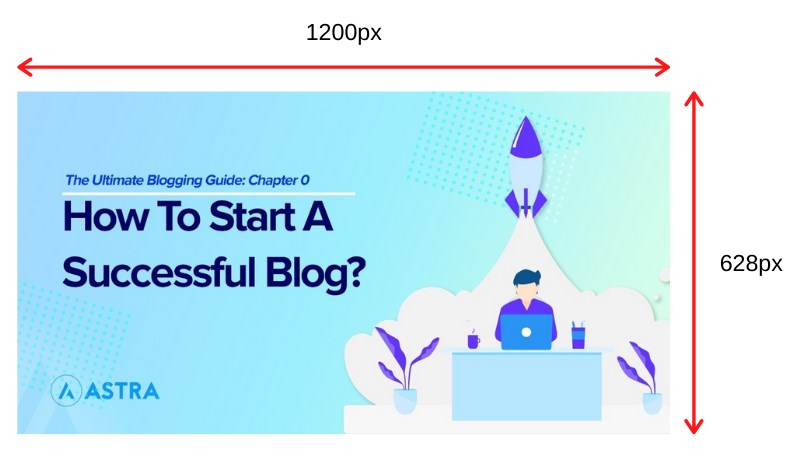
This should work well with most WordPress themes.
You can alter and customize the image settings in WordPress pretty easily.
Head over to Settings > Media and customize the images just the way you want to.
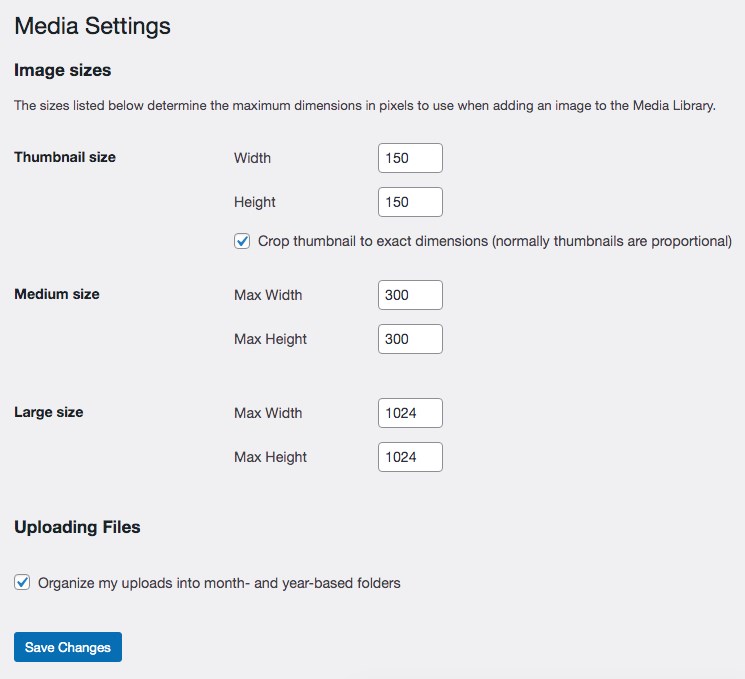
Ever wondered how large image sizes sit perfectly well on your mobile devices? Well, WordPress automatically resizes your images, making them work on any screen size.
You can explicitly mention the various image sizes under Media Settings.
What Type of Thumbnail Image Should You Use?
This is wholly based on the type of website you are running.
From using high-quality images, stock images, or even custom-made images, the choice is entirely yours.
You’ll benefit from having high-quality images if your site is to do with travel, food, photography, fashion and other subjects that are more visual in nature.
It makes sense to create your own images. A recipe blog talking of a particular dish must have relevant photos. If you are discussing a particular destination, ensure you have photos of that particular travel destination.
Here’s a recommendation.
While it is great to use stock photos from sites such as Unsplash, Shutterstock, and so on, we suggest using your own photos wherever possible. Many sites use the same images from the same stock image repositories on their about page, the management, products or services.
Additionally, using unique images helps your website to stand out from the crowd.
You don’t have to just use images either. You could also use graphics. Consider using custom-made graphic images similar to the ones we’ve used.

Since you are creating such images, not only are they original, you also have the option to include your logo within your WordPress featured image.
WordPress Default Image Sizes
Did you know that WordPress automatically creates three versions of your original image when you add it to your site?
These are:
- Thumbnail size: 150×150 pixels
- Medium size: 300×300 pixels
- Large size: 1024×1024 pixels
Now, why are these different versions created? Let’s explain this with an example.
Consider an image of dimension 1200px by 630px.
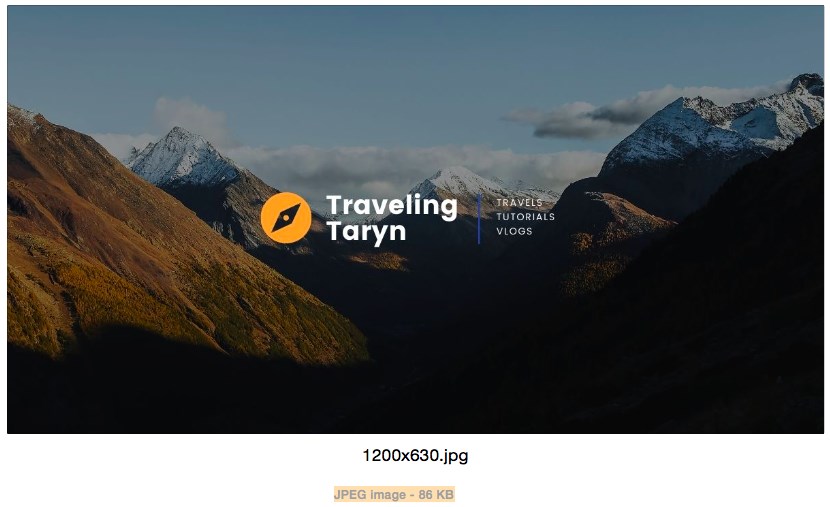
It’s got a file size of 86KB.
We’ve gone ahead and created the same image, this time with the dimensions of 150px by 150px. The file size now reduces to 10KB.
If you were to upload the original file, i.e., 1200px by 630px, and WordPress didn’t automatically resize the images, would it make sense to use the same image for a thumbnail size of 150px?
You’d be slowing the page load speed and increasing the bandwidth used. Not to mention, if you were viewing the image on a mobile device with a smaller screen size than desktop, you don’t need such a huge image.
WordPress automatically resizing the image is helpful for sure. However, they may not work in all instances. For example, if a particular WordPress theme requires an image of a certain dimension, the default resizing may not necessarily help.
In such cases, you’ll need to resize the images yourself.
How is this possible?
How to Change Default WordPress Image Size
Websites undergo design changes. This could either be to include new products and services or could be to have a new look and feel altogether.
When customizing your website look and feel, altering the featured image size could also be on your to-do list.
Let’s understand how to change the default WordPress image size.
Considering you are making changes to your live site, we recommend carrying them out in a staging environment.
A staging site (environment) is an exact clone of your live site and allows you to make changes without impacting your users. That way, you needn’t worry about how a faulty update or badly customized site may end up looking to your visitors.
Once you’ve completed all your changes, you can push the changes to the live site.
Resize Your Featured Image Dimensions
To change the default image sizes in WordPress, head over to Settings > Media.
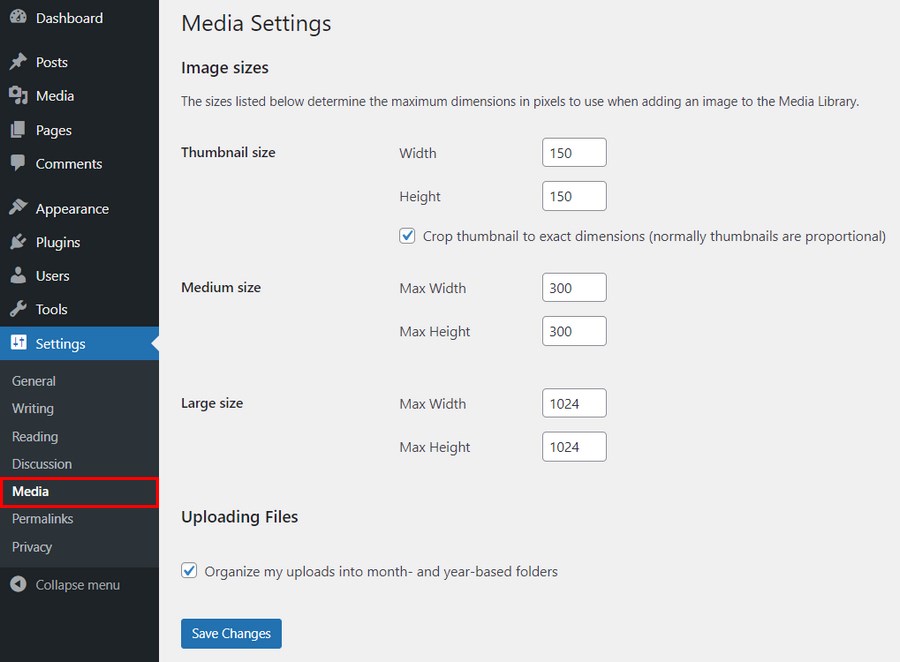
Make the necessary changes to the image sizes in the Max Width and Max Height fields.
Once done, click Save Changes.
Any new image uploaded to your WordPress site will now be automatically resized to the dimensions you’ve entered.
How about the older images?
Reformat Your Old Featured Images
The new images will all be resized to the dimensions set under Media settings.
To resize the existing images on your WordPress site, you can reupload them manually.
As this is a tedious process, especially if your site has several images, we recommend using WordPress plugins such as Regenerate Thumbnails, reGenerate Thumbnails Advanced, WordPress Real Thumbnail Generator and other such plugins.
How to Add a Custom WordPress Image Size
To recap, WordPress automatically creates three versions of our original image, thumbnail, medium, and large size.
What if you wanted to add another default size? Can we have a custom WordPress image size included?
Yes, we can!
Step 1. Add Custom WordPress Image Size by Editing function.php
For this, we’ll need to do a bit of coding and will need to access the website’s functions.php file.
As we will edit the code, you could either take a backup of the file or make these changes on a staging site.
We would actually recommend creating a child theme to make your changes instead though.
A child theme is a replica of your main (parent) theme. When your web page loads, it will read your main theme files and then your child theme. Any change you make to your child theme will appear to users.
The biggest advantage of creating a child theme is that your website doesn’t break if an update on your theme goes wrong.
Simply delete the child theme and create a new one from the parent theme. That way, you can go about making those changes to any file without worrying about the repercussions on the front end.
How to create a child theme? We have a step-by-step guide on how to create a WordPress child theme here.
Once you’ve opted for one of the above-mentioned options, we need to add a bit of code to the functions.php file.
For this, head over to Appearance > Theme Editor.
Then select your functions.php file from the menu on the right.
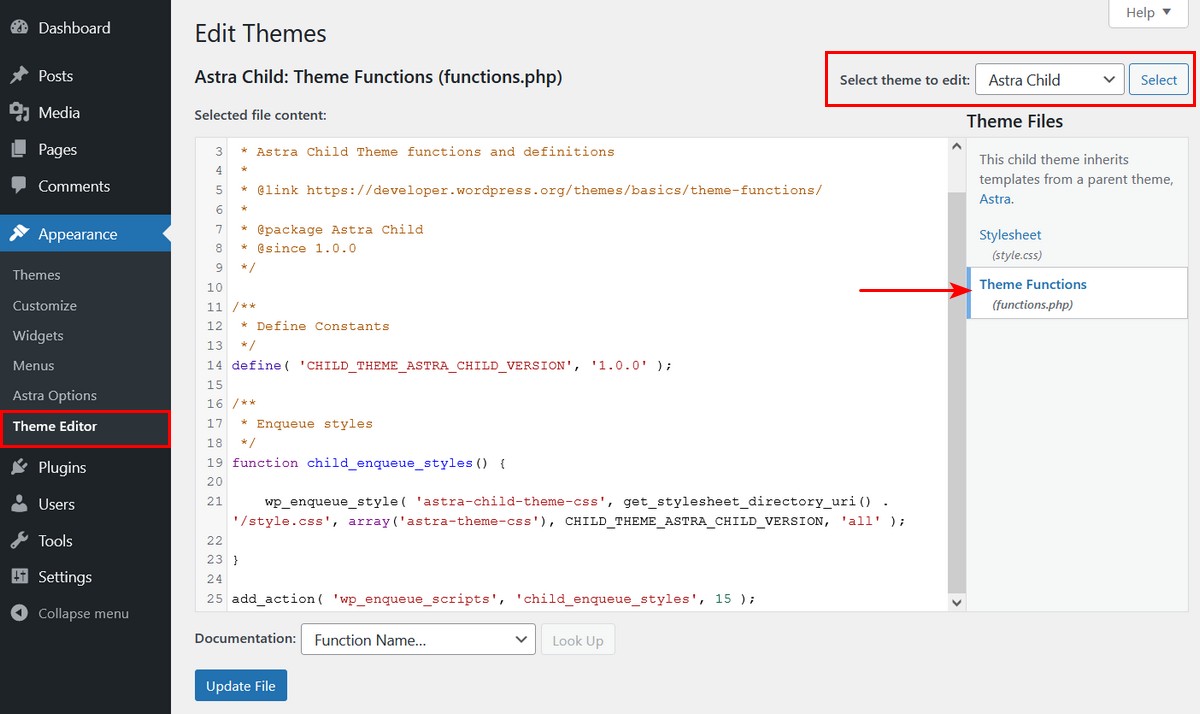
The general syntax is,
add_image_size( string $name, int $width, int $height, bool|array $crop = false )
Click Update File once you’re done.
The code you’ve just included enables the add_image_size() function. This helps add new custom WordPress image sizes.
For instance, the following are examples of how you can add custom images using the above syntax.
add_image_size( 'newpost-thumbnail size', 600, 250 );
add_image_size( 'newhome-thumbnail size', 250, 150 );
add_image_size( 'newfull-thumbnail size', 800, 1500 );
Where, ‘newpost-thumbnail’, ‘newhome-thumbnail’, and ‘newfull-thumbnail’ are custom names we created for the new image sizes. It can be any custom name of your choice.
The values such as ‘600’ and ‘250’ are the width and height, respectively.
Step 2. Display Custom Sizes in Your Theme
Now that we’ve created the custom image sizes, we need to display them. There are several ways to do so.
For a post’s featured image, you can add the custom image size using the_post_thumbnail() function in the theme template file.
if ( has_post_thumbnail() ) {
    the_post_thumbnail( 'your-custom-size' );
}
Want to select the custom sizes from your WordPress admin? You can do so by using the image_size_names_choose hook. This helps you assign a familiar name from your dashboard.
add_filter( 'image_size_names_choose', 'my_custom_sizes' );

function my_custom_sizes( $sizes ) {
    return array_merge( $sizes, array(
        'your-custom-size' => __( 'Your Custom Size Name' ),
    ) );
}
You could reference the following link on how to access the_post_thumbnail() function in your theme.
Step 3: Regenerate Thumbnails
Once you’ve completed the above steps, you’ll need to regenerate your existing images. You can choose any WordPress regenerate thumbnail plugins such as Regenerate Thumbnails.
This plugin allows you to regenerate the thumbnail sizes for one or more images in your media library. It also allows you to delete old and unused thumbnails. This way, you can free up some server space.
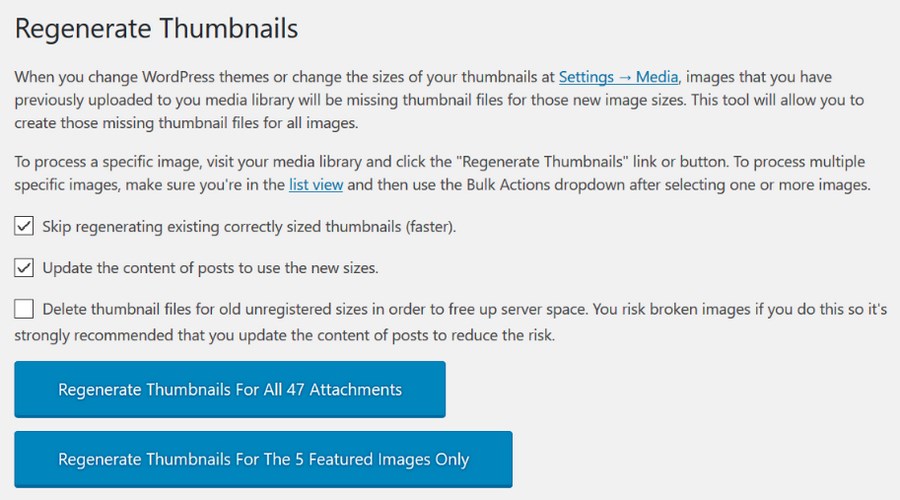
Once the plugin is activated, you can click on the regenerate thumbnail button and the plugin will take care of the rest.
Optimizing WordPress Post Thumbnails for Social Sharing
When an article or a product listing is shared on social media, the featured image is what really stands out and grabs attention.
Getting the perfect featured image is important if you want to engage with your audience. Be it getting a high-quality image or the right image size, all these add to having the right featured image.
Plugins help enhance the functionality of your WordPress site. They also help ease a lot of otherwise tedious tasks, such as the various SEO plugins available.
SEO plugins provide you with a checklist that allows you to easily follow along and complete all your on-page SEO ranking factors.
If you’re the Yoast SEO plugin, it gives you the option to include an image, title, and description specific to different social platforms. It also indicates the right image size to be used for the various social media platforms.
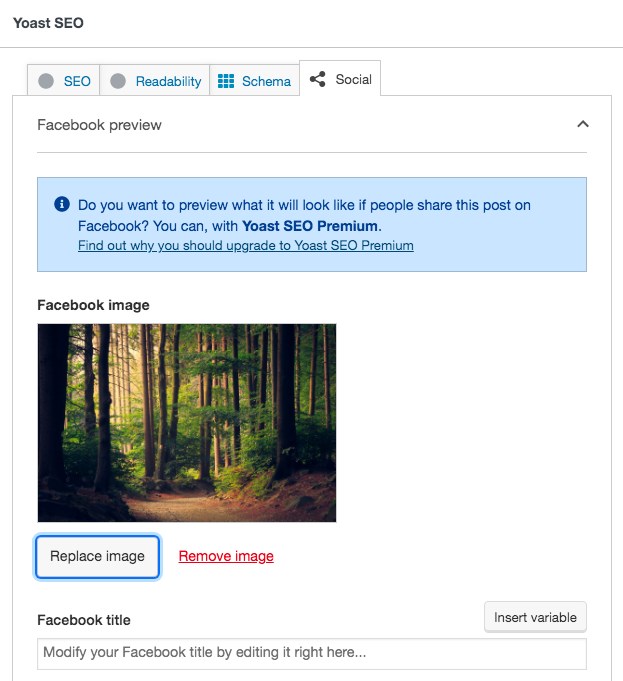
This way, you needn’t explicitly create a specific post for the various platforms. You can easily create it all right from your WordPress dashboard.
How to Optimize WordPress Featured Images for Search
While a perfectly crafted featured image helps attract readers, a well-optimized image helps drive some organic traffic (and readers) through search engines.
When it comes to optimizing your featured image, it’s more than just having an ALT text.
We’ve listed a few tips that you can use to optimize your featured images.
1. Use Unique Images
We recommend using actual photos or creating custom images rather than using a generic stock image.
2. Use SEO-Friendly ALT Text
What happens if an image doesn’t load on your website for some reason? The ALT text (also referred to as Alternate Text) is your fallback plan. It’s a good practice to include your keywords in the featured image. This helps rank your image and content higher on the search results page.
3. Create the Right File Name
Your back from a vacation and creating a post on your travel website. Would you name your images as image1.jpg, image2.jpg, and so on? Or would you instead name your images mentioning the locations in it, e.g., maldives-beaches.jpg? It is good practice to include keywords within your image file names.
4. Your Page Title and Description
While this is not something you carry out on your images, including a page title and description with relevant keywords on your page helps show your images on Google Image search.
Additionally, here are some best practices that you can follow.
WordPress Featured Image Best Practices
Here are a few additional best practices you could consider when creating the ideal WordPress featured image.
Use High-Resolution Images
Your featured image will represent you across social media. You’ll want to choose an image that looks good both as a thumbnail and within your post. So when opting for an image or creating one, consider a higher resolution image that is scalable.
Be Consistent
When creating a custom image, you have the option to include your logo and brand it accordingly. Maintaining a consistent approach to your image designs helps branding and is easily distinguishable for your visitors.
Use Relevant Images
We tend to look at the images first before looking at the post title. The images you select can not only attract users; they also indicate the context of the page. For this reason, you should choose a relevant image. One that represents your page accurately. Else, you could end up with a higher bounce rate.
Ensure You Have Legal Rights
Sourcing stock images from sites such as Unsplash, Pixaby, and other copyright-free photo sites? No problem at all! If not, be aware of potential licensing issues.
When sourcing images from Google, look out for those that are licensed under Creative Commons. Consider this option only if you are not creating your custom images.
What’s Your WordPress Featured Image Size?
Featured images are a part of every WordPress site.
A thoughtfully designed featured image helps your website look more professional and goes a long way in building brand awareness. The same goes for an online store as well. The images help you sell your products.
A well designed featured image also helps your post or the product listing stand out on social media. This surely helps in getting more visitors.
Including a featured image for your pages and posts is really simple. Additionally, WordPress automatically resizes your image to have them ideally displayed on the page regardless of the device you’re using.
With a little attention to detail, you can optimize your featured images, not only to grab the attention of your visitors but also to increase your organic traffic. Thereby gaining more readers for your website.
Over to you. What are your WordPress featured image dimensions? What are the best practices that you follow? We’d like to know what you think in the comments below!
Disclosure: This blog may contain affiliate links. If you make a purchase through one of these links, we may receive a small commission. Read disclosure. Rest assured that we only recommend products that we have personally used and believe will add value to our readers. Thanks for your support!





Thanks for this professional article.
Although we can resize the images ourselves in Settings > Media.
But the article doesn’t give multiple specific values.
Could you please tell me, in astra or most themes, what should be the size of the images set in Settings > Media?
“While different themes have different featured image sizes, we recommend going with an image size of 1200 pixels by 628 pixels if you want to play it safe.”
If you want to keep it simple I would just upload and image 1200×628. If you want to get complicated create a new feature image size 2x as large.
“For a post’s featured image, you can add the custom image size using the_post_thumbnail() function in the theme template file.”
if ( has_post_thumbnail() ) {
the_post_thumbnail( ‘your-custom-size’ );
}
Can you write or update this guide on featured images for those using your Astra Theme?
Which theme template file are we supposed to change in Astra? The only one I can find is under inc/blog/blog.php on line 219
if ( has_post_thumbnail() ) {$post_featured_data = '';
$post_featured_data .= get_the_post_thumbnail();
$post_featured_data .= '';
} else {
Is it this? This seems overly complicated given how much you’re emphasising the importance of featured images and optimisaton.
Also, in the intro, it mentions you’ll address “How do I change the default featured image?”. Can you update this article to answer this? Particularly for Astra Theme and adding a fallback image option.
Thanks.
Hi, I’m using the Astra Starter template (Natural) and have added a blog….I’m using Beaver Builder as well. My problem is the image sizes (height) are all different. I have tried resizing them to be 630px in height but they are all rendering different. I have read your article on image sizes but nothing seems to change. Many thanks – Kaz