What are shortcodes? You’ve probably heard the term before, but likely assumed it was just a technical concept that the average WordPress user doesn’t need to understand.
Or, maybe you’ve used a shortcode or two before, but didn’t quite grasp exactly how they worked at a deeper level.
Either way, if you want to unlock the full potential of WooCommerce, you’ll definitely want to familiarize yourself with shortcodes.
Why? Because they power much of the plugin’s functionality, including all of the public-facing pages like Checkout, Cart, and Product Categories.
Most importantly, knowing how to use WooCommerce shortcodes allows you to create highly-customized sales pages, and an incredible sales funnel to build a powerful eCommerce site for any situation.
In this post, you’ll learn the following:
- What a shortcode is
- Why you should use WooCommerce shortcodes
- How you can use them
Let’s get started!
What Are Shortcodes?
Put simply, shortcodes are tiny pieces of code that perform specific actions on your site.
When you place this code on a WordPress page, post, or widget area, something happens. What exactly happens depends on the shortcode. Some will load post content, while others will display a contact form. There are hundreds of different use cases.
Shortcodes are a WordPress-wide feature and so they all have the same format. The structure is simple: a short piece of text is placed in between two brackets, like this:
[shortcode]
Many different plugins and themes use shortcodes. As such, the shortcode will often be prefaced with the name of the plugin itself to differentiate it from others, like this:
[pluginname_shortcode]
However, this is not always the case. It depends on the particular plugin.
What are WooCommerce Shortcodes?
WooCommerce shortcodes are shortcodes designed for the WooCommerce plugin. There are dozens of shortcodes in WooCommerce and they are used to display most pages, so it’s important to understand how they work.
When you first install WooCommerce and go through the setup wizard, a number of pages are automatically created. If you go to edit one of these pages, you’ll notice that they contain a shortcode.

When the page is loaded, the shortcode loads the relevant content. For example, the [woocommerce_cart] shortcode will load the WooCommerce cart page.
Shortcodes are used to display the following WooCommerce pages:
- Products
- Cart
- Checkout
- My Account
- Order Tracking
Why Should You Use WooCommerce Shortcodes?
Shortcodes are an easy way to customize your WooCommerce shop. By pasting a shortcode (and modifying some minor parameters), you can easily create any type of eCommerce site you like.
You can choose which products are displayed, how they’re ordered, and how many are shown per page. Plus, you can add Add to Cart buttons in opportune places, like at the end of your posts.
You also don’t need to know how to code. You only need to copy and paste a line or text or two. Pretty easy, right?
How To Insert Shortcodes
Now that you know what a shortcode is, let’s talk about adding them to your site.
Gutenberg Block Editor
With the Gutenberg editor, adding shortcodes is easy. Just press the plus sign to add a new block, type shortcode in the search bar, and select the Shortcode block.
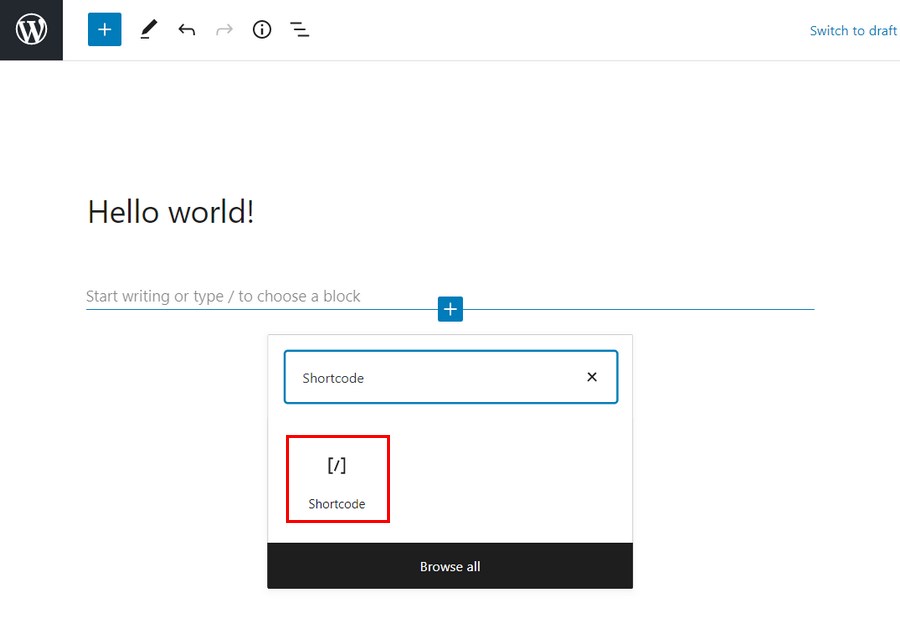
Then, type in your shortcode in the field.

Save the page and view it. You’ll now see the results of your shortcode.
Classic Editor
If you prefer using the Classic Editor, adding shortcodes is easy, too.
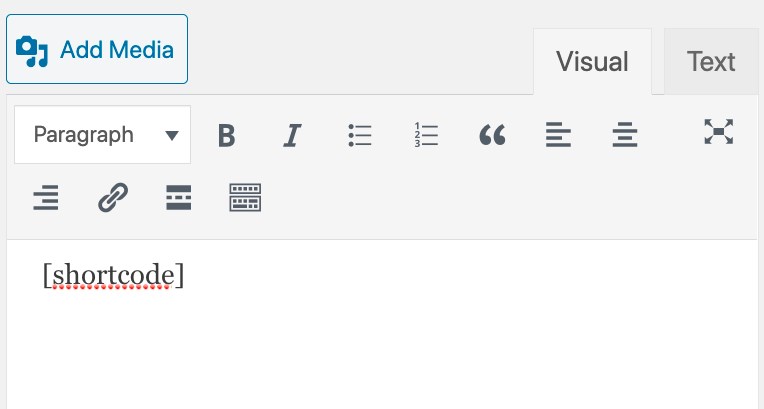
Simply add the shortcode, like above, making sure to include the brackets ([ and ]).
Widget
To add a shortcode to a widgetized area, just add a Text widget with the shortcode.
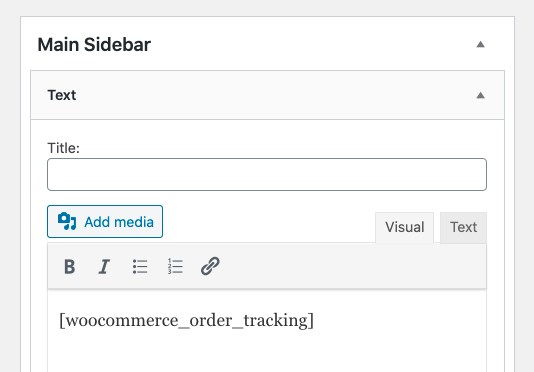
Then, load the page to see the shortcode’s content on your sidebar.
How WooCommerce Shortcodes Work
While they look simple, shortcodes are actually quite powerful! Let’s cover the different parts that make up a shortcode.
The Shortcode Itself
Shortcodes are a single word or set of words connected with underscores, like this:
- [products]
- [woocommerce_order_tracking]
While some shortcodes will function alone, others require some parameters.
Parameters
Parameters, or arguments (called args in some of WooCommerce’s documentation), are extra lines that make the action of the shortcode more specific. Most, but not all, WooCommerce shortcodes use parameters.
For example, if you add on_sale=”true” to the [products s] shortcode, the only products displayed will be the ones on sale.
List of All WooCommerce Shortcodes
Now let’s go through some of the most useful WooCommerce shortcodes.
- [woocommerce_cart]
- [woocommerce_checkout]
- [woocommerce_my_account]
- [woocommerce_order_tracking]
- [products]
[woocommerce_cart]
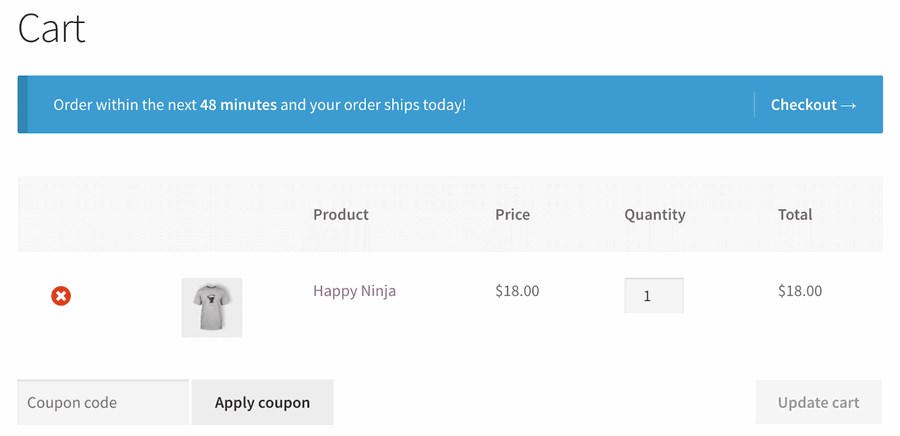
This shortcode adds the WooCommerce cart functionality to the page. In other words, it will display all of the products that the user has added to their cart. There are no parameters to add to this shortcode.
[woocommerce_checkout]
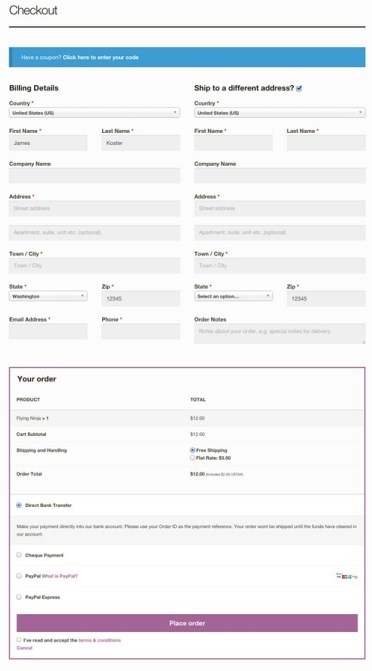
This shortcode displays the checkout page. Since it’s a critical aspect of your business, make sure that the page is set up correctly. After all, if a customer can’t find the checkout, they can’t buy anything. Additionally, with the flexibility of modern e-commerce platforms like WooCommerce, you now have the opportunity to customize your checkout page to align with your brand identity and enhance the user experience.
As above with [woocommerce_cart], there are no extra parameters for the checkout page.
[woocommerce_my_account]
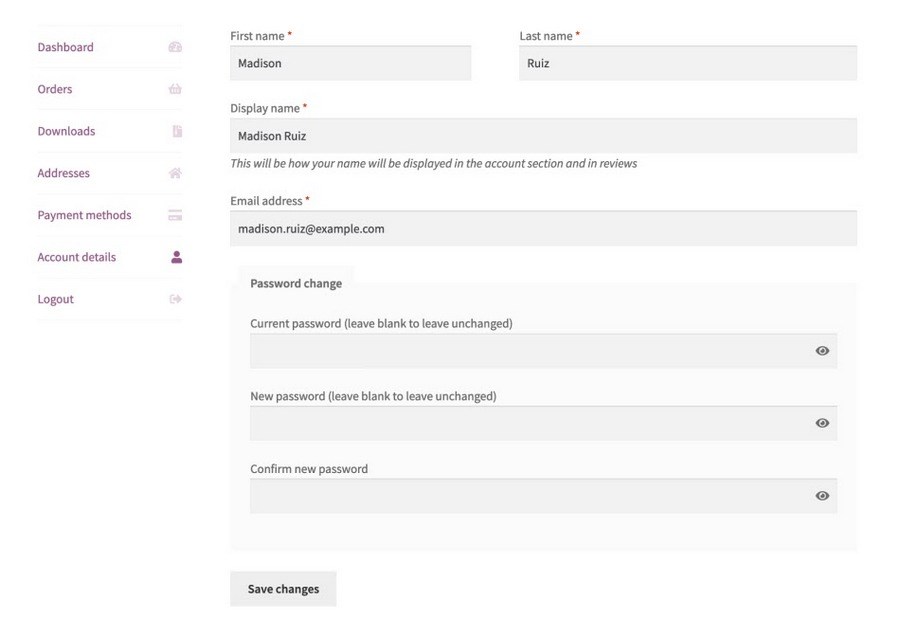
This one shows the My Account page, which contains all of the customer’s information, as well as their previous orders from your shop.
By default, the number of orders displayed is set to 15. You can change it to display all orders by making the number -1.
[woocommerce_order_tracking]
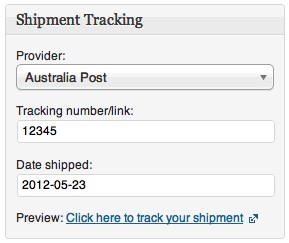
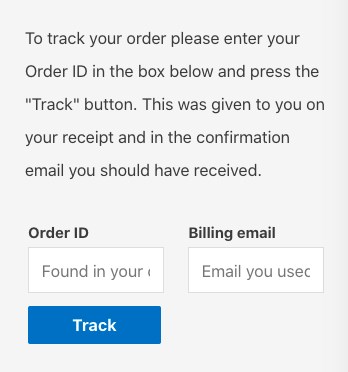
This shortcode creates a “order tracking” page, which allows customers to see the current status of their orders. There are no other parameters.
[products]

The [products] shortcode is one of the most powerful and widely used shortcodes in WooCommerce. As you probably guessed, it displays your products. There are a ton of parameters which allow you to customize the types and quantities of products displayed.
To add a parameter, simply write its name, followed by the equals sign and the desired value inside of quotation marks. Make sure this is inside of the [products s] shortcode.
For example, to display 3 products from the shoes category, use this shortcode:
[products limit=”3” category=”shoes”]
To make it easier to understand, we’ve included a sample product shortcode with the parameter included below each one.
Control the Number of Products Displayed with limit
The limit parameter controls the number of products displayed. By default, it will be -1, which displays all products.
Example
[products limit=”3”]
Display Products from a Certain Category with category
The category parameter will display products that have a certain category slug. You can add more than one category by placing a comma in between them.
Example
[products category=”shoes, hats”]
Customize the Layout
There are a few parameters that help you control the layout of your product pages.
1. columns
This parameter controls the number of columns. By default, it is set to 4, although this will usually collapse into a smaller number on mobile (depending on your theme.)
Example
[products columns=”3”]
2. paginate
This parameter will determine if your product result pages will be paginated. It only has two options: true or false. By default, it is set to false.
You will probably want to use the paginate parameter in conjunction with the limit parameter we mentioned above. Thus, the limit parameter will determine how many items are listed on each page.
Example
[products paginate=”true”]
3. orderby
This parameter has a number of options that allow you to customize how your products are ordered. By default, they will be ordered by the product’s title.
You’ll can add more than one option by separating them with a single space.
- date: This orders products by the date of the publishing (new first)
- id: This setting will order products by their Post ID
- menu_order: This will order products by the menu order (lower numbers first)
- popularity: This will order the products by the number of purchases (most first)
- rand: This displays products in a random order. There might be issues with sites that use caching plugins.
- rating: This will order products by their average rating, from higher to lower.
Example
[products orderby=”date”]
4. order
Based on the above orderby setting, this determines if the order will be ascending (ASC) or descending (DESC). By default, it is ASC.
Example
[products order=”ASC”]
5. skus
SKU stands for Stock Keeping Unit. It is a system designed to keep track of products across different marketplaces. While they aren’t required by WooCommerce, they are highly recommended, especially if you plan on selling your products wholesale. You can use this plugin to automatically generate SKUs for all of your products.
This parameter lets you add specific SKUs, which should be separated by commas.
Example
[products skus=”tshirt-white-small, tshirt-white-medium”]
6. tag
This lets you display products with a certain tag. You can add more than one tag by putting a comma in between them.
Example
[products tag=”blue, summer”]
7. class
This adds an HTML wrapper class around the element, which allows you to modify it with CSS.
Example
[products class=”custom-element”]
8. on_sale
Want to display products that are marked as on sale? Use this parameter. The options are true or false. Be sure to not use it at the same time as best_selling or top_rated.
Example
[products on_sale=”true”]
9. best_selling
This will display the best-selling products. Options are true and false. Make sure not to use it at the same time as on_sale or top_rated.
Example
[products best_selling=”true”]
10. top_rated
The top_rated parameter will display the products that are the most highly-rated. The available options are true and false. Do not use it at the same time as on_sale or best_selling.
Example
[products top_rated=”true”]
Product Attributes
These shortcodes can be used to display products based on their attributes. Attributes are elements that are shared across multiple products. For example, size or color.
1. attribute
This will display products with a certain attribute.
2. terms
This must be used with attribute above. It will display products with certain terms that are linked to the attribute. For example, the Attribute may be size and the Terms are small, medium, or large.
3. term operator
These allow you to perform simple calculations to determine which terms will be included. Likewise, they must be used with attribute and terms.
- AND: Will display products with all of the attributes listed
- IN: Will display the selected terms. This is the default.
- NOT IN: Will display items that aren’t in the selected terms (i.e. all of those other than the ones you select)
4. tag operator
The same as the term operator above, except for tags.
- AND: Will display products with all of the tags listed
- IN: Will display items with the selected tags. This is the default
- NOT IN: Will display items that aren’t in the selected tags (i.e. all of those other than the ones you select)
5. visibility
This displays products depending on their visibility on your site.
- Visible: Displays products that are visible in searches and on your website. This is set by default
- Catalog: Displays products that are visible in the shop, but not in search results
- Search: Displays products that are visible in search results, but not on the shop
- Hidden: Displays products that are hidden from both search results and on the shop, but are only accessible via direct URL
- Featured: Displays products that are marked as featured
6. cat_operator
Cat stands for category. This allows you to perform simple calculations to determine which products will be included.
- AND: Displays products in all of the categories
- IN: Displays products in the selected category/categories
- NOT IN: Displays products that are not in the selected category
Product Categories
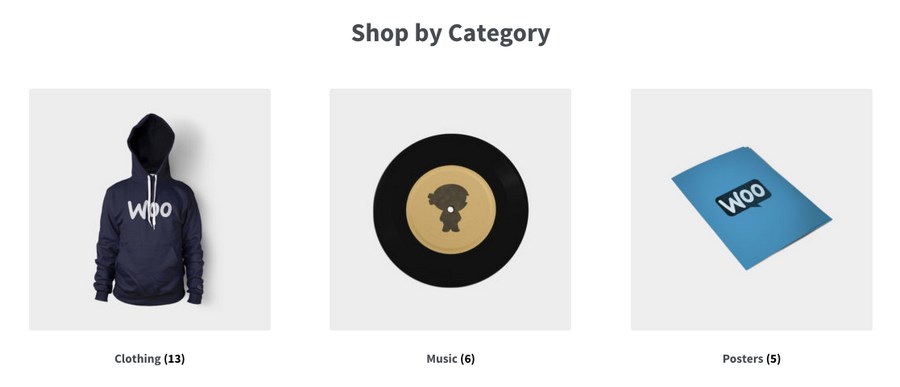
These two shortcodes allow you to display your product categories. As with products themselves, there are a large number customization options available.
[products _categories]
Without any parameters, this shortcode will display all of your categories on a single page. If you want to add more than one category, you should also use this shortcode.
[products _category]
This is the generic shortcode for displaying a particular category. You’ll need to add a specific parameter, listed below, in order to actually display one (or more.)
Parameters
Now let’s go through the parameters available for the product category shortcodes.
1. ids
Display specific categories by their ids.
Example
[products _categories ids=”1,2”]
2. limit
This determines the number of categories that will be displayed.
Example
[products _categories limit=”5”]
3. columns
This parameter determines the number of columns. By default, it is set to 4.
Example
[products _categories limit=”5”]
4. hide_empty
This will hide empty categories. There are two options: “1” and “0”. “1” will hide empty categories, while “0” will show them. By default, it is set to “1.”
Example
[products _categories hide_empty=”1”]
5. parent
This parameter will show the child categories of a specific parent category, which is targeted by id. For example, [parent=”3”] will display the child categories of the category whose id is 3.
If you set parent to “0”, only the top-level categories will be displayed.
Example
[products _categories parent=”0”]
6. orderby
This controls the order in which categories are displayed. By default, it will order them by name, but you can also change it to id, slug, or menu_order.
Example
[products _categories orderby=”id”]
7. order
Related to orderby, this parameter will either make ordering ascending (ASC) or descending (DESC.) By default, it is set to “ASC.”
Example
[products _categories order=”ASC”]
Other Useful WooCommerce Shortcodes
Now let’s take a look at some other useful shortcodes!
[add_to_cart]
This shortcode lets you easily create an Add to Cart button for a specific product, which is targeted by id. There are quite a few parameters. As with other shortcodes, each should be placed within two quotation marks, “like this”.
- id: Choose the product by ID
- style: Customize the CSS of the button directly
- sku: Choose the product by SKU
- show_price: Choose whether the price is displayed with the button. There are two options, “TRUE” and “FALSE”
- class: Assign an HTML class to the button, so that you can target it with CSS code
- quantity: Choose the product amount that will be added to the cart. In most cases, this will just be “1”
Example
[add_to_cart id=”34” style=”border: 1px solid #111111;” show_price=”TRUE” quantity=”1” class=”example-cart-button”]
[add_to_cart_url]
This shortcode will display the actual URL of a particular product. There are only two parameters:
- id: Target the product by ID
- sku: Target the product by SKU
Example
[add_to_cart_url id=”99″]
[shop_messages]
Want to display WooCommerce messages on non-WooCommerce pages? This shortcode will allow you to display notifications like “This product has been added to your cart” on any page with it.
Coupon Shortcodes
WooCommerce also offers a way to display available coupons on any page. However, you’ll need to purchase their Smart Coupons add-on, which you can read more about here.
Troubleshooting Shortcodes
In the final section, let’s briefly cover some common issues that prevent shortcodes from working.
The Shortcode is Between <pre> Tags
When adding a shortcode to a page, make sure that it is not between <pre> tags, which are designed to display (and not execute) code.
Quotation Marks are Curly, Not Straight
Another common error is if the quotation marks (used with parameters) are angled, or “curly” (like this: “) and not straight (like this: “). Parameters won’t work with curly quotation marks.
Final Thoughts
As you probably notice, there are a lot of shortcodes in WooCommerce! Hopefully this guide has been a useful resource for you in all of your eCommerce endeavors.
Although it may seem a little technical, the power and flexibility of shortcodes allows you to create virtually any type of eCommerce page that you can dream of.
If you’re using WooCommerce, have you utilized shortcodes? If so, in what way? And if not, is it because you find the process confusing? Let us know in the comments!
Disclosure: This blog may contain affiliate links. If you make a purchase through one of these links, we may receive a small commission. Read disclosure. Rest assured that we only recommend products that we have personally used and believe will add value to our readers. Thanks for your support!


Hi there,
It seems “on_sale” can be set to “true” only. “False” doesn’t work.
If somebody has a solution to display products which are NOT on sale, I’m all ears
Thank you so much for the insights.
This is such an eye-opener for me as an intermediate WordPress developer.
I have one question though; can I use Woocommerce shortcodes to design a sales funnel by just adding and arranging the sequence of pages after a button has been clicked that will redirect to “other awesome stuff that compliments your product added to the cart” on the same page, especially making it sort of an ‘Order Bump’ feature? This, all done with the default Woocommerce plugin + the shortcodes only.
Thank you in advance
Hello Christopher, glad this article helped.
Instead of going ahead adding shortcodes to create a funnel, we would recommend the funnel builder for WordPress – CartFlows – https://wordpress.org/plugins/cartflows/
Hope that helps. 🙂
How to change display 12 columns of product per row? The maximum is “6” now. Any number past 6 will display 4 col in a row only.
how can i give confirmation_order_details in shortcode . i have tried this (confirmation_order_details) but actually this is not working, please help me find out. give me the solution .
When I am adding product to cart in mobile side cart automatic open half how can I do in Astra free version
Hello! Can you help me with shortcode?
to show all brands