Are you a teacher, professor, or other educator that wants to create an online course? Or maybe you’re an expert in a particular subject and want to monetize it? Have you ever considered building your very own online course website?
It’s easier than you might think!
In this post, we’ll walk you through creating an online course website using WordPress.
We cover everything you’ll need to know, including how to set up WordPress, the best WordPress course plugins to use and answer some common questions
We’ll also show you some of the best eLearning sites from around the web you can use for inspiration.
Finally, we’ll show you how to create an online course using a free WordPress plugin.
Ready to create your own eLearning site?
- Why Create an Online Course?
- What Do You Need to Create an Online Course Website?
- Can You Make Money From an eLearning Website?
- The Top eLearning Website Examples
- WordPress Plugins to Create an Online Course Website
- Creating Online Course Website With WordPress
- Promoting Your eLearning Website
- Using Gamification in eLearning
- Learning Website FAQs
- Wrapping Up
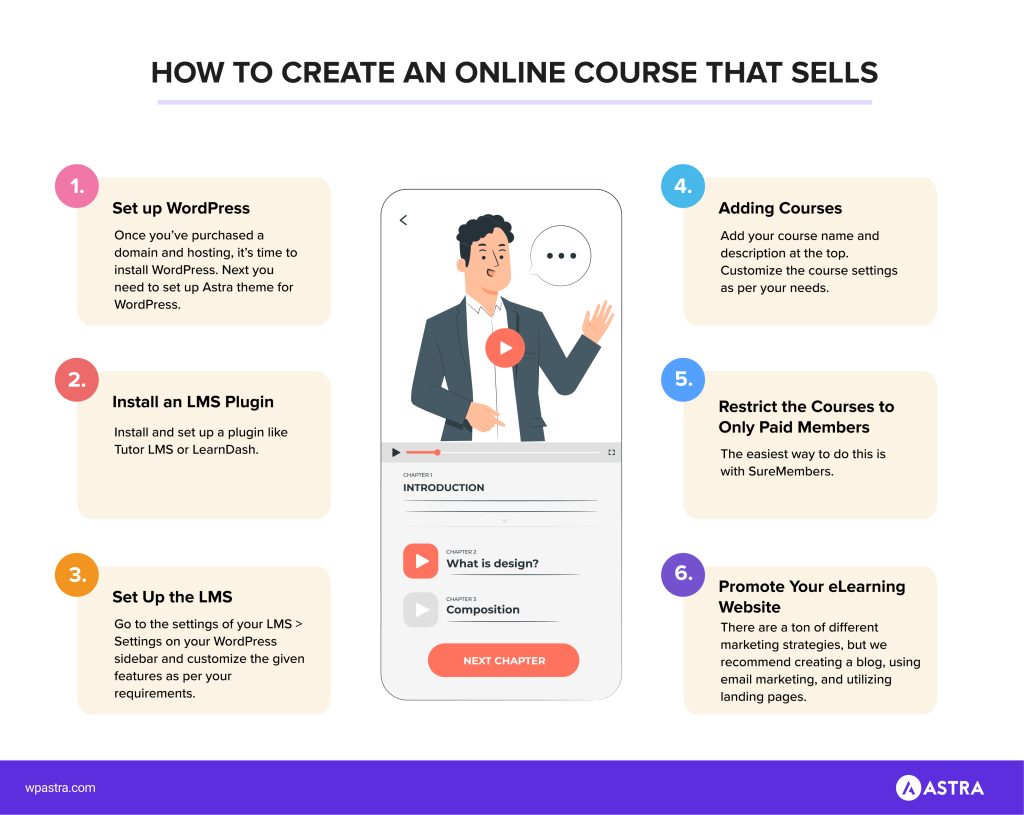
Before understanding why is it necessary to create an online course, see our latest infographic about easy steps to create an online course site.
Why Create an Online Course?
If you aren’t familiar with the online learning sites, you might wonder exactly what the term eLearning means. Don’t worry – it’s quite straightforward.
eLearning sites are just websites that have educational content. That educational content can be more formal, such as university lectures, or it can be more informal, such as a web design course.
The acronym used to describe these types of websites is LMS, which stands for Learning Management System. There are many different LMS available today and they cover virtually every kind of use case you can think of.
What Do You Need to Create an Online Course Website?
If you’re an educator, teacher, or just want to share your knowledge, you should definitely create an LMS website.
There are three big reasons why:
- It provides a framework for creating and offering courses. Instead of making everything from scratch, you can use an LMS to build curriculums, lesson plans, and other elements. This increases your productivity and also makes the entire process less complex.
- Build an audience. If you don’t have a website, you’re missing out on a great opportunity to gather new followers and subscribers. While you might think that Facebook, Twitter, and other social networks are sufficient, they are only a piece of the puzzle. You should also have a website that allows you to capitalize on your audience.
- Making an income from your work. Finally, one of the most rewarding aspects of building an eLearning website is being financially compensated for your hard work. By combining an LMS system with a payment plugin like WooCommerce, you can earn income from your courses.
Can You Make Money From an eLearning Website?
Definitely! As we mentioned above, most LMS plugins integrate flawlessly with payment plugins like WooCommerce and Easy Digital Downloads.
These plugins allow you to use any kind of business model you like, ranging from one-off single purchase courses to memberships and everything in between. Once you learn how to create an online course, you can easily make them for different topics, too.
Many educators earn a good living from their online courses. In addition, many universities, schools, and other institutions use an LMS like LearnDash to run their entire organization.
The Top eLearning Website Examples
Let’s look at some of the top eLearning websites from around the web. There are thousands of different real-world use cases, but here are four of our favorites:
Infusionsoft / Keap
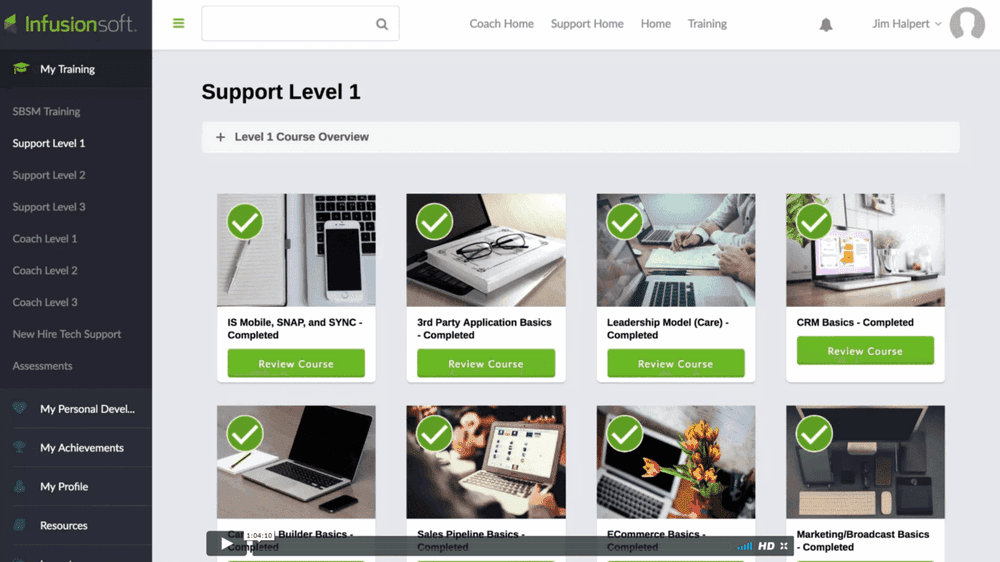
Infusionsoft, now known as Keap, uses LearnDash for their LMS. They use it to onboard new team members, train clients, reduce customer churn, and improve their overall productivity and profit.

The University of Michigan Center for Socially Engaged Design uses LearnDash for some of their online educational programs. Their courses help students learn how to visit other countries and come up with creative solutions to local problems.
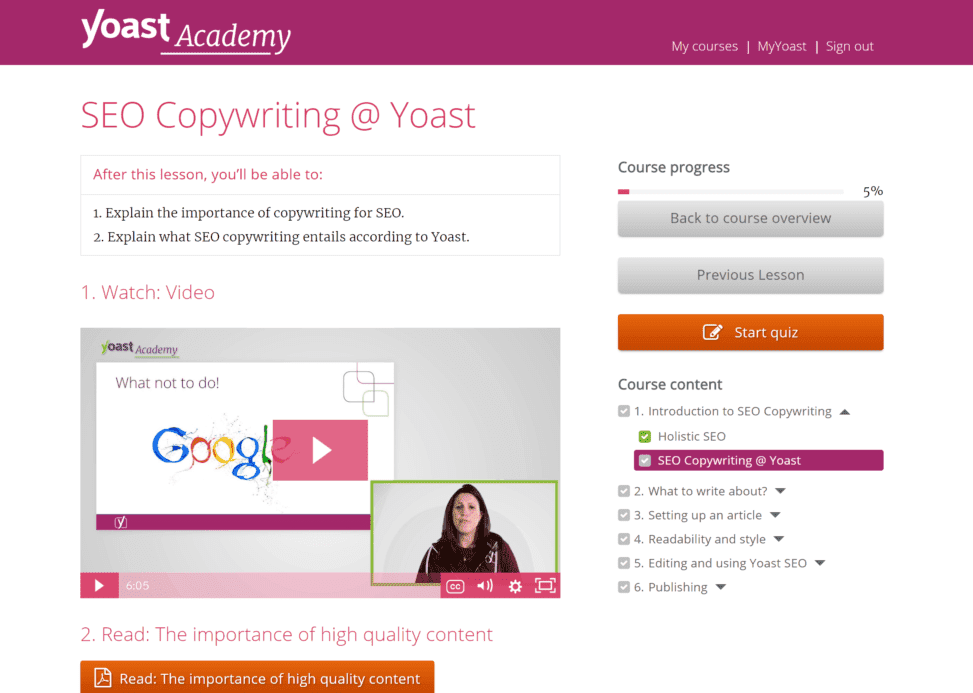
Yoast is the most popular SEO plugin for WordPress, and Yoast Academy helps students learn how to use it. They used the LMS to create a variety of courses on SEO for thousands of users around the world.
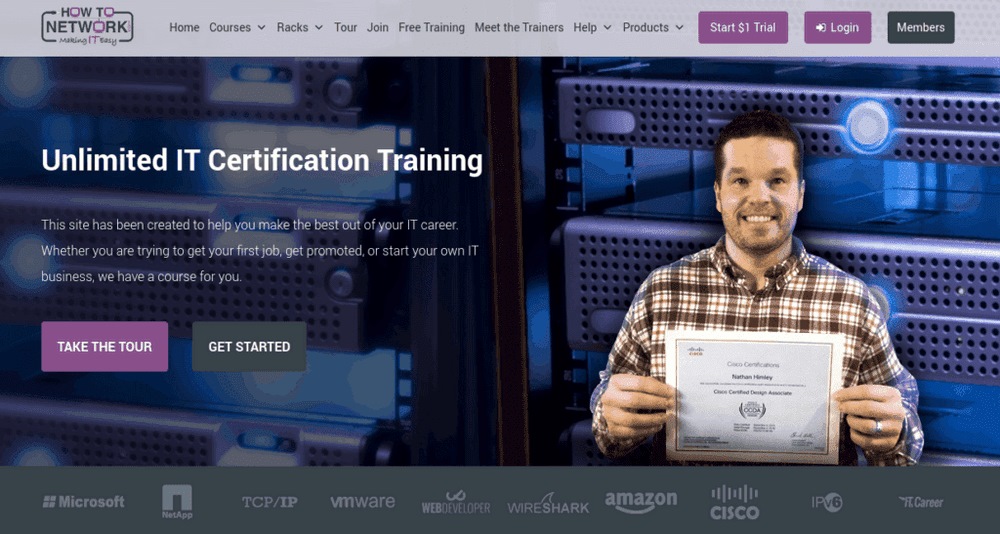
Finally, How to Network uses MemberPress to offer IT certification training to their students. They have streaming video training for different certifications by companies like Cisco and Microsoft.
WordPress Plugins to Create an Online Course Website
There are many different eLearning plugins you can use. Let’s cover the absolute best ones.
1. SureMembers
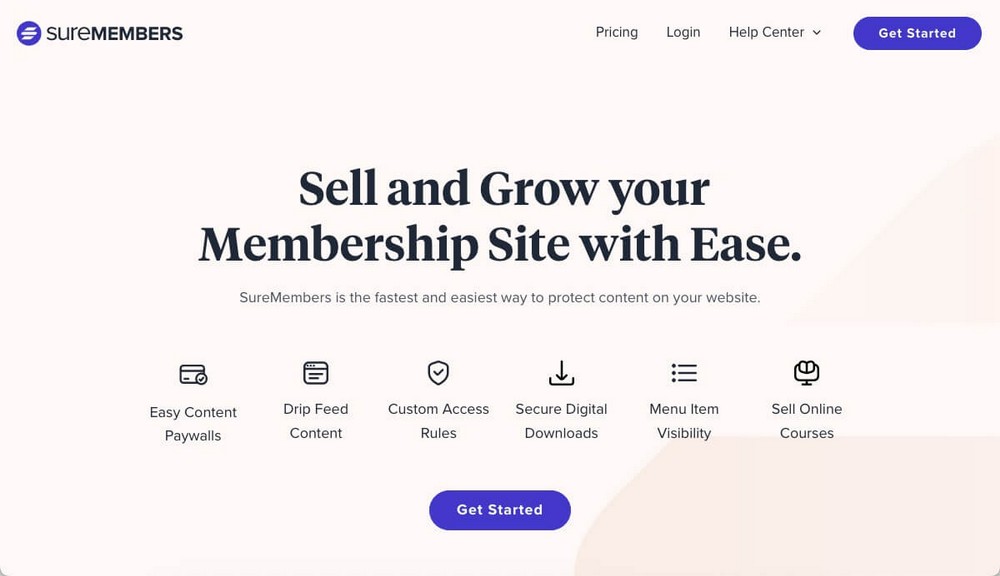
SureMembers is a membership plugin that can help you make money from your online course website. It works seamlessly with any LMS plugin to accept payments, restrict course content to paying students, drip feed coursework to avoid rushing and manage learners.
SureMembers is built to be compatible and will work with any of the other LMS in this list as well as SureCart, WooCommerce, gamification plugins and most other tools you care to use.
The plugin has been designed specifically for ease of use, both for you managing the site and your users accessing learning. It’s a powerful, flexible option for turning learning into cash.
Features
- Works with LMS plugins to enable subscriptions
- Powerful membership tools for online course websites
- Management and user dashboards to control everything
- Simple to set up memberships and course restrictions
- Supports drip content to prevent binge learning
Price
SureMembers costs from $69 per year.
Our opinion of SureMembers
SureMembers is our own product so we naturally have a high opinion of it. Fortunately, customers who have tried it agree that it’s a fantastic membership plugin.
2. LifterLMS

LifterLMS is a course builder plugin aimed at online businesses and training programs. You can create courses, quizzes, and other educational materials using their drag-and-drop system.
The courses themselves can be simple or have multiple steps and multiple instructors.
You can use any business model type that you like, from a single payment to memberships. There are no other eCommerce plugins required for setup, which is a nice bonus. Finally, there are a lot of different tools that help keep your students engaged and on track.
Features
- Create simple or complex courses
- Use any payment type
- Powerful student engagement features
- Keep course content private
- Integrate with other tools
Price
The basic plan comes with the plugin and one add-on and is $120 per year.
Our Opinion of LifterLMS
Overall, LifterLMS is a powerful plugin that can work in almost any situation. However, it does seem to be optimized for businesses and training courses rather than individuals.
3. LearnDash
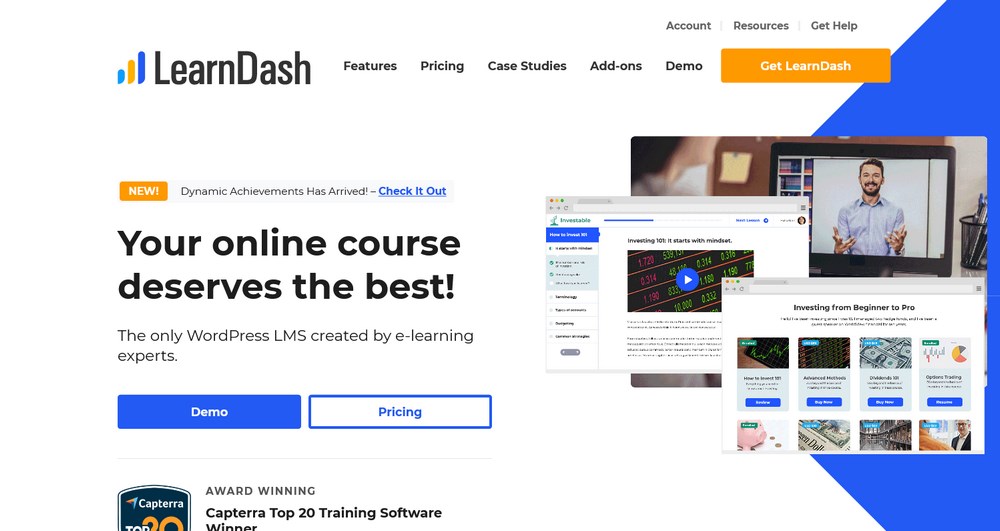
LearnDash is a WordPress LMS created by and for educational professionals. That makes it very powerful, flexible, and full of useful features. These include quizzing capabilities, immersive learning experiences, renewal reminders, and tons of other functionalities.
This plugin also supports any pricing model that you might want to use. These include memberships, subscriptions, one-time sales, bundles, and others. This makes it ideal for those that have a variety of different products. For example, books and recurring courses.
Features
- Easy setup with no technical knowledge required
- Structure content to maximize learning
- Quizzing capabilities
- Use any pricing model, including memberships, subscriptions, and one-time sales
- Tons of guides and FAQs to help you
Price
LearnDash starts at $159 per year for a single website.
Our Opinion of LearnDash
If you are a professional educator looking to create an online course website, LearnDash is a great choice that has everything you need.
4. MemberPress
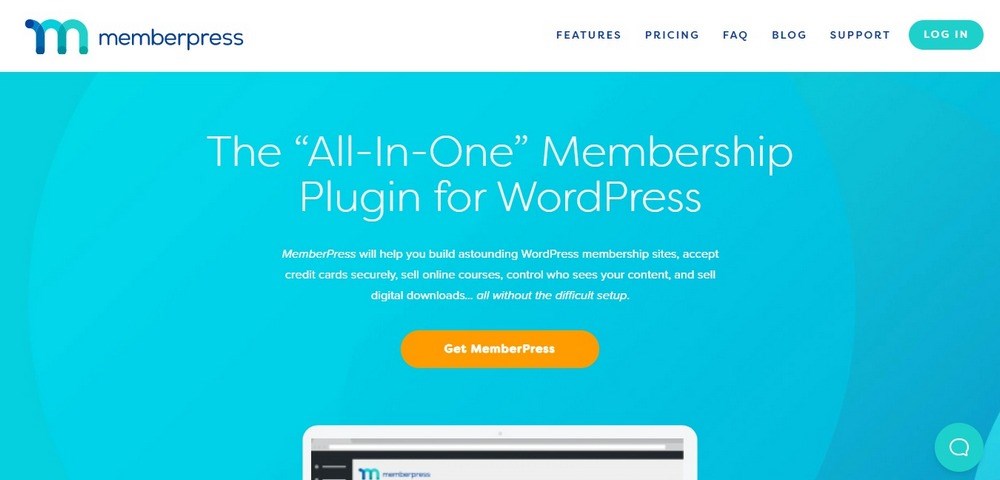
MemberPress is an all-around membership plugin jam-packed with features. You can use it to create any kind of membership site, including an educational portal that sells access to courses.
This plugin also has features aimed specifically at educators and course creators. Their Courses add-on, which is included in the regular plugin, has everything you’ll need to create a robust course system.
It’s also easy to create pages and doesn’t require any technical expertise.
Features
- Drag-and-drop editor
- Protect content with access rules
- Track learners’ progress
- Build subscriptions and plans, plus use coupons
- More advanced features for those that need powerful, custom solutions
Price
The basic plan starts at $179 per year for one website.
Our Opinion of MemberPress
MemberPress is an extremely powerful plugin for anyone that wants to create a membership website. However, it might be a little too complex and too expensive if you only want to sell a handful of courses and/or don’t need a detailed website.
There are a good number of LearnDash compatible themes that will hugely improve your website design and functions.
5. Sensei
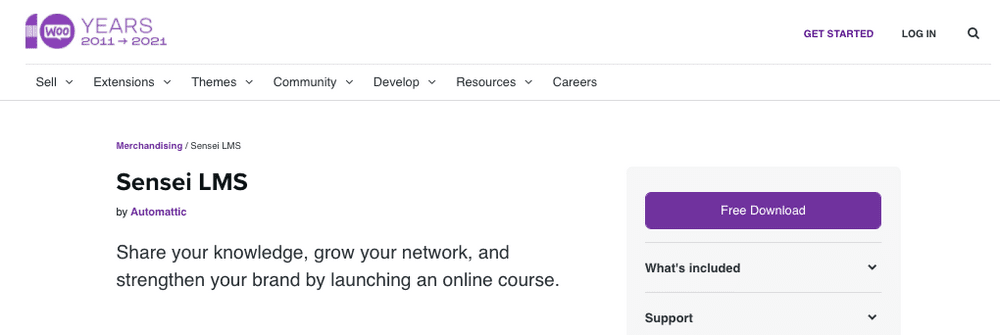
Sensei is an add-on for WooCommerce, which is the most popular eCommerce solution in the world. It integrates directly with WordPress and makes it simple to create educational materials like lessons, quizzes, courses, exams, and other content.
Nothing requires coding knowledge, which is a benefit for any non-technical users.
Best of all, Sensei is absolutely free to use, as is WooCommerce itself. If you want to use more advanced features, you’ll need to get their WooCommerce Paid courses plugin, which costs extra. But it’s possible to set up a basic LMS for free.
Features
- Seamless integration with WordPress
- Support for all WordPress themes
- No coding required
- Quizzes and other tests
- Works well with other WooCommerce extensions
Price
Both WooCommerce and Sensei are free to use. However, if you want to use more advanced payment features, you’ll need WooCommerce Paid Courses, which is $129 per year.
Our Opinion of Sensei
If you are looking for a simple, free solution that works well with WordPress staples like WooCommerce, Sensei is a great choice for any project.
6. WP Courseware

WP Courseware is a popular plugin that makes it easy to create an LMS site. It has a drag-and-drop course builder, integrations with WordPress eCommerce plugins and email marketing services, assignments and course requirements. Basically, anything that relates to creating a powerful eLearning system.
You can add any kind of media type that you want, ranging from images, video, text, file uploads, and other multimedia. Plus, you can have unlimited courses, unlimited students, course tracks, drip content, instructor roles, and lots of other customization options.
Features
- Unlimited courses and students
- Use any kind of multimedia
- Drip content
- Integration with plugins and other tools
- Drag-and-drop course builder
Price
- The least expensive plan starts at $129 per year for 2 sites
Opinion of WP Courseware
This veteran plugin has pretty much everything you’ll ever need to create a powerful LMS system. Since it’s rather old it also has a lot of documentation and guides online.
7. Tutor LMS
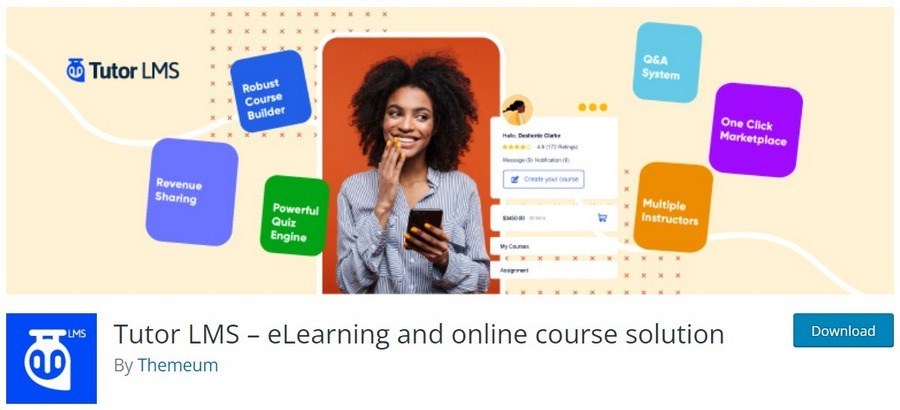
Tutor LMS is a freemium plugin that lets you create online courses. You can create quizzes, interact within lessons, provide student reports, and other educational materials. Everything is drag-and-drop and doesn’t require coding knowledge.
The base plugin is free, while paid addons add extra functionality. These include the ability to offer certificates, email notifications, a shopping cart, and some other features.
Features
- Unlimited courses and lessons
- Teacher profiles
- Quizzes
- Track course progress and difficulty level
- Course marketplace
Price
The basic plugin is completely free, while addons are paid and start at $149 per year.
Our Opinion of Tutor LMS
As one of the few free options available, Tutor LMS is a powerful tool that can get the job done for most users.
8. MasterStudy LMS
MasterStudy LMS is a freemium plugin for creating educational WordPress websites. You can add quizzes, courses, and other elements using their visual editor.
It has a messaging system, quiz space, quiz results, course announcements, wish lists, a shopping cart, and a course builder. Everything is added via shortcodes.
The basic plugin is free to use, making it more affordable than some other options. There are also paid addons which add extra features, such as a certificate builder and an email manager.
Features
- Unlimited courses and lessons
- Front-end course builder
- Profiles for students and instructors
- Course preview, announcements, and retakes
- Different lesson types
Price
The standard plugin is free, while the paid addons start at $55 for a single site for one year.
Our Opinion of MasterStudy LMS
MasterStudy is a good “middle of the road” option, as it has a free version and an affordable paid version.
9. Masteriyo
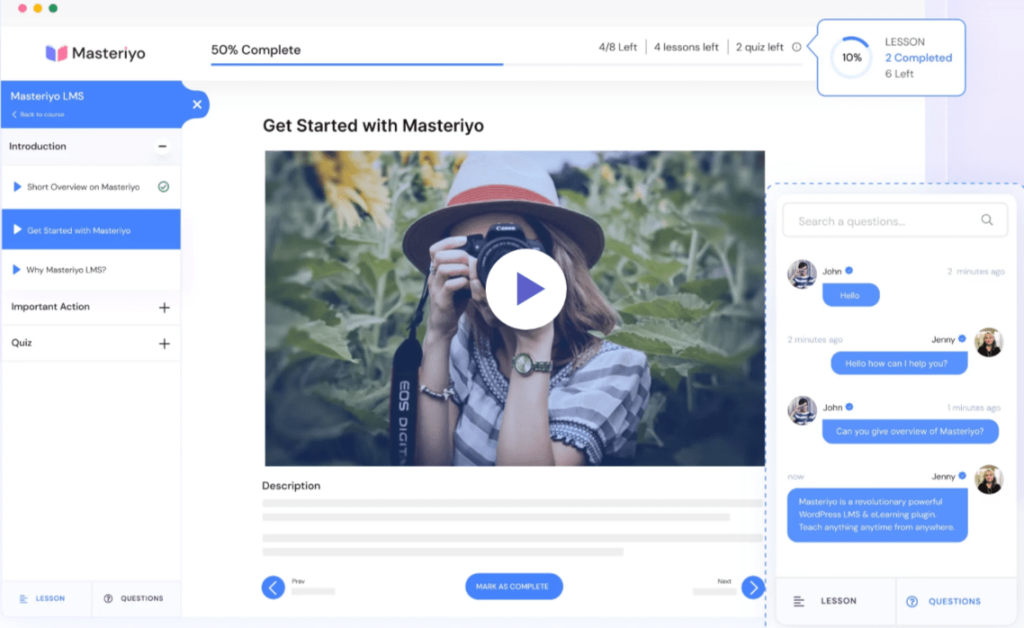
Masteriyo is a fantastic WordPress LMS plugin for creating online courses. It offers a user-friendly interface, making it perfect for beginners to create engaging learning experiences for their audience.
The plugin includes a drag and drop course builder to easily create interactive segments like sections, lessons, quizzes, and many more. Additionally, you can design beautiful certificates for your students after they complete their course.
With the use of the inbuilt order system, you can easily sell courses without using any additional plugins. It has inbuilt support for PayPal and Stripe. In addition, you can also use the WooCommerce integration addon to integrate a checkout and use 300+ secure payment gateways.
Features:
- Schedule live classes and meetings easily with the Zoom integration
- Provide a Q&A section for lessons, assignments, and quizzes
- Review system for rating courses
- Password strength checker to enforce strong passwords
- Course archive filter for students
Price:
Premium versions cost between $49.17 per year and $164.67 per year depending on the features you choose.
Our Opinion on Masteriyo
If you’re looking for a feature-rich and easy-to-use LMS plugin for WordPress, Masteriyo is an excellent choice. Learn More: https://masteriyo.com/
Creating Online Course Website With WordPress
Now that you’re familiar with the different eLearning plugins available, let’s walk through the process of creating an eLearning website.
There are a number of different steps, but the entire process is not too lengthy or complicated. We will show you, step-by-step, how to create an online course.
For this tutorial, we’ll use the Tutor LMS plugin, as it is free and has many features that you’ll want to use. Depending on your situation, one of the other paid options may fit your project better.
Step 1: Set up WordPress
First, you’ll need to set up your WordPress website. To do that, you need to purchase a hosting plan and a domain name.
We recommend a managed WordPress host, as they will handle a lot of the more technical aspects for you. SiteGround, Hostinger, and GreenGeeks are some of the most popular options.
Once you’ve purchased a domain and hosting, it’s time to install WordPress.
Usually this is done via your hosting provider or via cPanel. The setup wizard is very easy to follow and only takes a few minutes.
Next we need to choose a theme.
Astra is the most popular theme for WordPress (and it’s our theme!) so we’ll use it.
To install Astra, go to Appearance > Themes on your WordPress sidebar then click the Add New button.
Search for “Astra” and then install and activate the theme.
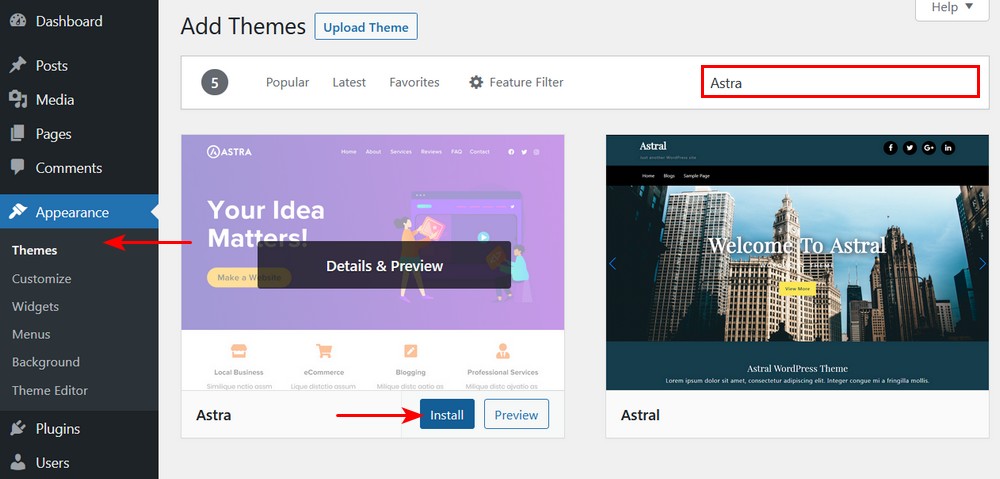
Astra comes with 200+ premade website templates, about a dozen of which are designed specifically for online courses and LMS sites.

You can choose from the templates for LearnDash Academy, eCourse, and Online Courses, just to name a few. For this demo, we’ll use the LearnDash Academy template.
Recommended Astra’s templates:
To install the template, go to Appearance > Starter Templates on the sidebar. Type “learndash” in the search bar, then select the first item.
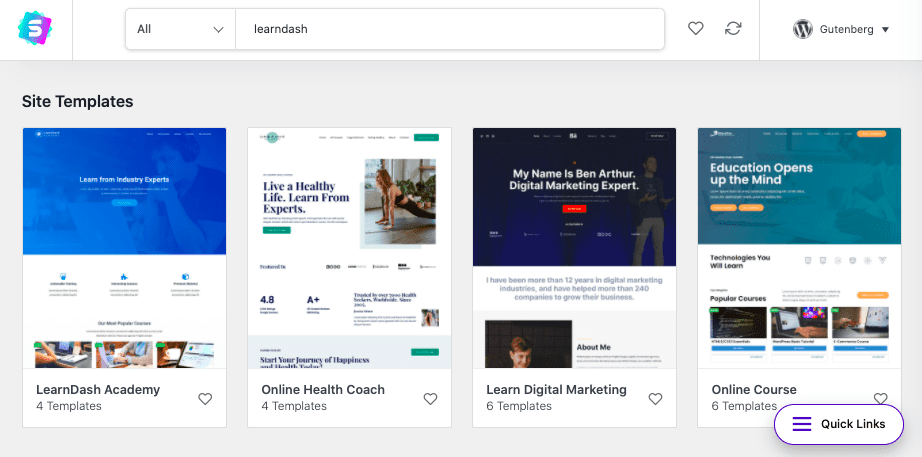
Now you can choose if you want to preview the template, import the complete site, or import a particular page in the template.
Since we have a brand new site, click the Import Complete Site button.
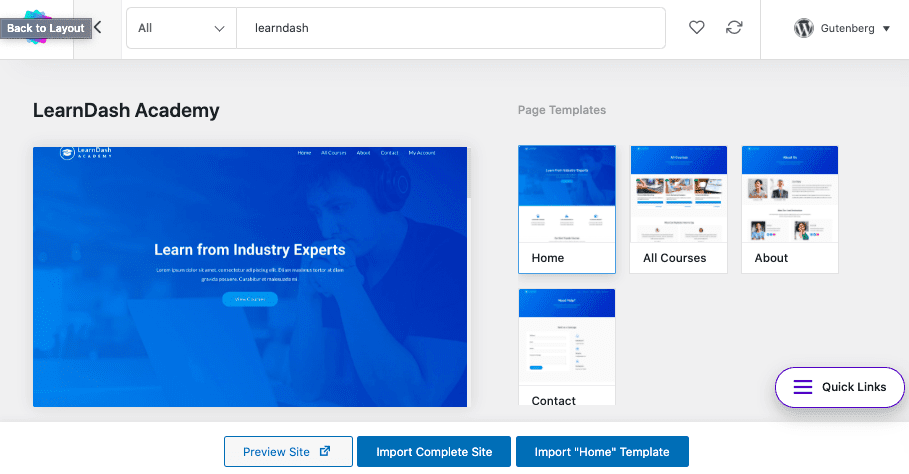
Voila! We now have a fully-fledged eLearning theme installed and set up on our website!
Finally, we want to secure WordPress to keep your courses, students and data safe. There are many different things you can do to secure your site, which include only using updated plugins, making a strong password, and utilizing a firewall.
To start, however, we recommend using a WordPress security plugin like Sucuri or Wordfence. They are both simple to install and set up and will keep your site secure.
Nice job!
We now have a secure WordPress website up and running with a beautiful theme.
Step 2: Install an LMS Plugin
Let’s install an LMS plugin now. Since it has a powerful free version, we will use the Tutor LMS plugin. If you have a larger budget, we recommend LearnDash.
You can install Tutor LMS by clicking on that link or by going to Plugins > Add New on your WordPress sidebar, then searching for “Tutor LMS.”
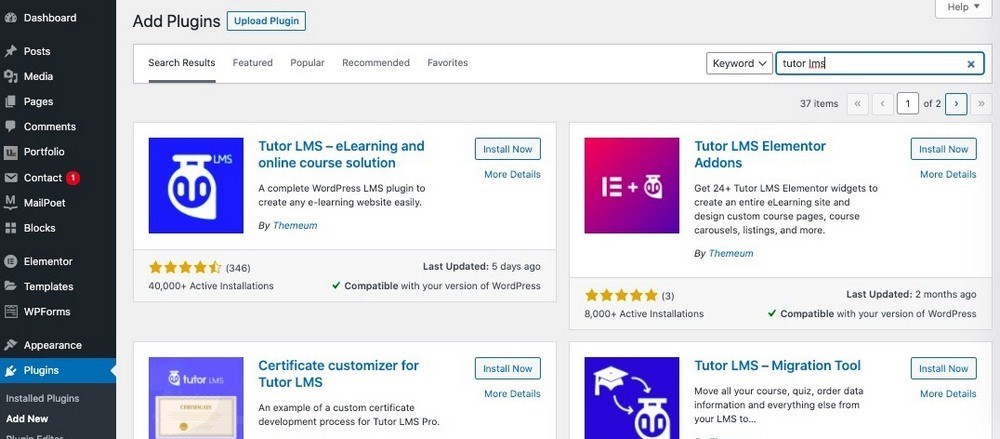
Once you’ve installed the plugin, activate it.
Step 3: Set Up the LMS
Now we have installed an LMS plugin, let’s set up some of the basic functionalities.
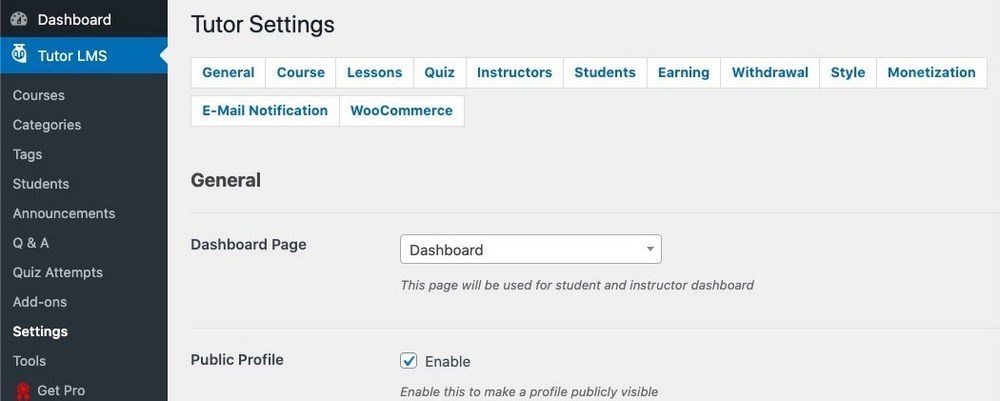
First, go to Tutor LMS > Settings on your WordPress sidebar.
This is the settings page. On it, you can customize just about everything to do with the plugin. There are literally hundreds of different settings.
Some of the more useful ones are:
- On the General Tab
- Spotlight Mode lets you hide the header and footer when students are viewing a course.
- On the Courses Tab
- Gutenberg Editor lets you use the Gutenberg editor on the course description page.
- Enable / Disable Course Content access allows admins and instructors to view a course without enrolling in it
- On the Monetization Tab
- You can enable monetization for your courses. The plugin supports WooCommerce, Easy Digital Downloads and Paid Memberships Pro.
Step 4: Adding Courses
Now let’s add a course. Go to Tutor LMS > Courses on your WordPress sidebar and click Add New.
Add your course name and description at the top.
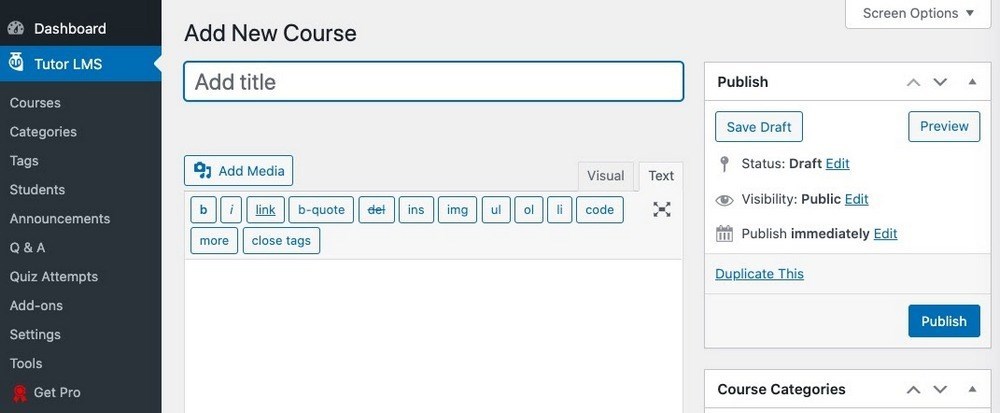
If you scroll down, you can also customize different settings for the course. These include the maximum number of students and difficulty level.

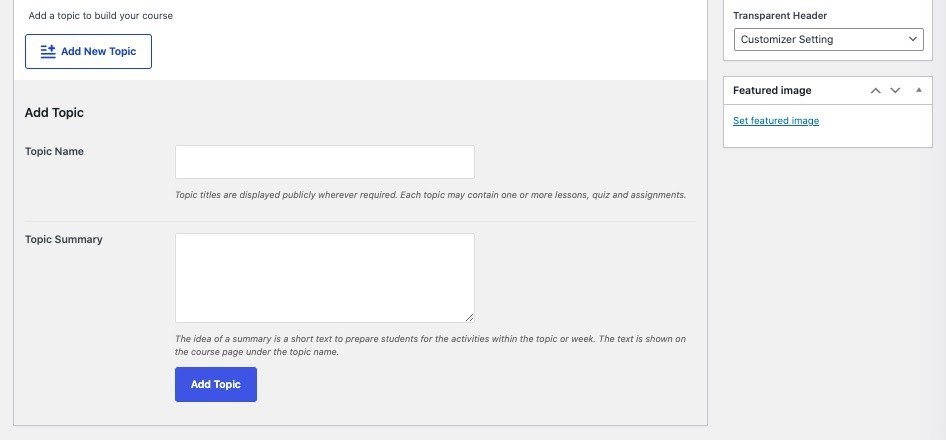
Go down further and you’ll see a button for the Course Builder. Click on it and you can add a topic, which is a space for one or more lessons, quizzes and assignments.
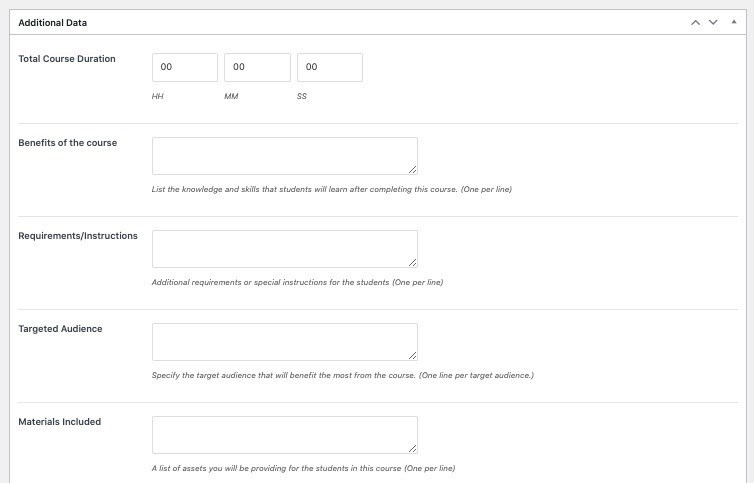
Finally, at the bottom you can add additional data about the course. This includes the duration, benefits of taking the course, requirements, intended audience, and materials included. You can also add a course video.
Once you’re done, press the Publish button.
Step 5: Restricting Courses to Paid Members
Once you add courses, you’ll most likely want to restrict them to certain people. To do this, you need to add a product and then connect it to your course.
The easiest way to do this is with WooCommerce.
To create a product in WooCommerce, go to Products > Add New on your WordPress sidebar.
Fill in the name and description.
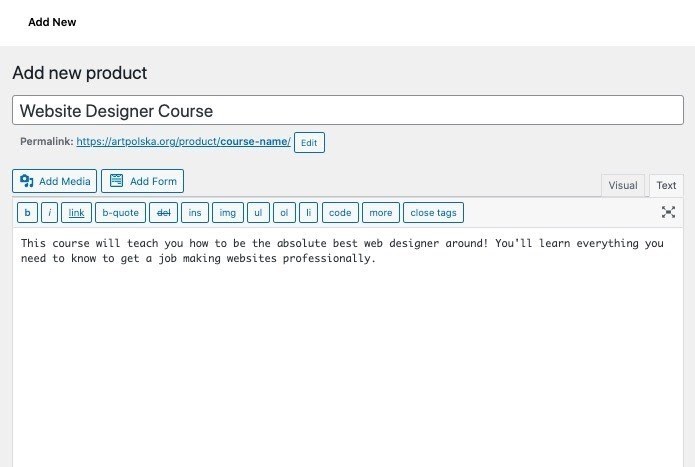
Then, scroll down and add the price. Also, be sure to check Virtual at the top.
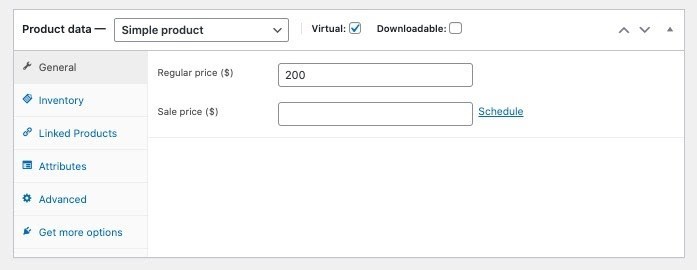
Next, add any other settings that you want to include, such as the product category, product tags, short product description, sale price, and more.
When you’re done, publish the product.
Go back to the course and scroll down to the Add Product section. Find your product and add it.

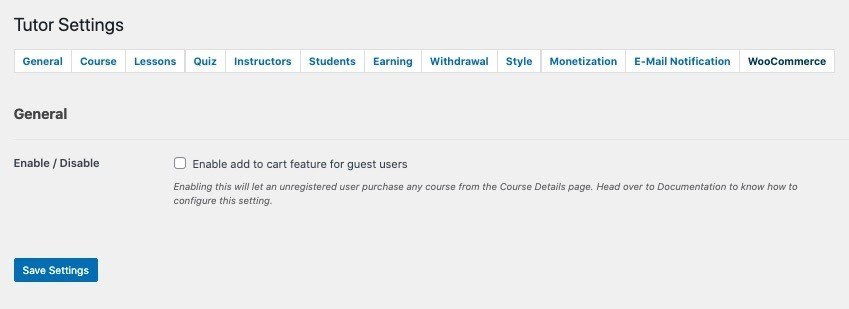
As a final step, make sure that you have set up the WooCommerce (or other payment service) provider on the Tutor LMS > Settings page, on the WooCommerce tab.
You’ll also need to have WooCommerce itself set up for it to work.
Creating a New Registration Page
Now that we have a course set up, it’s time to create a registration page. This will be the page where students can sign up and register for your courses. Note that we will be using the Gutenberg editor to create this page.
However, first we should note that there are already two registration pages created by default for you when you install the Tutor LMS plugin.
You can find them by going to the Pages section of your site and searching for registration.
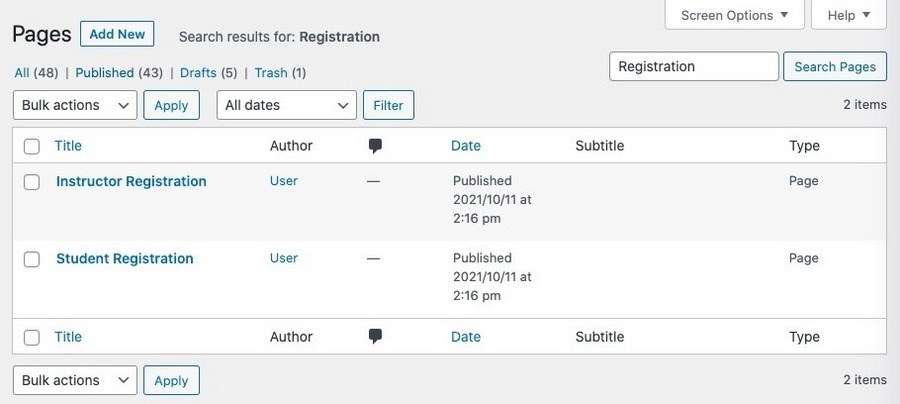
There are two pages: Instructor Registration and Student Registration. The first is if you have a complex site that has a number of different courses, while the second is for students that want to register for your course.
If you click View, you can see how the page looks:
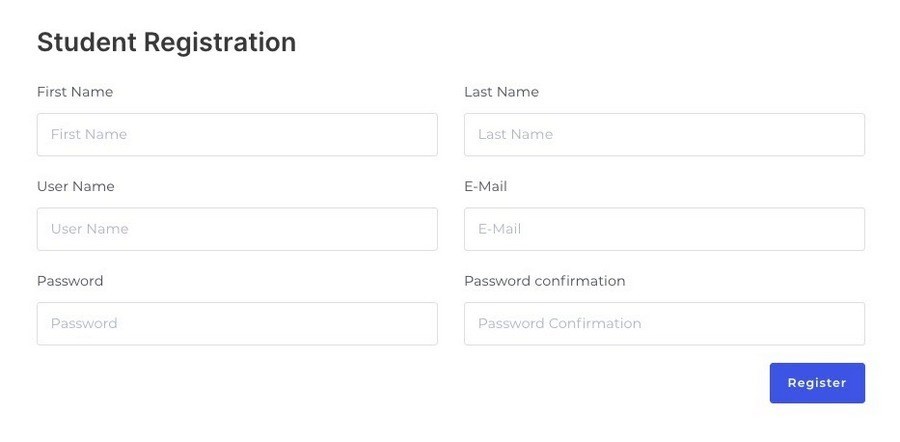
If you want to create a separate registration page, you can add a Gutenberg block for it.
Start by creating a new WordPress page by going to Pages > Add New. Give your page a title like “sign up” or “registration.”
Then, add a new block. Search for LMS and you’ll see two different blocks: Student Registration and Instructor Registration.
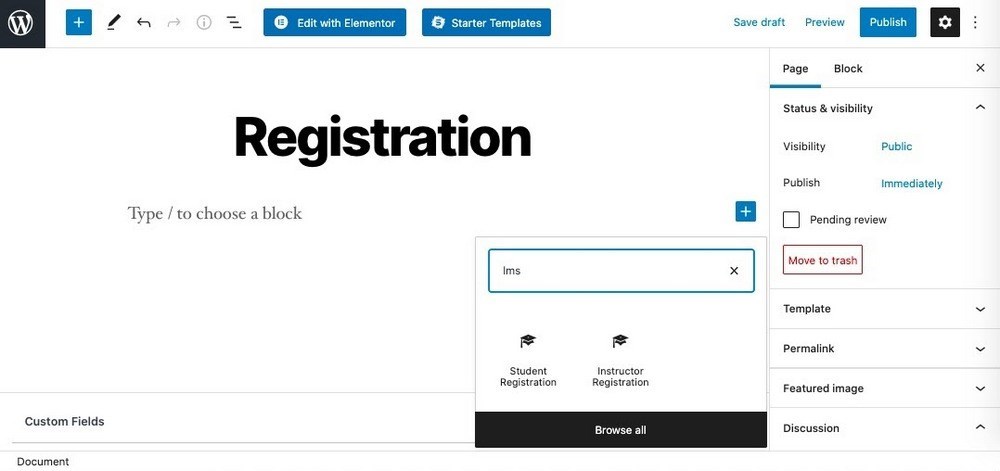
For this walkthrough, we will just add the Student Registration page. Add the block.
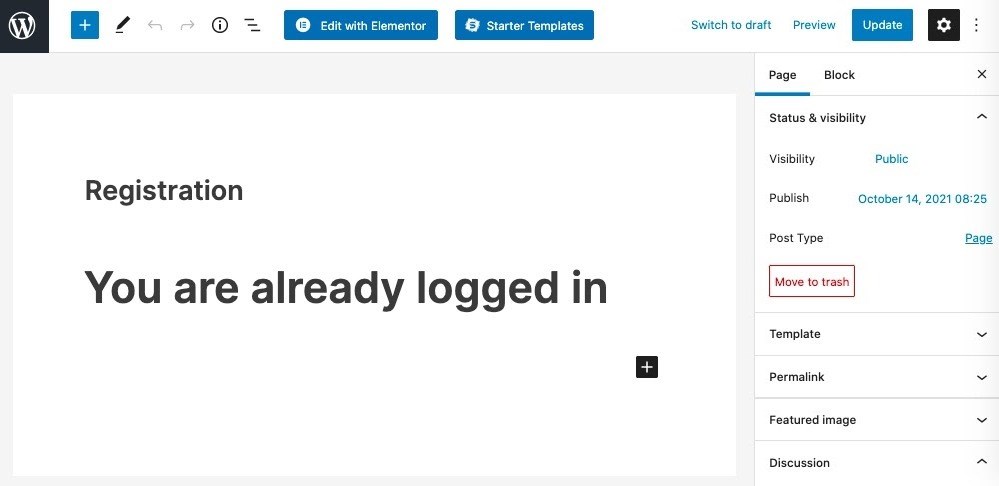
You will then see a message that says “You are already logged in.” This is because your admin account is by default already-registered for a course.
Let’s also see how to add the product itself to the page.
Add another block and search for WooCommerce. Select which format you want to use — probably Featured Product if you are only offering one product.)
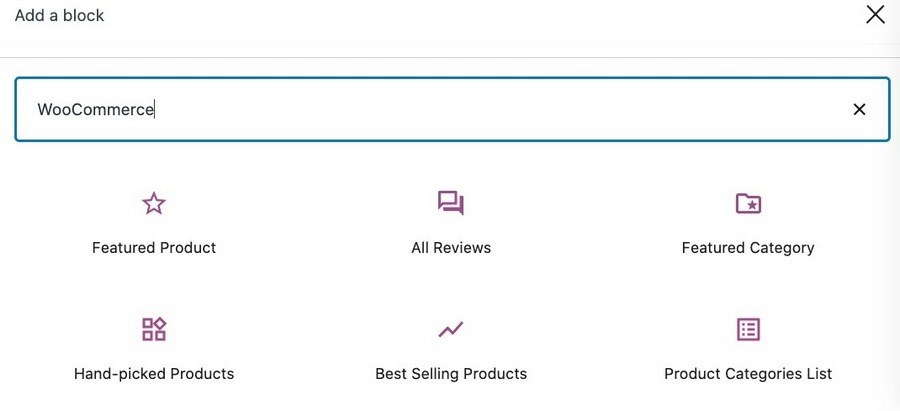
Then find and add your course as a product.
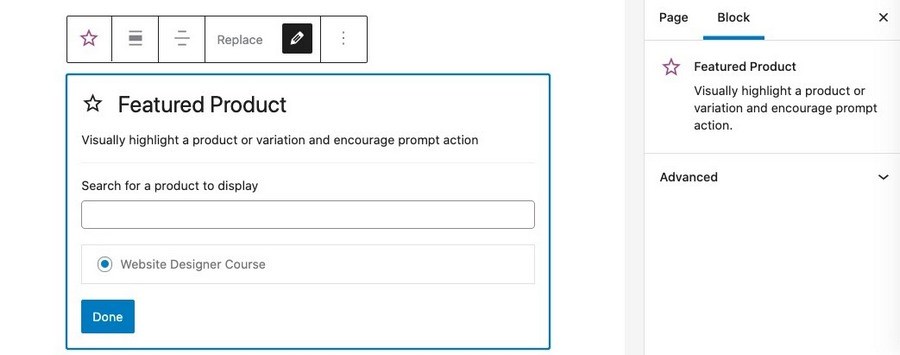
Add any other descriptive text that you want to add, then click Publish.
That’s it! You’ve successfully created a registration page and a product page!
Access Denied
To view the page properly, either log out of WordPress or view the page in an Incognito window. When you do this, you may see another message that says “Access Denied.”
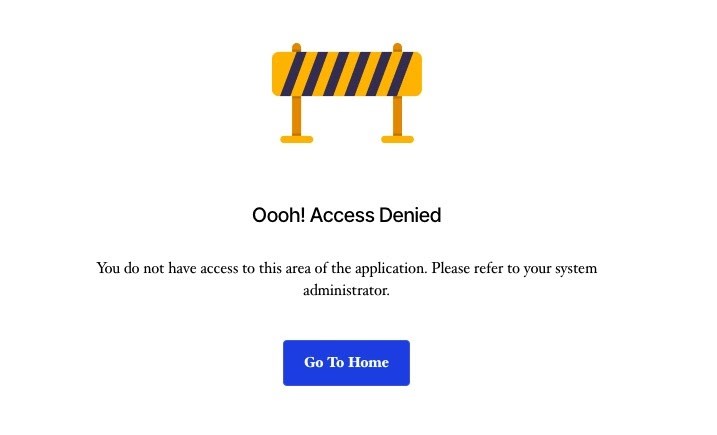
To fix this, go to Settings > General on your WordPress sidebar.
Scroll down, find the Membership item and click the checkbox next to Anyone can register.
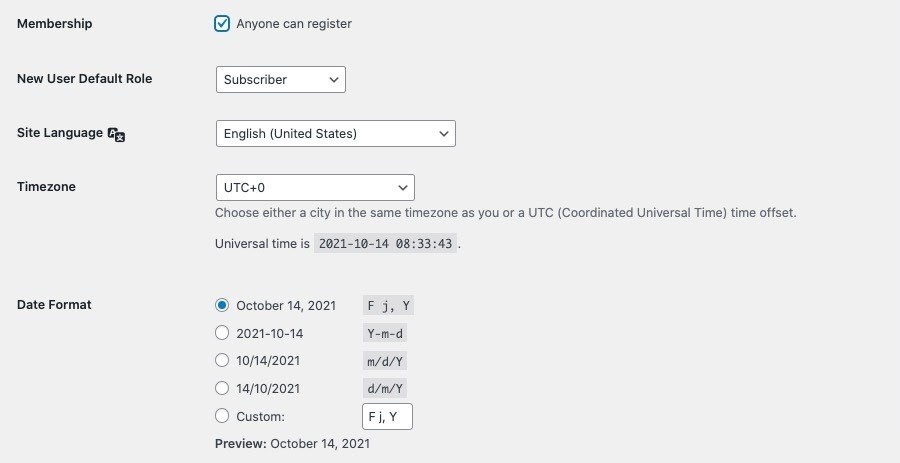
You should now be able to view the registration page without any issues.
Promoting Your eLearning Website
Now that you have learned how to create an online course, you’ll need to promote it!
There are a ton of different marketing strategies, but we recommend doing at least three things:
- Use email marketing tactics. Email marketing is a super powerful way to build an audience and market your products to them.
- By creating a blog on your website and writing awesome content. Having great content is perhaps the best way to get people to visit your website, see your courses, and purchase one.
- Build a landing page that converts. By having an effective landing page design, you can increase your conversion rate and sell more courses.
Using Gamification in eLearning
Everyone loves games! They’re often a welcome respite from work, as they are less serious and more fun. That’s why gamification is a great method to use in eLearning.
Gamification is just using a game-like approach to teaching your material. This is often more effective than teaching in a regular straightforward manner. There’s a lot of science behind gamification in learning and it’s a great tactic to use.
There are many different ideas for implementing game-like tactics into your courses. Here are a few ideas:
- Add challenges to each lesson. For example, don’t just add simple assignments, but include different challenges at varying difficulties. Have easy, medium, and hard versions of the challenge.
- Have a scoreboard. Competition is a great way to drive action. If your course results can be made public, consider adding a public scoreboard that shows everyone’s results.
- Give out badges. Badges are a great way for users to show off their accomplishments. If your site has a public profile for each student, definitely add a place to share badges for the courses they’ve completed.
- Add sequential levels. Just like in a regular game, having numbered levels that lead from one to another is motivating for the user. For example, instead of just listing different subjects as content, use level 1, level 2, level 3, and so on to organize them.
Learning Website FAQs
Looking for quick answers? We have a brief FAQ for you here.
How do I create an online course website?
How do I run an online course?
Will people buy my online course?
How much does it cost to make an online course?
For the website, there are many free educational WordPress themes and plugins available, which makes creating an online course very inexpensive. However, you’ll need to purchase a hosting plan, a theme, and a domain name, among other costs.
Wrapping Up
Whether you’re a professor, teacher, or just a knowledgeable person that wants to share your skills online, you’ll definitely want to create an eLearning site!
With WordPress and an LMS plugin like Tutor LMS or LearnDash, creating that site is super easy. Plus, you can easily monetize it by connecting WooCommerce, Easy Digital Downloads, or another payment plugin.
In this post, we covered everything you’ll need to know about creating an online course website on WordPress. First, we covered the absolute best plugins that you’ll want to use on your WordPress site.
Then, we walked you through setting up your own online course using Tutor LMS.
Finally, we talked a little bit about promoting your eLearning website and using gamification to keep students more engaged in your lessons.
Do you run your own eLearning site? Which LMS system did you use and what has your experience been?
Disclosure: This blog may contain affiliate links. If you make a purchase through one of these links, we may receive a small commission. Read disclosure. Rest assured that we only recommend products that we have personally used and believe will add value to our readers. Thanks for your support!



Hi. we need to setup a free course with by registring user name, mobile no and email address but it goes into error message. fo i have to buy a plugin for that ?
Hello Yusuf, we are unsure about the error message you are referring to. Can you describe the error or reach the relevant customer support who can help you in a better manner.