Updates nowadays come too often and too many for most of us. And the fear of breaking your website with every update is ever-present. Especially when you don’t have a backup plan.
If you’ve ever found yourself in a position where you need to update a theme or plugin, test something new, maybe add a few trinkets here and there, install new things, or hand over your website to a tech team to troubleshoot, it’s understandable if you might feel a little reserved about losing your website.
At worst, you might find your WordPress website suddenly stop working and you can’t log in to the dashboard to fix things.
To help reduce the risk and the fear of losing your website completely, the best solution is to create a staging site and test everything before rolling updates to your live website.
In this article, we’ll talk about just how to do that. We’ll show you the ropes on how to perfectly clone your website to a staging site to test and implement updates and changes before rolling it out to live.
And it all takes less than 5 minutes to complete!
Let’s get started.
Why You Might Need to Clone Your Website
There are a lot of different scenarios when you might need to clone your website.
From simple updates of themes and plugins up to and including complicated theme customization, the benefits outweigh the time it will take to do by ten-fold.
Certain scenarios include:
- Updating plugins and themes and testing compatibility
- Changing themes and plugins
- Adding a child theme
- Changing PHP versions
- Updating WP Core
- Adding additional functionalities using plugins
- Customizing themes and plugins
- Handing over a copy of your site to a tech team to troubleshoot
- Changing your Domain Name
- Changing Web Hosts
- And many many other things.
Basically the general rule is if you want to change anything on your website, before you update the live site, it’s best that you do the changes on a cloned staging site to make sure that these changes will not break your live site.
In this context, however, “cloning” doesn’t just refer to backing up your website. There’s a whole other topic that covers that. But in a way, it does involve getting a back-up copy of your website and dropping that to another server. It can be on your same hosting or another.
Essentially, yes, the literal definition of “cloning” Making an exact, fully functional copy of your website for purposes listed above.
It’s also best to take note that, whatever server you are ready to set up your staging site on is similar, or the same as your live site. We’ll talk about this more below, but you also need to make sure that the content is synced between the live and staging sites.
After covering the scenarios why you might need to clone your website, let’s talk about the certain benefits:
- Having a fresh backup of your site all the time – If you’re in the habit of constantly cloning your live site, you’re sure that you always have a fresh copy of your website all the time.
- Making sure you don’t break your live site with updates – It’s what we’ve been saying all this time. You can always rebuild your staging site, but your live site is one and only.
- Have a playground for new pages and things – With a staging site, you’re sure that you’ll always have new ground to break for new pages where you’ll have the freedom to design without affecting your site speed or SEO.
- Worry-Free tech support handover – If you regularly hand over your website to a third-party support person, you will no longer worry about whatever changes they make that will affect your live website.
Now that we’ve covered the whats and the whys let’s now hop into the how. We’re going to talk about 2 very easy ways to clone your WordPress website in less than 5 minutes!*
*The speed will largely depend on the size of your website.
How to Clone Your WordPress Website
There are a lot of different ways that we can go about doing this, but in this article, we’ll focus on two using the easiest plugins out there. But there are of course some pre-requisites.
Before You Clone
Before you go about cloning your website, you first have to have set up your staging environment.
You can either do that on a different web host, the same hosting but different directory or create a local environment.
Instructions of which are aplenty online and elsewhere. But don’t go and set up WordPress there yet, we’ll take care of that during the cloning process.
Speaking of which, let’s cut to the chase!
Using Duplicator (Step-by-Step)
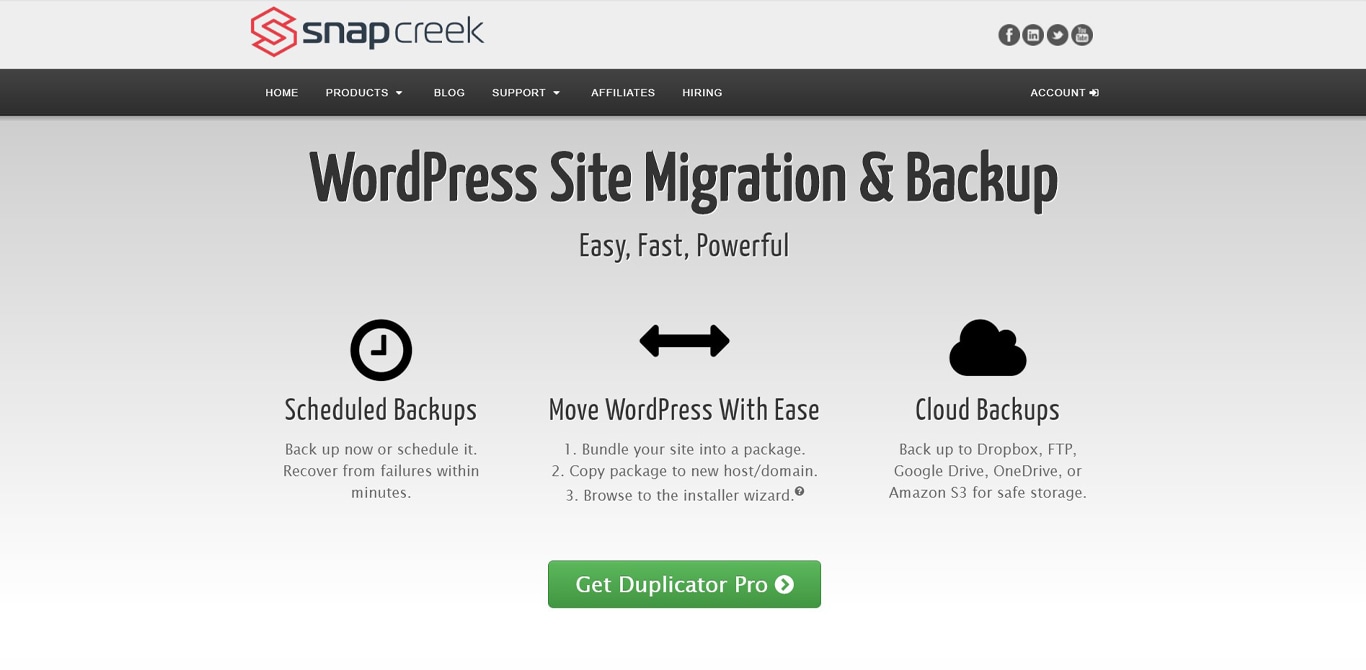
Duplicator is a popular WordPress plugin that’s used widely in cloning, or yes, “duplicating” your website on another server. It’s free and available on the WordPress.org repository.
It’s easy and has its own standalone installer to help you with cloning your website.
Before actual steps, here’s a visually appealing infographic that outlines simple steps to clone your website.
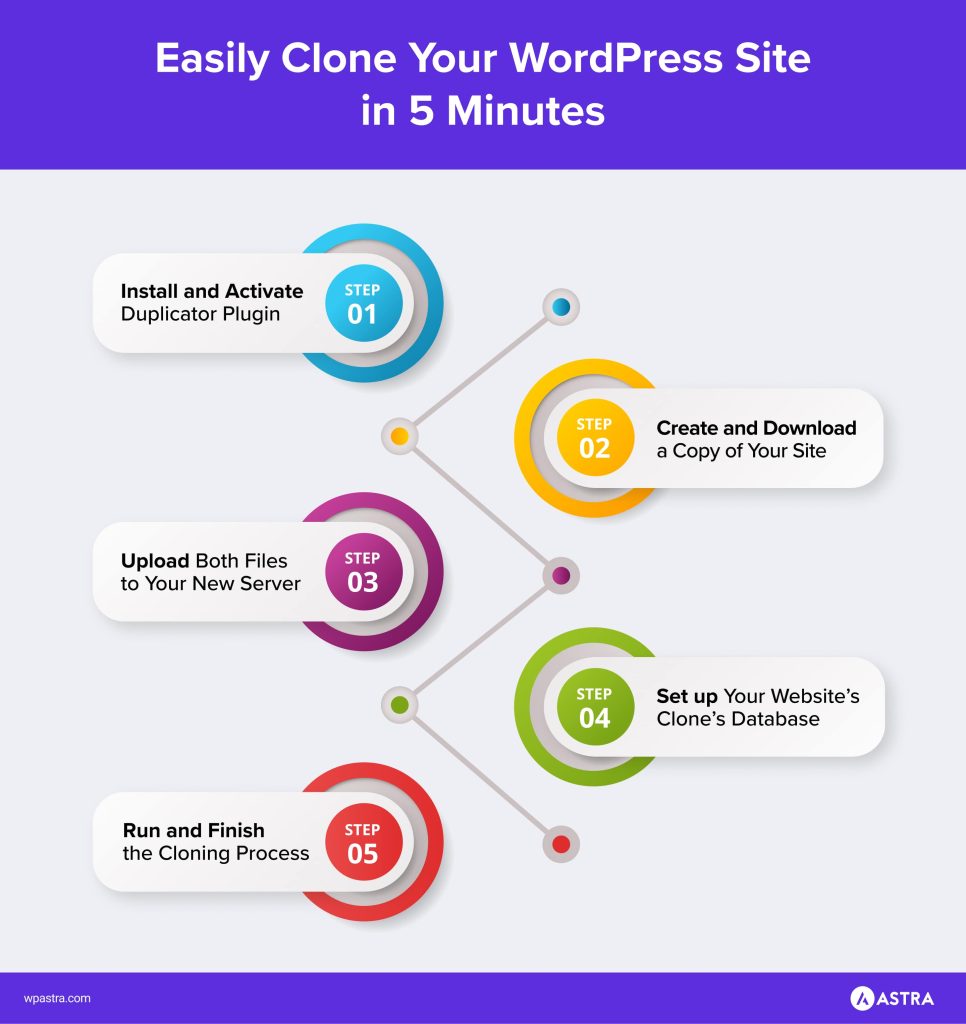
Step 1: Install and Activate Duplicator
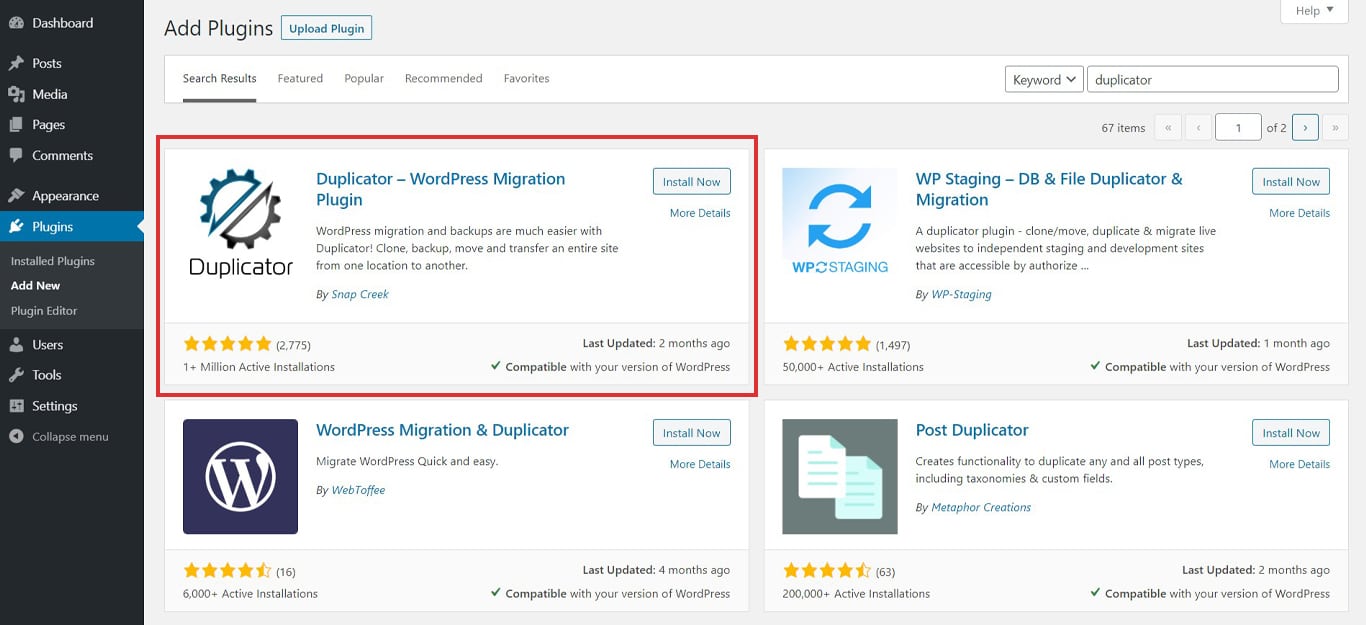
After downloading the plugin, you have to install it on your WordPress Dashboard > Plugins > Add New > Upload.
Alternatively, you can search for the plugin directly from your WordPress Plugins Dashboard, install and activate the plugin.
Step 2: Create and Download a Copy of Your Site
Once installed, head on to the Duplicator Tab on your WordPress dashboard and click on the Create New Option.
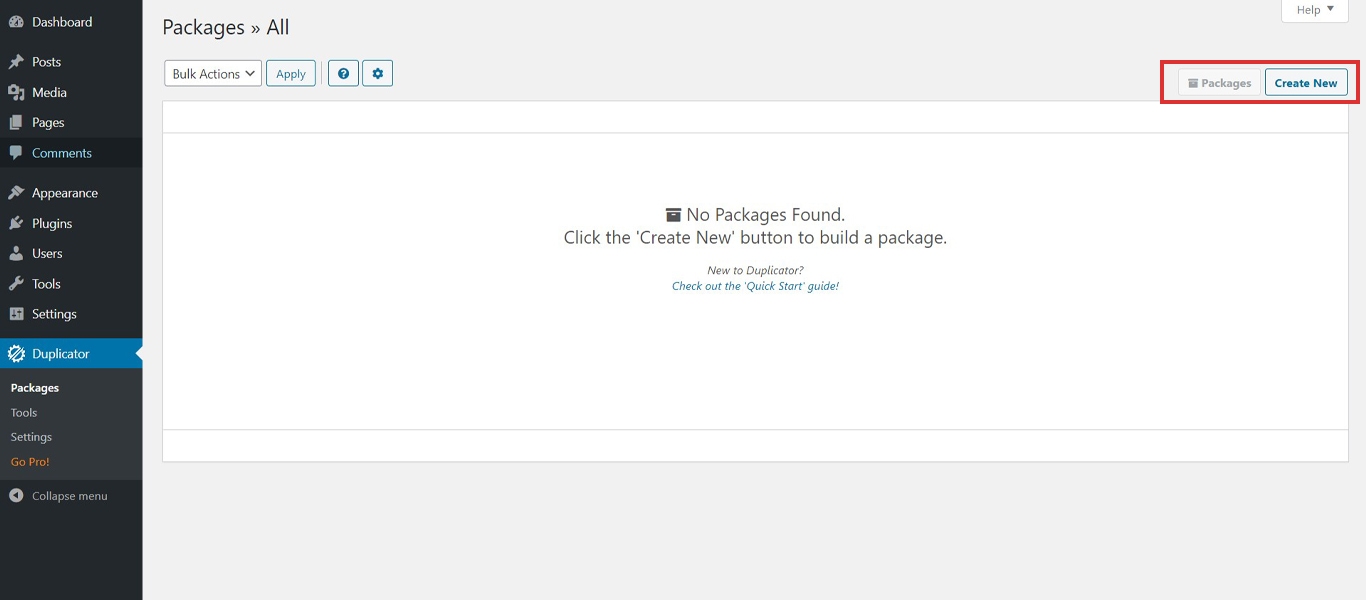
A “package” for Duplicator pro is your group or set of files that you need to set up an exact copy of your website on a new server. It consists of a standalone installer and an archive. You can create as many packages as you want.
The default options for creating a package should be set for you to use. No need to tinker around unless you have specific requirements for the backup like password protection.
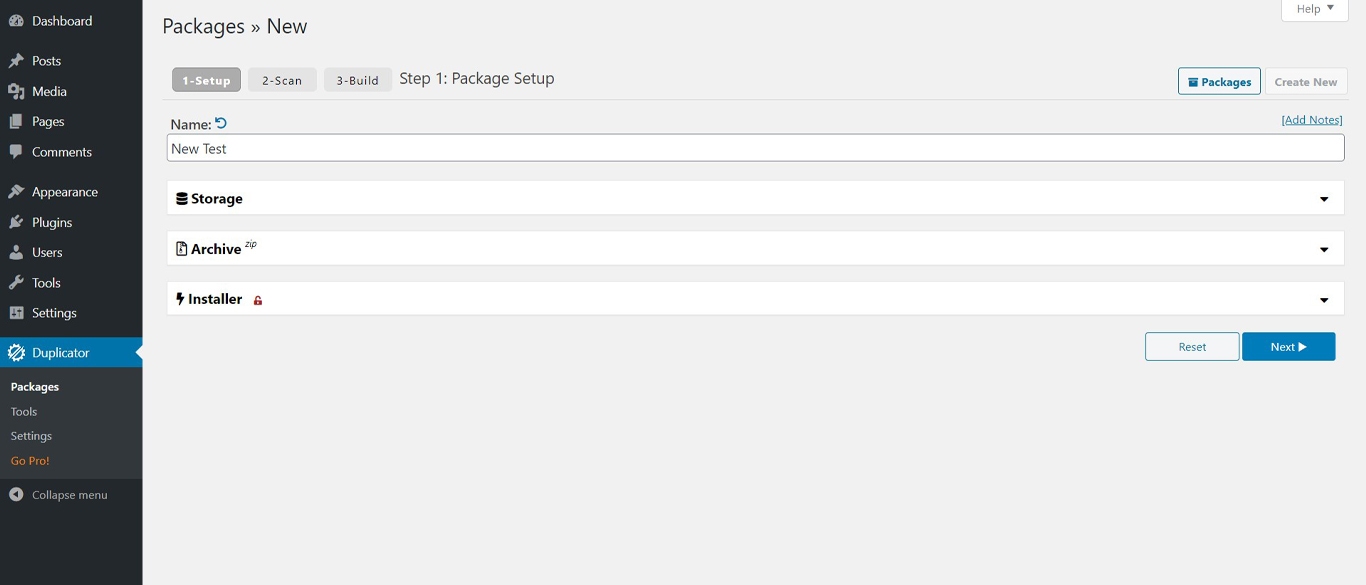
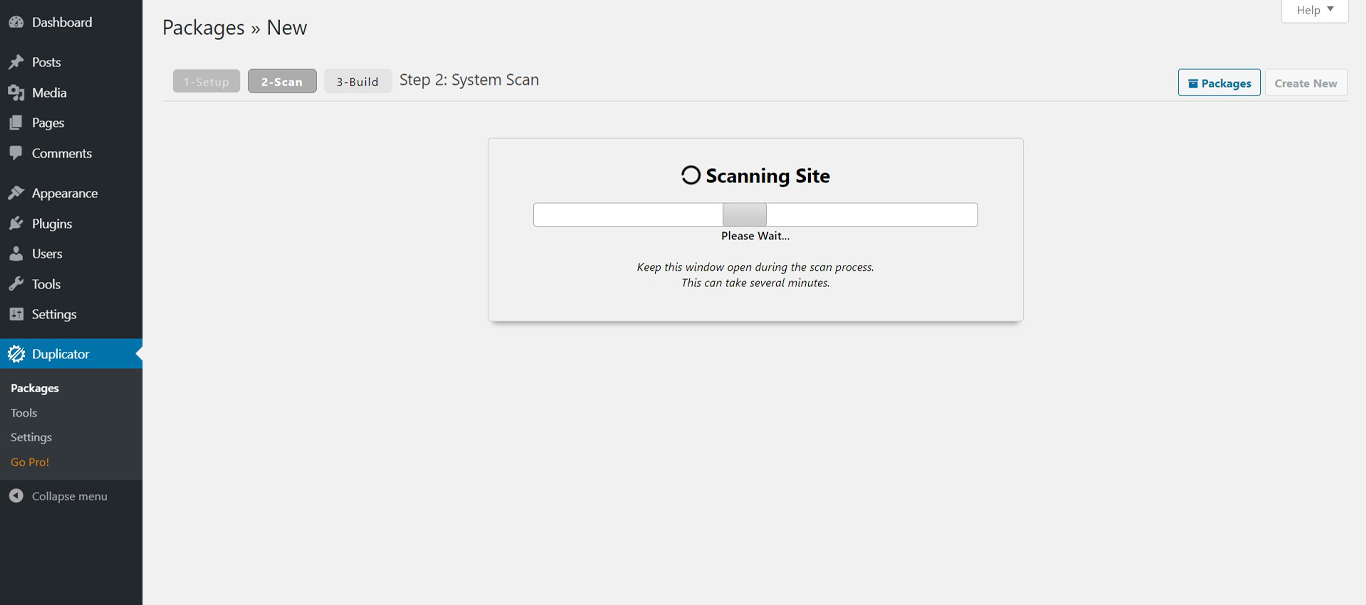
Next is to name the package to identify it. Then click next. At this point, the plugin will scan the site for errors, give you a report, and an option to continue.
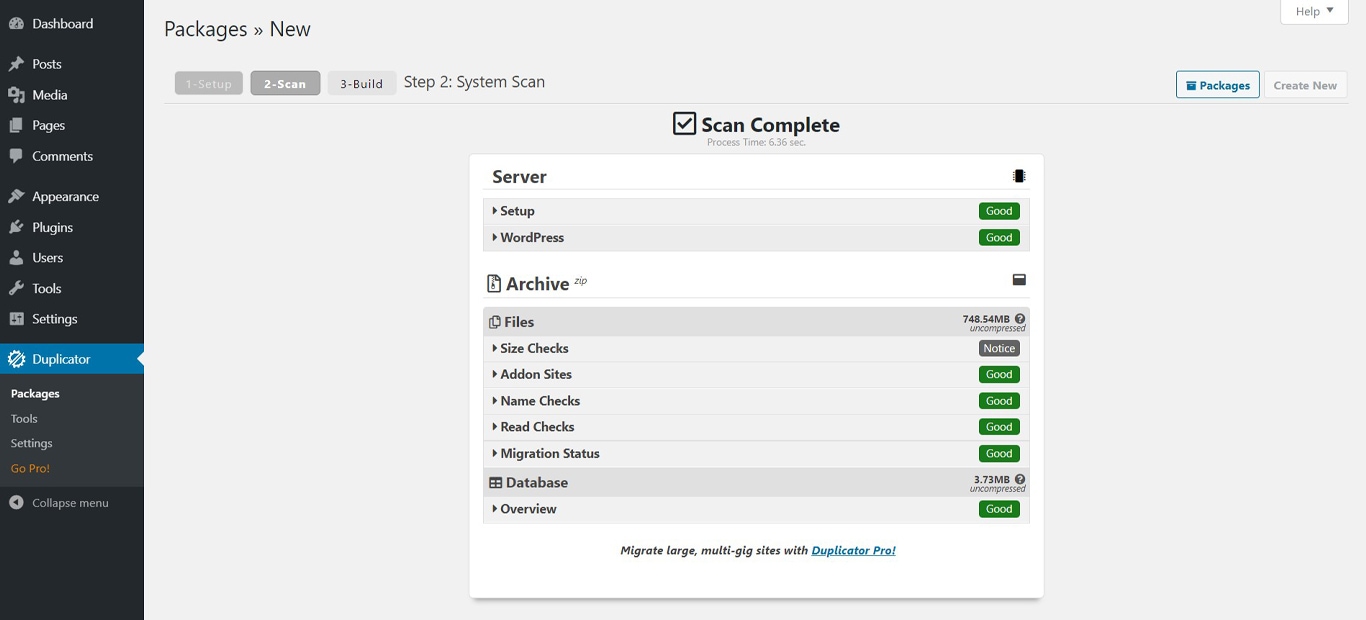
In the event that it returns an error, depending on your host and site size, just click “Yes. Continue with the build process.”
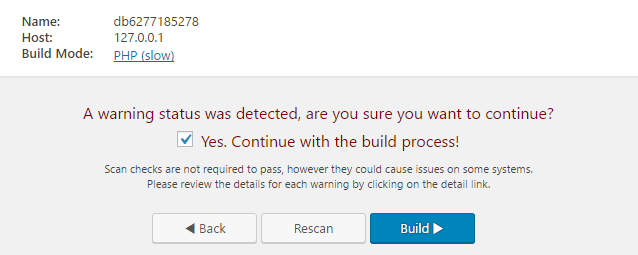
Hit build and let the plugin work it’s magic.
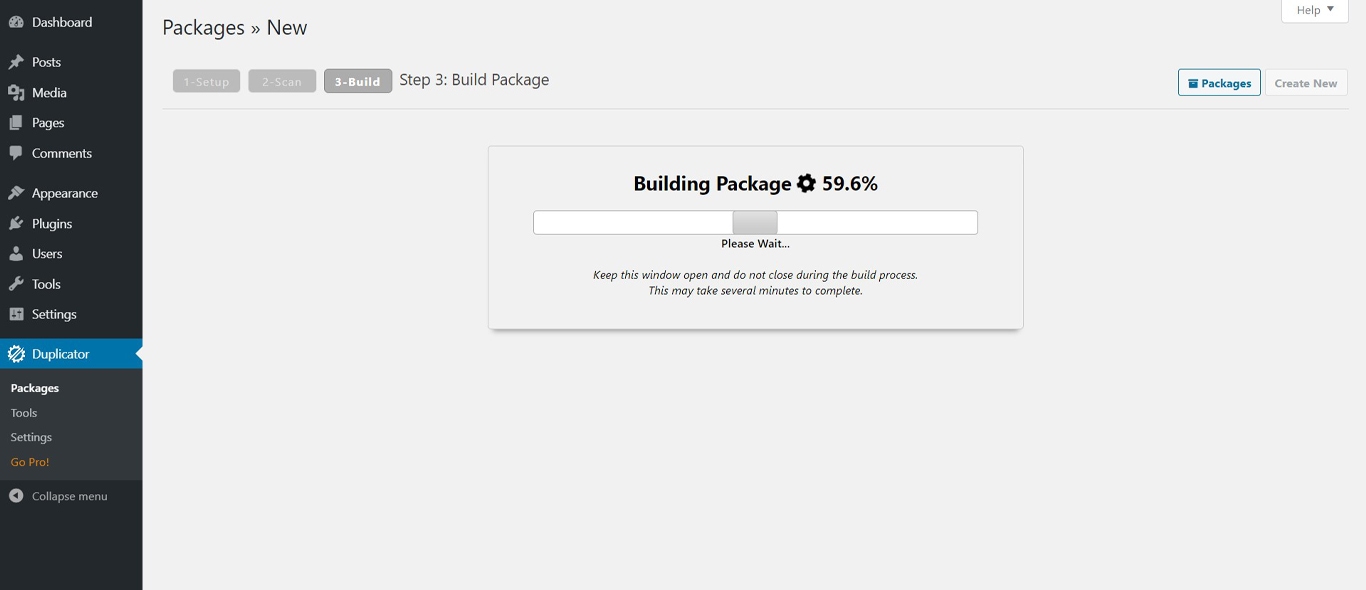
Once done, the plugin will give you two options.
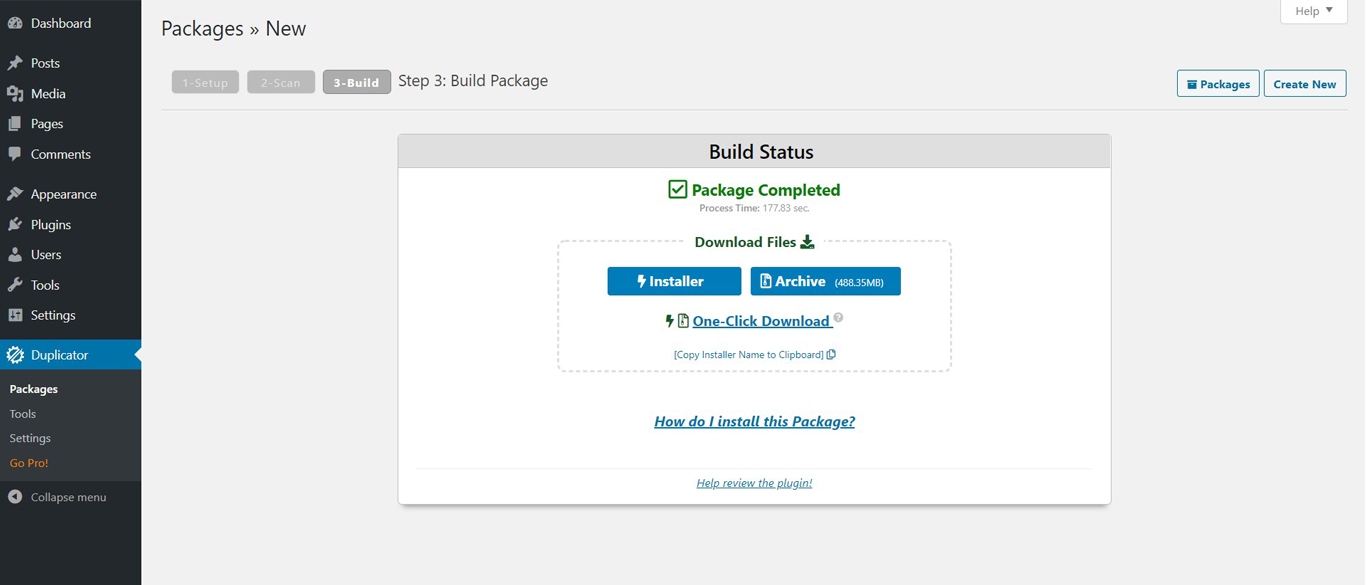
The installer is a standalone installer with the exact copy of your website, and the archive is the archive of all your website files. Make sure to download both.
Step 3: Upload Both Files to Your New Server
After downloading both files, upload them to your server using a file transfer client. Make sure you have FTP accounts set up. You can either use your hosts’ file manager or FileZilla.
Check out these instructions to learn more about FTP and File Transfer.
You’ll need to log in to your FTP server to be able to upload the files.
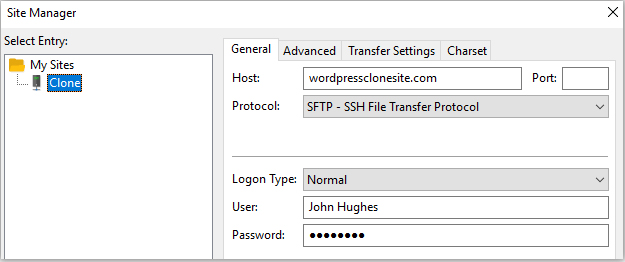
Just make sure you upload the files to the main directory of your website, normally in the public_html folder.
Step 4: Set up Your Website’s Clone’s Database
If you’ve been here a while, you probably are aware that every WordPress install needs a database in order to store information about your website such as comments, users, etc.
For this step, we are going to install an empty database to your new host where your cloned website database will be exported to. We will be using the Duplicator installer to do that.
If you’re using cPanel, simply navigate to My SQL databases, and create a new Database.

Name it however you like, but take note of the name including the prefix.
Next, you have to create a user for that database. Add a name and password and take note of those as well.
After that, head on down to “Add User to Database”, select the user you just created, and add it to the database that you just created too.
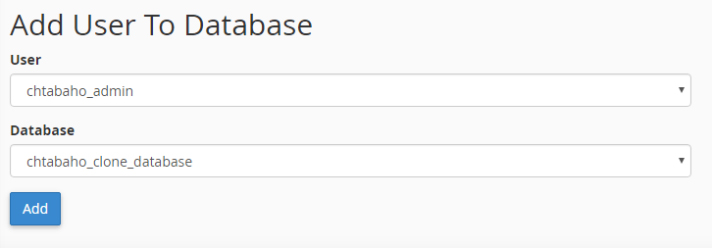
At this point, you might be asked to specify what privileges you want to add to the user for the specific database. Make sure that you enable all privileges for that user in order for this to work. You’d want your user to have full provisioning privileges.
Save it and take note of your database and user information.
Step 5: Run and Finish the Cloning Process
When you upload both duplicator files to your root server, you’re ready to run the installer and clone your website.
Access your new website url and add the /installer.php to the url, like below:
http://www.mywebsitecopy.com/installer.phpThis should run the standalone installer that you uploaded and begin the process. At this point, Duplicator will check your new WordPress website and alert you of any errors before you proceed.
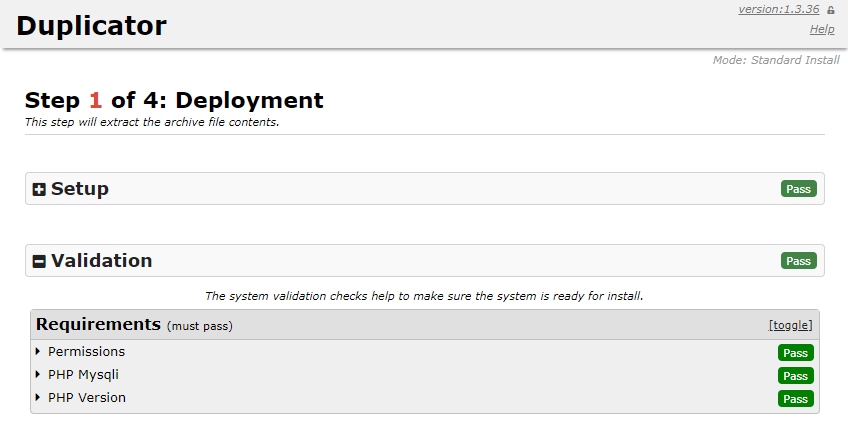
Tick on the box at the bottom once you accept the terms and conditions and proceed to the next step.
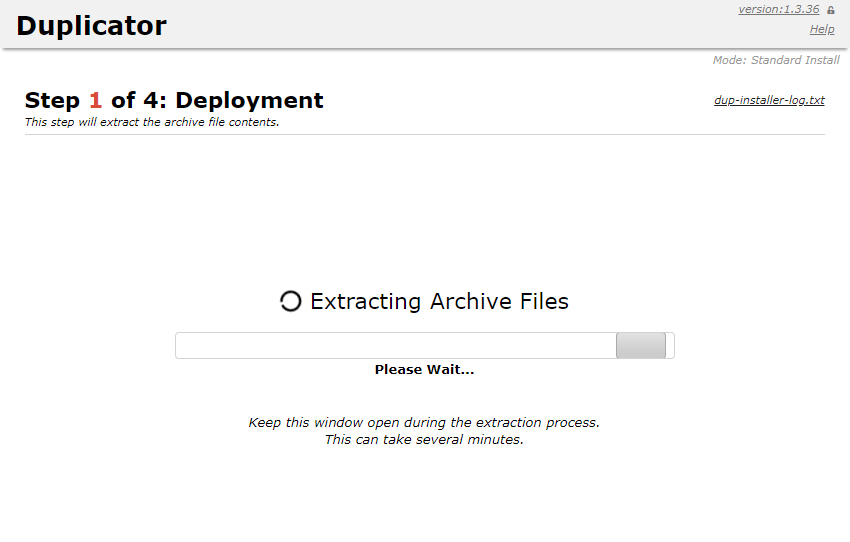
After this, Duplicator will start extracting the archived files, meaning it will start putting all your old site files to the new one:
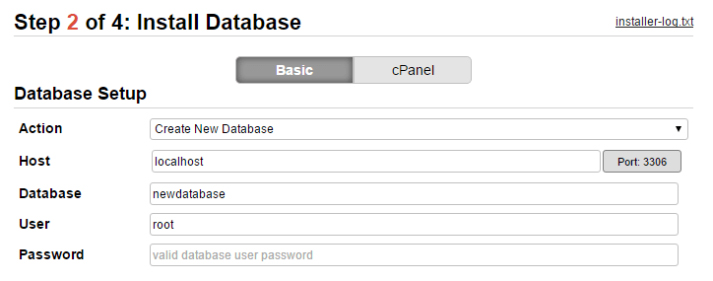
Once this part is done, the next thing that you have to do is put in your Database information. (The new one that you just made.)
Lastly, Duplicator will ask you to confirm your new, clone, website’s URL, installation path, and title.

And you’re done! To make sure that everything is working properly. Duplicator will ask you a few additional things like checking the permalink structure, testing the site, and other optional things that you might want to try.
Click on each button in order and Duplicator will do the work for you.
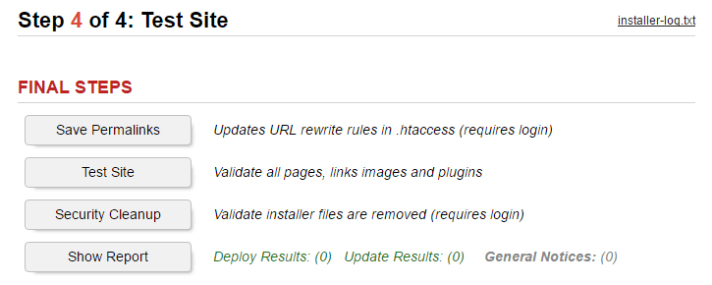
Simple, yet effective.
Using WP Staging Plugin
The WP Staging plugin is a free WordPress plugin that allows you to easily create an identical duplicate of our website and place it into a subdirectory on the same server.
But, in order to make sure that the staging and the live site behave the same, we need to be sure that the server settings are exactly the same. This means that creating a local server setup to test changes may not work since the site on the local setup may behave differently than the live one. Therefore, server settings need to be exactly the same.
Step 1: Install and Activate the Plugin
You can download the plugin from the WordPress.org repository or search it from your Plugins dashboard. Once done, just install and activate the plugin.
Step 2: Create a New Staging Site
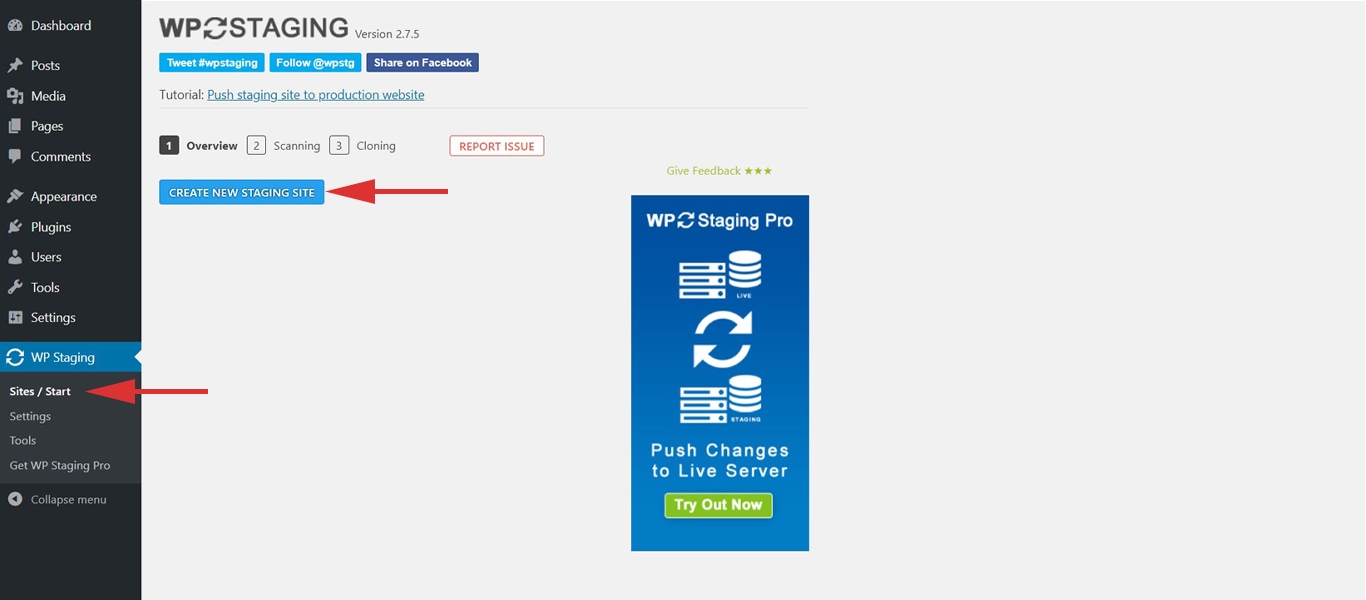
After you’ve installed and activated the WP Staging plugin, head to the plugin settings, click on Sites/Start. And click on Create a New Staging Site.
Step 3: Enter the Staging Site Name
You can check or uncheck the database or files that you might need or wish to exempt while creating a staging site.
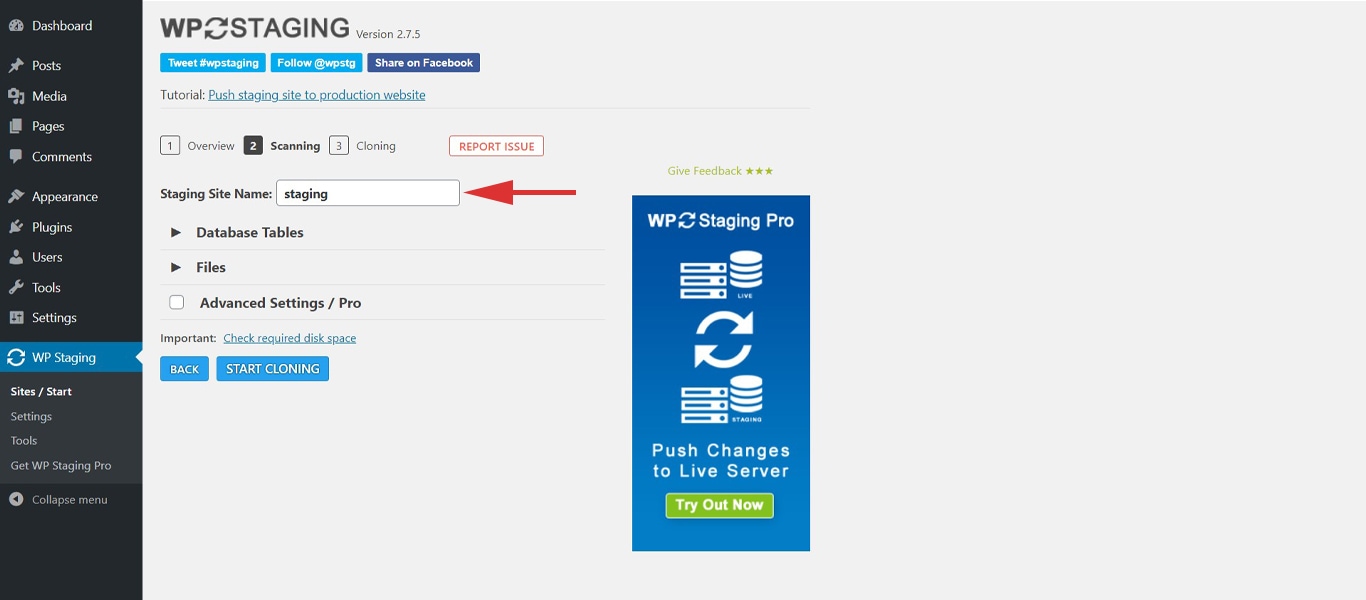
Step 4 (Optional): Adjust the Settings
If you have a custom link set up for logging into your website, you will need to set that up here too. You can do that by following the link. If you have the standard WordPress login link, you need not change anything here.
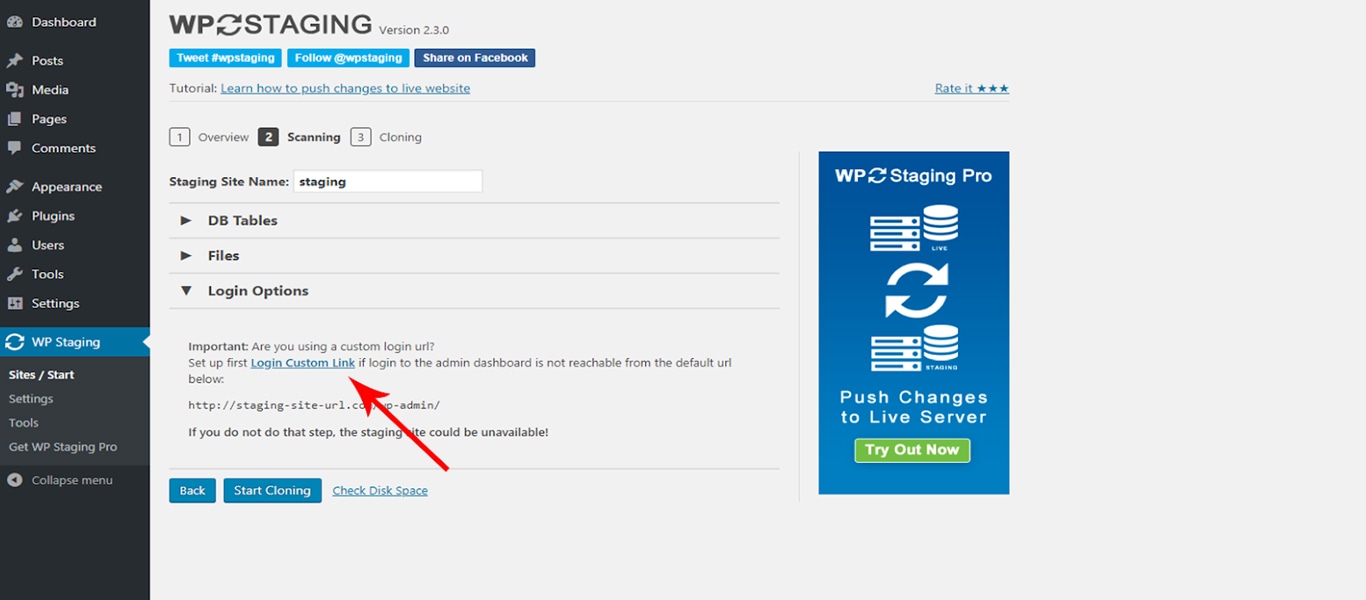
Step 5: Start Cloning
Note: If you are not sure of the amount of space you have on your server setup to be able to make a duplicate of your website, you can use the Check disk space link provided there.
Once you start cloning, the plugin will display a list of all it is doing in order to clone your website into a staging site. The cloning process might take a while as it depends on the speed and size of your website.
You can then see a link that will take you to the stating site. It leads you to a login page of your staging site. Now login to your staging site and work on anything you need without affecting the live website.
The best part is that you can easily identify the live and staging site as the plugin adds an orange admin bar that marks it as a staging site.
You can also check out this video if you want to see it in action.
The free version of WP Staging can only be used to clone a live site to a staging site. If you wish to push the staging site to the live domain, you will need to purchase the paid version of this plugin.
Final Thoughts
Cloning your website does involve a lot of finicking around with the settings and making sure that the settings are correct and aligned. But the bottom line is that it’s needed and essential.
Having a clone of your website does give you the flexibility to test for updates and make sure that any change that you want to make on your website gets tested thoroughly on a staging website.
It used to be the arduous process of manually migrating, i.e., copy+pasting the files using FTP, but WordPress and countless other plugins have long evolved to help you with that process. Although, if you’re one for a challenge or your website is, then it’s still an option that’s available for you.
With that said, using either Duplicator or the WP Staging plugin is the best choice that you have to make sure that your staging site is working properly, and that you have a perfect clone of your website all the time. Working as it should.
Using any other tool? Let us know in the comments below.
Disclosure: This blog may contain affiliate links. If you make a purchase through one of these links, we may receive a small commission. Read disclosure. Rest assured that we only recommend products that we have personally used and believe will add value to our readers. Thanks for your support!




Soooo.. Been trying for the past 2 hours to make this work.
Thank God for this article. Who knew it was that simple. Thanks guys!
Hello Oliver,
Glad that you found it useful. 🙂
Duplicator is fine of course, but there is much easier as a clone plugin. All in one Migration which I use quite often and find it very convenient and extremely easy to use.
Great article. Nicely done, and thank you for covering two options, in case the first one fails.
It worked for me, but might not work for everyone.
Can you build a copy of the website on the same host/server? Or does it need to be somewhere else?
Excellent details on the article though. Nicely done!
Hello Duncan,
Yes, you can create your copy of the website on the same host/server but based on the plans it might differ from host to host. Just reach out to your Hosting Provider for further clarification. 🙂
You will not believe how many times I’ve tried this and it didn’t work out.
Then I found your article. Duplicator is AMAZING. Thanks guys!
This is just what I needed.
Duplicator is amazing. I think it just bugged out the first time I tried it because I missed a few steps, but this guide’s it.
Really helpful.
Hello Joseph,
Glad that you found the article helpful! 🙂
Extremely helpful content right here.
It’s just what I needed.
My website’s been crashing out every single time I push an update.
Today I found out about this staging stuff. Thanks to this article for showing me the way. Nicely done!
Hello Francisca,
Glad to hear that our article has helped you when needed! 🙂
Soooo.. Been trying for the past 2 hours to make this work.
Thank God for this article. Who knew it was that simple. Thanks guys!
Great article. Nicely done, and thank you for covering two options, in case the first one fails.
It worked for me, but might not work for everyone.
Can you build a copy of the website on the same host/server? Or does it need to be somewhere else?
Excellent details on the article though. Nicely done!
You will not believe how many times I’ve tried this and it didn’t work out.
Then I found your article. Duplicator is AMAZING. Thanks guys!
This is just what I needed.
Duplicator is amazing. I think it just bugged out the first time I tried it because I missed a few steps, but this guide’s it.
Really helpful.
Bonjour, j’ai beaucoup lu sur votre thème. Il semble très intéressant et j’aime énormément sentir que vous offrez des tutoriels. Je possède un WordPress (Très lent et pénible). Est-ce possible de créer un clone de mon site pour repartir à neuf avec vous ? Je suis un peu stressé. Je ne sais pas trop comment m’y prendre.
Hello François,
Yes, surely you can give it a try. You can find our Switch to Astra article helpful in this process.
Hello,
Hope you doing fine. I just want to make a question.
The site i’m working on already exists and i want to create a new one in staging and eventually, replace the old with the new.
After following the steps and created a clone staging site from a live existing WordPress site, will this staging site have a wordpress dashboard as normal? with all the menus and options to add plugins etc.
Will i be able to access it like staging-site.com/wp-admin?
Please for your answer.
Thanks in advance,
Panagiotis
Hello Panagiotis,
Yes, correct you will be able to access the staging site’s dashboard and modify changes from the same as well. This will not affect the live website anyhow. Once all the changes are completed on the staging site, you can migrate the same to the live site.