Advanced Custom Fields turns WordPress sites into a fully-fledged content management system by giving you all the tools to do more with your data. Make use of the Advanced Custom Fields plugin to take full control of your WordPress edit screens & custom field data.
Add fields on demand: Our field builder allows you to quickly and easily add fields to WP edit screens with only the click of a few buttons!
Add them anywhere: Fields can be added all over WP including posts, users, taxonomy terms, media, comments, and even custom options pages!
Show them everywhere: Load and display your custom field values in any theme template file with our hassle-free developer-friendly functions!
Features
- Simple & Intuitive
- Powerful Functions
- Over 30 Field Types
- Extensive Documentation
- Millions of Users
Installation
The Advanced Custom Fields plugin does not come pre-installed with WordPress so you will need to install plugin before using its awesome features! WordPress makes this a very easy process!
If you are familiar with WordPress, From your WordPress dashboard
- Visit Plugins > Add New
- Search for “Advanced Custom Fields”
- Install and Activate Advanced Custom Fields from your Plugins page
- Click on the new menu item “Custom Fields” and create your first Custom Field Group!
How to Use
To make the process easier to understand, I have come up with a concrete use case for the demonstration. For this tutorial, I will create a group of custom fields for a post type called Mobile.
In particular, I want to add the following data:
- Mobile Name
- Mobile launch date
- Mobile Price
Let’s get started.
Step 1: Create A New Field Group
A Field Group is a group of custom fields that topically belong together. For example, all the information I want to add to my mobile launch logically correlates and can therefore all go in one group. Creating field groups is the main function of Advanced Custom Fields.
To create one, click Custom Fields in the WordPress admin area. The menu you are being taken to shows all the field groups you have created.
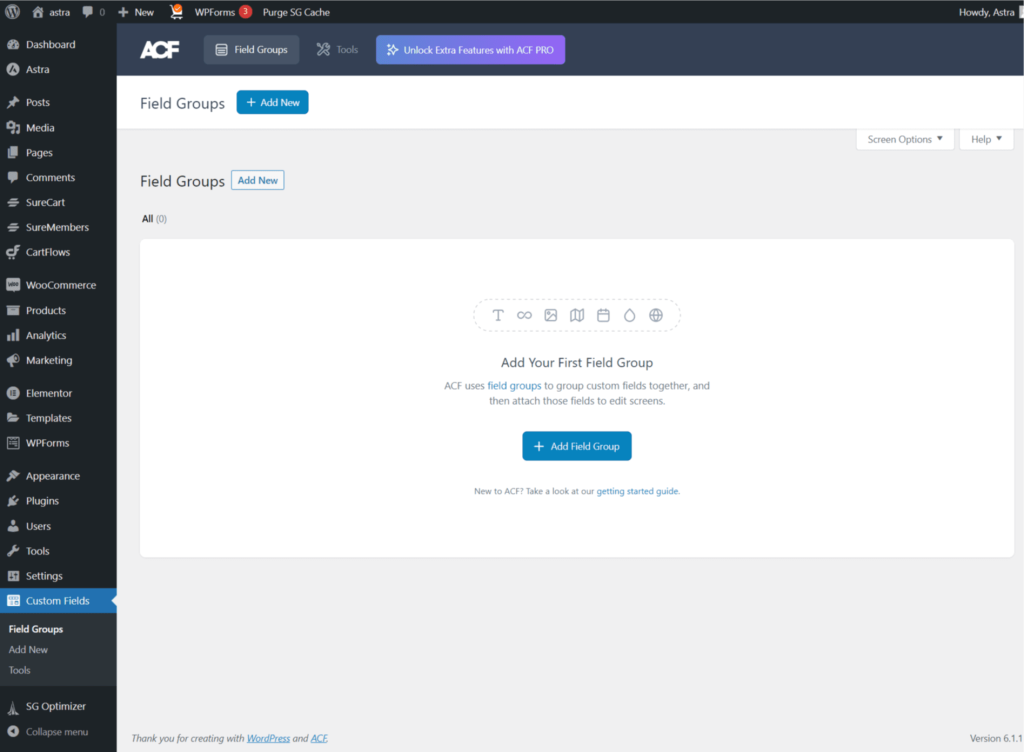
For now, it will be completely empty. To change that, find the Add New button at the top and click it. This will bring you to the following screen:
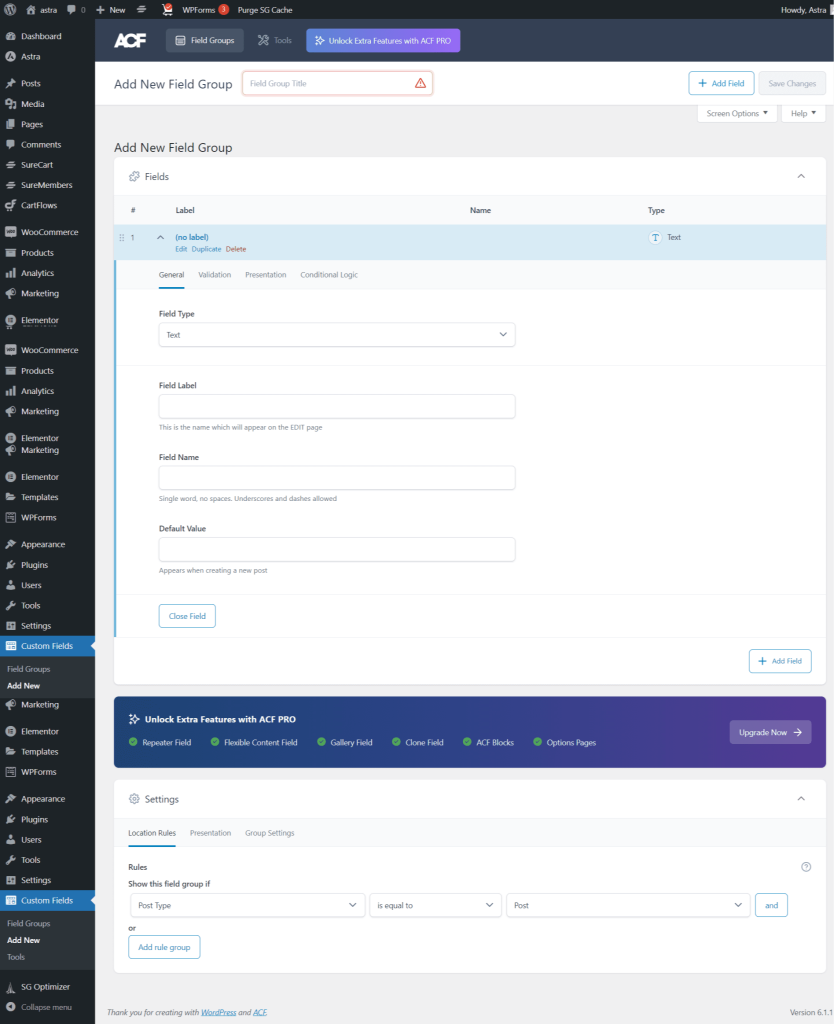
Step 2: Add And Configure Fields
To start adding fields to your group, just click the blue ‘Add Field’ button at the top. It will open this form:
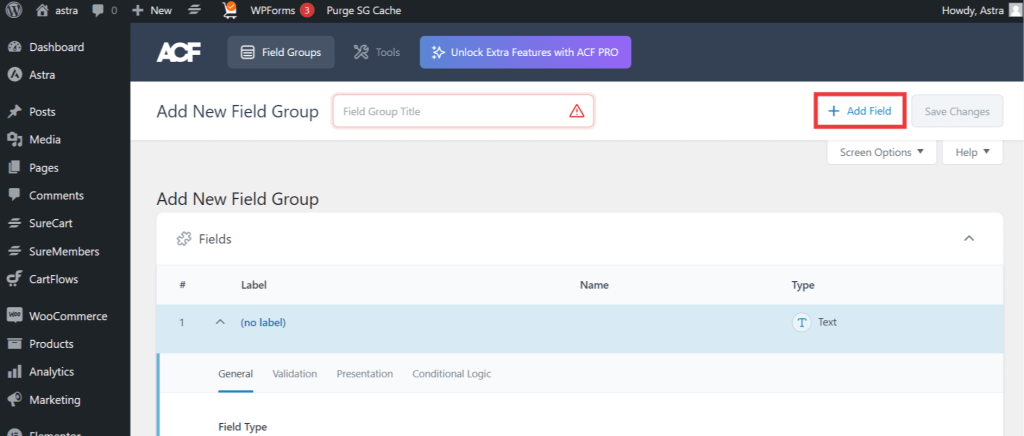
Here’s what each of the fields in the form means and is used for:
- Field Label — The name that appears inside the advanced custom fields menu
- Field Name — Name used inside templates and code. Should automatically be populated with the label. No spaces are allowed between words, only hyphens, and underscores.
- Field Instructions — Leave instructions for using the field later
- Required — Determine whether or not this field is mandatory to fill in. If yes, authors won’t be able to save posts or pages associated with the custom field unless contains something.
- Default Value — This value will automatically populate the field when creating a post
- Placeholder Text — Appears within input fields on the editor screen
- Prepend & Append — Defines what appears before and after the input text
- Formatting — Check whether or not HTML input into a text field will be rendered on screen
- Character Limit — Optionally put a limit on how many characters can be typed in
- Conditional Logic — Rules for when fields are visible
Example: My own setup ends up looking like this:
- Field Label: Launch Date
- Field Name: launch_date
- Field Type: Number
- Required: Yes
- Field Label: Mobile
- Field Name: mobile
- Field Type: Text
- Required: Yes
- Field Label: Mobile Price
- Field Name: mobile_price
- Field Type: Number
- Required: Yes
Once you are done, you can close the fields to see the entire group. This also allows you to change the order of the items via drag and drop.
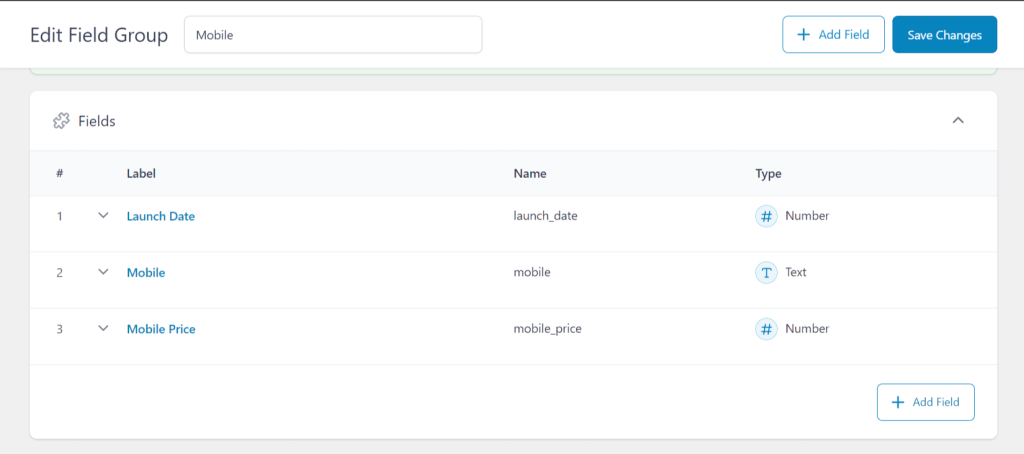
Step 3: Configure Custom Field Location And Options
Before we are done here, we need to configure where and how the newly created custom fields will show up and we do so with the Location and Options panel.
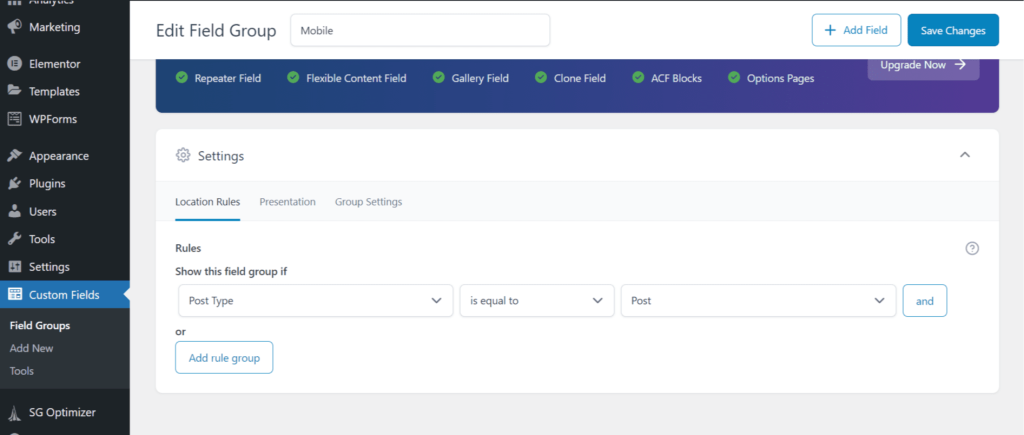
Under Location, you can add rules that determine under which circumstances the fields will be displayed. They can be included and excluded depending on:
- post type
- user type
- exact post
- post category
- post format
- post status
- post taxonomy
- exact page
- page type
- page parent
- page template
- attachment
- taxonomy term
- user
In my case, I want to limit my field group to my Mobile post type, so will choose Post type > is equal to > product.
After that, it’s on to Options. Here’s what each setting means:
- Order No — The order this field group will take if there are several on the same screen
- Position
- Normal — After content
- High — After title
- Side — On the side of the editor
- Style
- Seamless — Without a WordPress meta box
- Standard — Placed inside a meta box
- Hide on-screen — Checkboxes that allow you to hide other panels you are not going to need like tags, categories, comments, and more
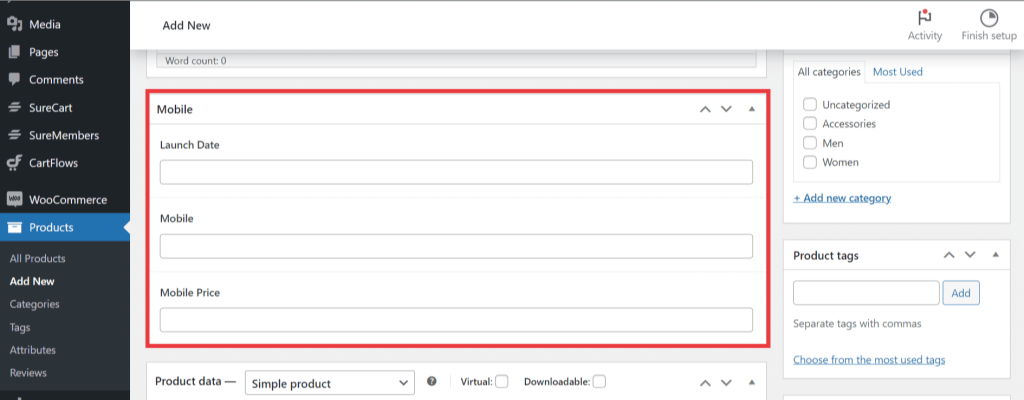
Pick whatever is right for your case. I leave the rest as is for now. When done, hit Publish. After that, you can head on over to your custom post type to see if the new meta fields show up. In my case, they are added.
How to display the data
You may now load and show the data in your theme after creating a field group and entering some data. Although you can use the native WP function get_post_meta( ), it is best to practice utilizing the appropriate ACF function, such as the get_field ( ). All values are saved as native post meta (when saved to a post). This is because ACF will format the value according to the field type and speed up and simplify development!
The get_field ( ) function can be used to get a field value as a variable. Being the most flexible function, it always provides value for every kind of field. Use the field( ) in a similar way to display a field. Below are the few examples:
Display a field:-
<p><?php the_field('field_name'); ?></p>Retrieving a field as a variable:-
<?php

$variable = get_field('field_name');

// do something with $variable

?>
For more examples, please visit the ACF documentation page here.
