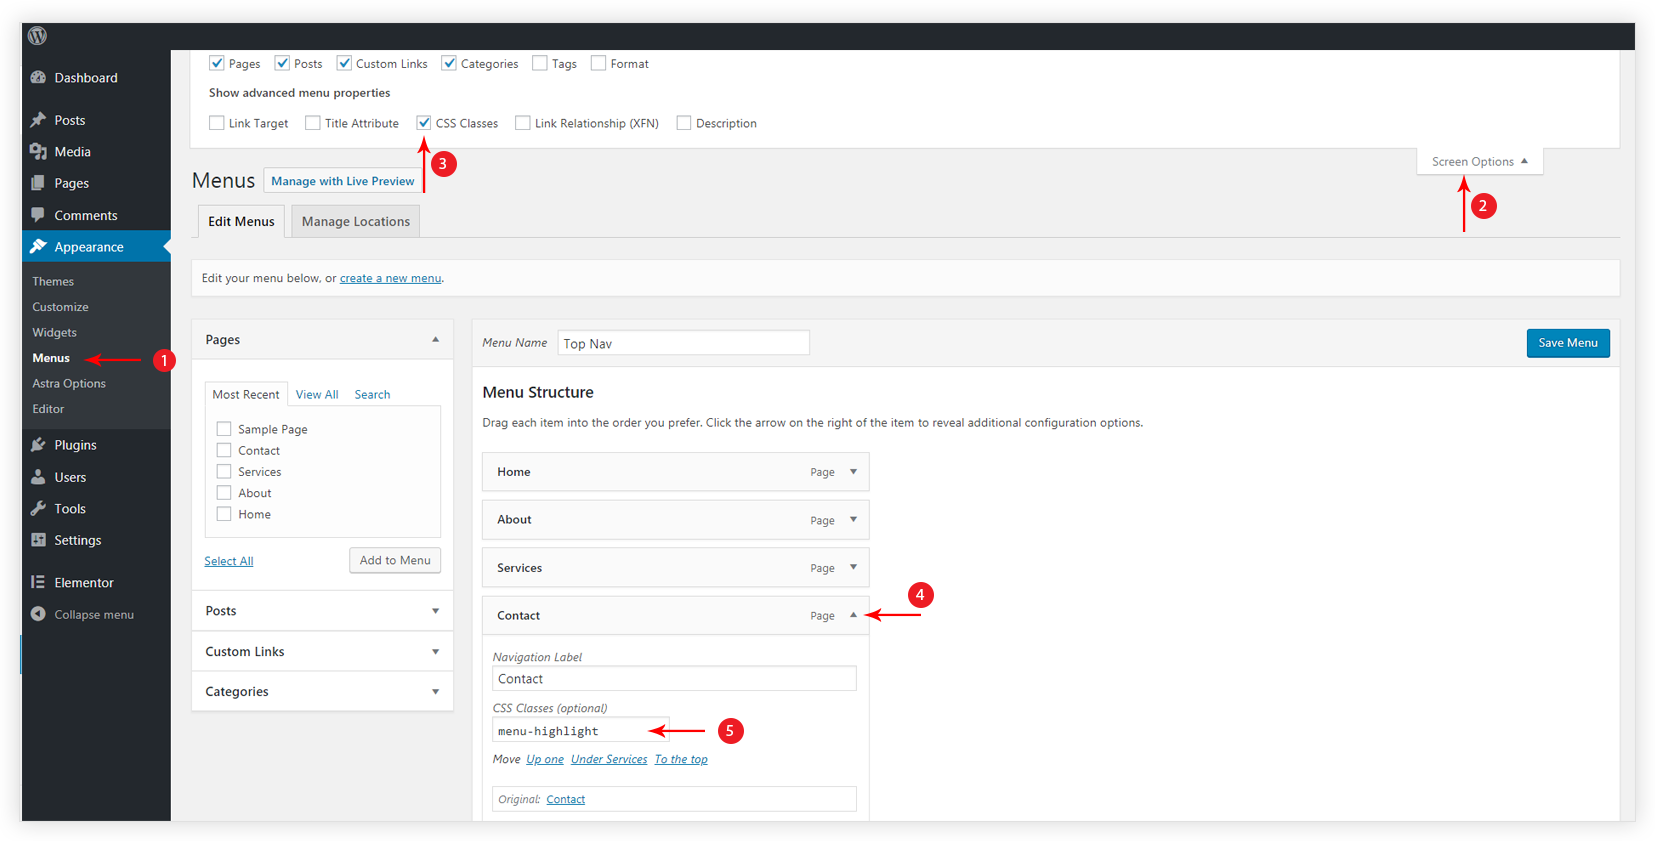
Sometimes there is a need to highlight a particular menu item. You can highlight a menu by adding a different background color, text color etc to the particular menu item using custom CSS. To apply custom CSS you need to add CSS class for the menu. Below are the steps to add a CSS class to the menu and highlight it using a custom CSS.
Step 1 – From the WordPress dashboard navigate to Appearance > Menus.
Step 2 – Click on Screen Options and tick the CSS Classes checkbox.
Step 3 – Click on the menu item that needs to be highlighted.
Step 4 – Add CSS class to the menu item and save the changes in the menu.
Once the CSS class is added you can add CSS with respect to this class. Make sure you add a dot (.) before the CSS class while writing the CSS code. Below is a sample CSS code that you can try. Note the CSS class used is menu-highlight
Below CSS will create a simple button out of the menu item:
.menu-highlight
{
 background: #d3d3d3;
 border-radius: 35px;
 padding: 0px 20px;
 line-height: 50px !important;
 margin: auto;
}
For the above CSS, the highlighted menu will look as shown in the screenshot below –
Below CSS will add the outlined button to the menu item:
.menu-highlight a{
color: #ffffff !important;
background: transparent;
border-color: #1172c4;
border-style: solid;
border-width: 2px;
border-radius: 50px;
padding: 0px 10px !important;
transition: all 0.2s linear;
line-height:45px;
}
.menu-highlight a{
color:#1172c4 !important;
}
.menu-highlight a:hover {
color: #ffffff !important;
background: #1172c4;
border-color: #1172c4;
}
li.menu-highlight:hover a{
color:#ffffff !important;
}
.menu-highlight:active {
border-radius: 22px;
}
For the above CSS, the highlighted menu will look as shown in the screenshot below –
Additional Notes:
- This CSS can be pasted in Customizer ▸ Additional CSS as explained here.
- You can tweak the CSS code to change the colors and look of the highlighted menu item.


