Setting up your own blog may seem daunting. Lots of things can look that way at first.
But if you break the process down into bite size pieces, it will look a lot more approachable.
Follow this guide and by the end, you will have a fully operational website ready to blog to your heart’s content!
When it comes to creating a website, there are several reasons why we prefer WordPress.
It is easy to use, offers tons of customization options, has a responsive design, is SEO friendly, and has an extensive community of users
Those things make the platform accessible to everyone.
And that’s the reason why we will learn to create a blog website using WordPress.
- How to create a WordPress blog in 8 easy steps
- Step 1: Think of a name and register it
- Step 2: Sign up for a WordPress web hosting account (Best blog hosting provider)
- Step 3: Install and set up WordPress (Most popular CMS platform)
- Step 4: Choose and install a WordPress theme
- Step 5: Design and basic blog configuration
- Step 6: Install necessary plugins
- Step 7: Write your first blog post
- Step 8: Optimize your website for SEO
- How to make money from your blog
- What types of blogs can I create with WordPress?
- Creating a WordPress Blog FAQs
How to create a WordPress blog in 8 easy steps
There are 8 major steps to starting a successful WordPress blog:
- Step 1: Think of a name for your blog and register a domain name
- Step 2: Sign up for a WordPress web hosting account
- Step 3: Install and set up WordPress
- Step 4: Choose and install a WordPress theme
- Step 5: Configure and set up important pages
- Step 6: Install necessary plugins
- Step 7: Write your first blog post
- Step 8: Optimize your website for SEO
We’ll cover each of these steps in detail.
Creating a WordPress blog is made easy with this infographic showcasing the necessary steps to get started.
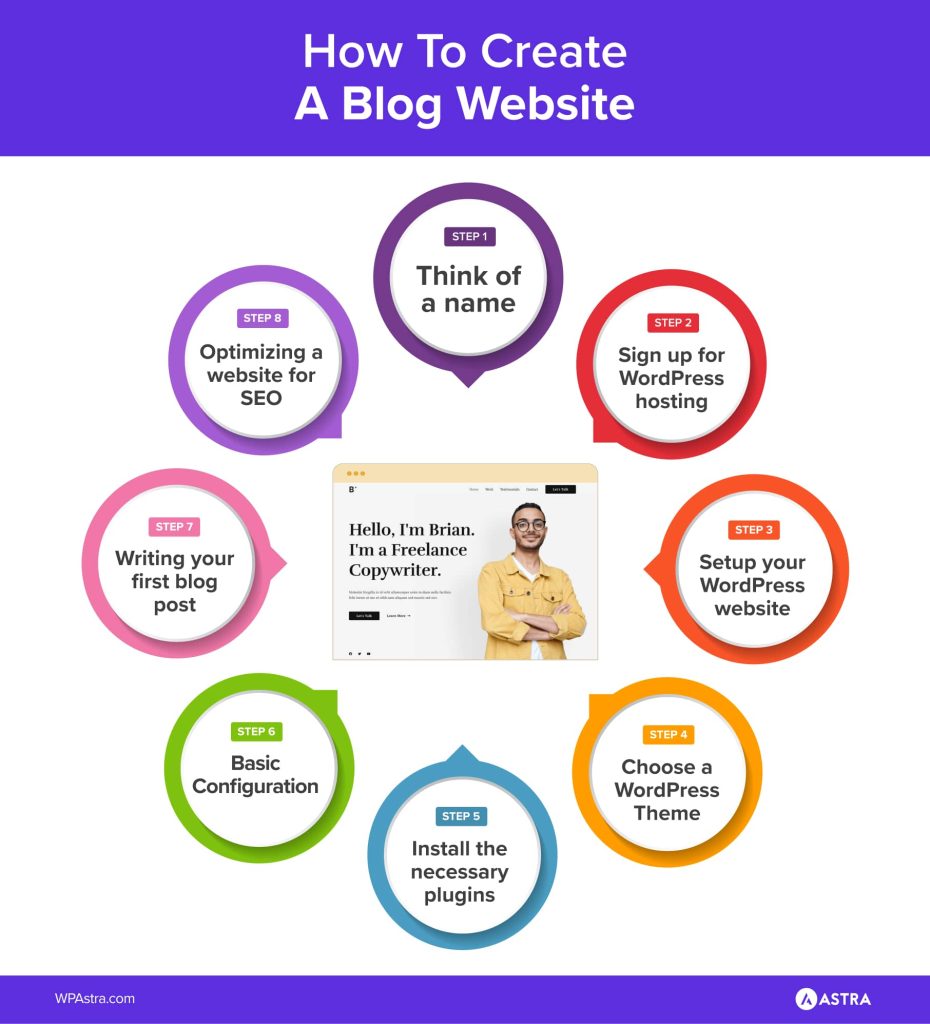
By the end of this article, you’ll have a fully-fledged WordPress blogging website to share your stories with the world!
Ready to roll up your sleeves and get started? Let’s do this!
Step 1: Think of a name and register it
All identity starts with a name! It has a huge impact on your identity and how people perceive you.
The name of your blog is the same!

Most of us struggle to come up with a name for a blog, but we are here to help.
When choosing a name ask yourself these questions:
- What is my blog going to be about?
- Who is the target audience?
- What’s my style?
- Is my blog name related to my business?
- Is the name easy to spell and remember?
Once you consider all these aspects, naming your blog gets a bit easier!
If you already own a business or brand related to the website, you can name your blog the same.
See what works or what doesn’t work in your niche. Also see what your competitors call their blogs.
Competitor analysis can be very useful. It can give you ideas of what and what not to call your blog.
We have a detailed tutorial guide on how to name your blog.
If time is a constraint, try using a blog name generator for some quick inspiration.
Some examples include:
Once you decide on the name for your blog, it’s now time to register it.
A domain name is what you type into your browser address bar. Google.com, WPAstra.com, and Amazon.com are examples of domains.
Websites need domain names to identify themselves. It is the face of your brand and your audience will see it every time they search your blog on Google.
Domain names can be purchased from organizations called registrars. Some examples of registrars include

To register your domain name:
- Visit the website of a domain registrar
- Type in your desired domain name, and press search.
If the domain has already been registered, you’ll see a “this domain not available” message. Some already-registered domains are for sale, while others aren’t.

If the domain is not yet registered, you can go ahead and buy it.
Prices vary depending on the registrar and the TLD, but unregistered .com domains are usually about $10/year.
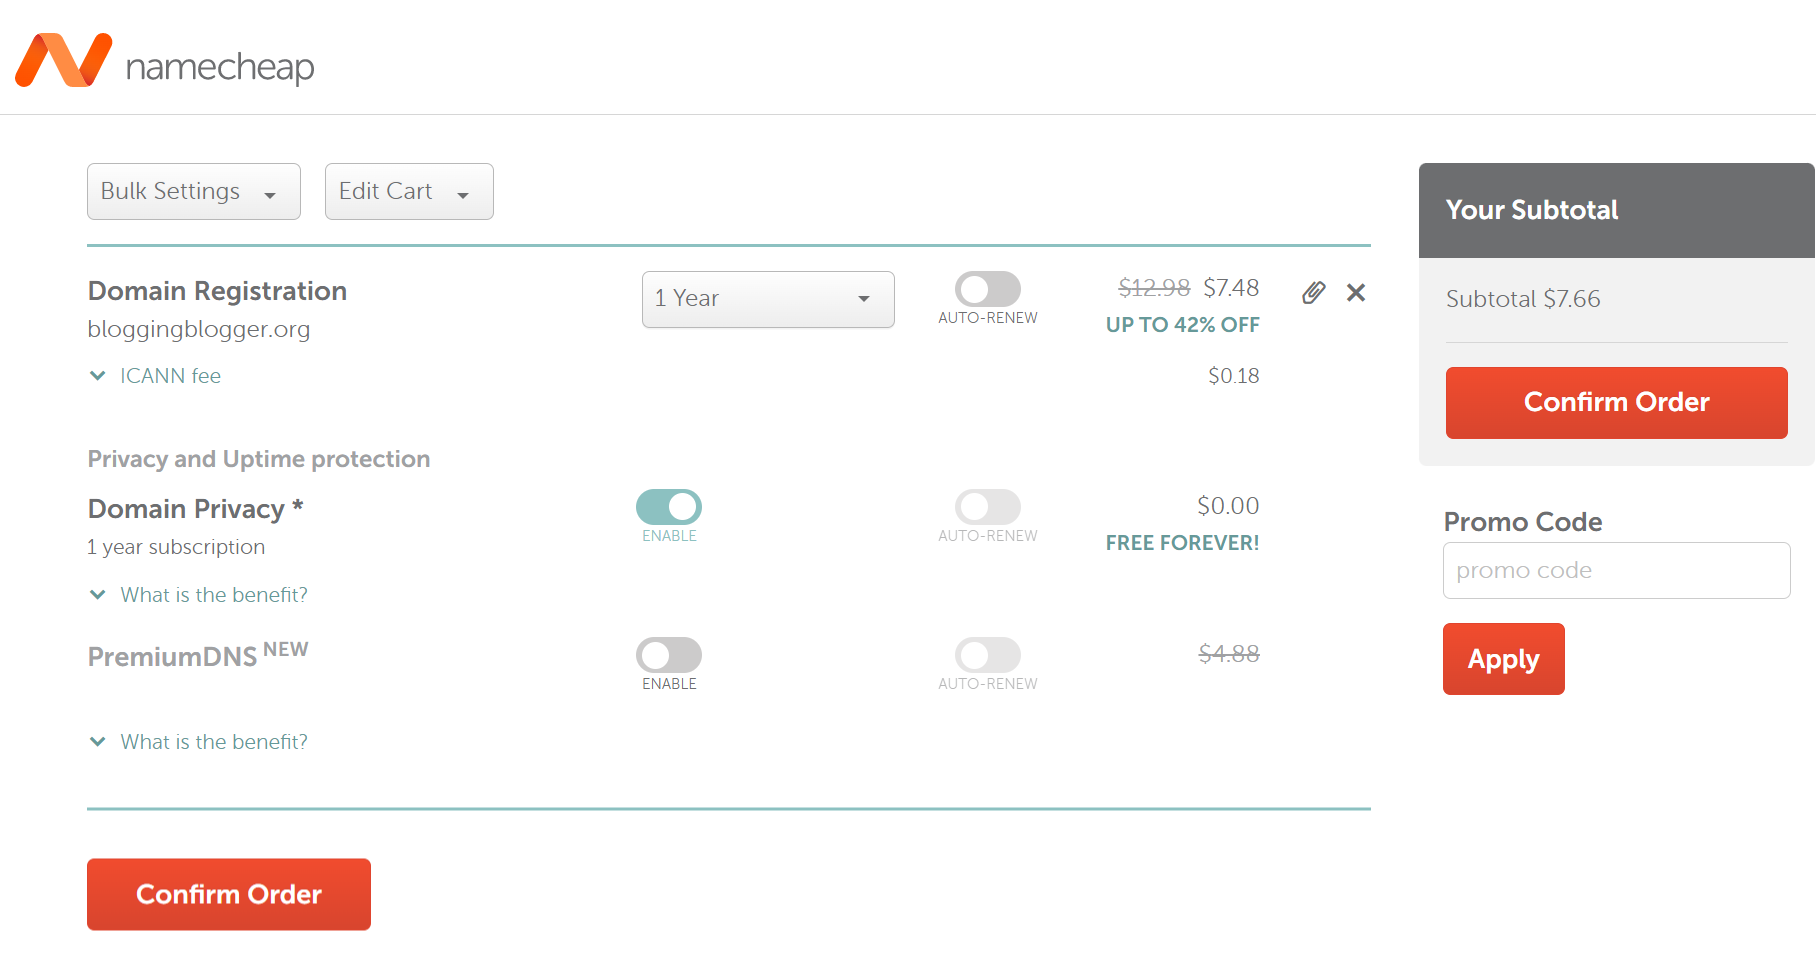
- During the checkout process, you’ll have to add some information about yourself or your company, including name, address and phone number.
Depending on the domain and the registrar, you can also pay extra for WHOIS protection, which will hide this information from being publicly accessible.
- Done! You’re now the proud owner of a new domain for your blog.
Step 2: Sign up for a WordPress web hosting account (Best blog hosting provider)
Finding the fastest WordPress host is important.
WordPress web hosting should offer security, speed, core updates, daily backups, scalability, and maximum uptime for your website.

When selecting a WordPress web hosting for your blog, we suggest not going with the cheapest.
Some things are just worth investing in and hosting is one of them.
After all, you can’t expect much from a $4 per-month plan!
The security of your blog is crucial, and hosting plays a major role in that. Therefore, this is an important step for bloggers.
We recommend managed WordPress hosting as the best solution for your blog. The whole setup is geared towards WordPress and should be all the hosting you need.
Check out the 12 best-managed WordPress web hosts.
Some of the fastest-managed WordPress hosting companies are
- SiteGround (Pricing from $3.99)
- Cloudways (Pricing from $11, offer cloud hosting)
- Hostinger (Pricing from $2.99)
- DreamHost (Pricing from $2.59)
- Kinsta (Pricing from $35)
- Nexcess (Pricing from $7.60)
If you want to save time and money, we suggest getting a domain name from your hosting provider. Most web hosts allow you to register for a domain name along with hosting.
For this tutorial, we will go with SiteGround. They offer managed WordPress hosting which is ideal for our blog.
- Select the WordPress Hosting page from the Hosting menu
- Select the right plan for your needs
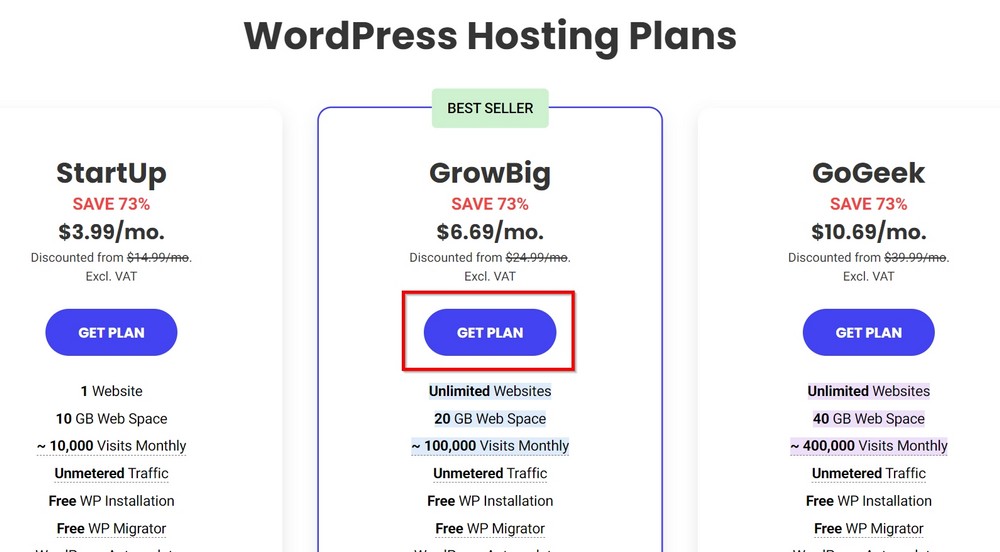
- We recommend starting with a StartUp Plan
- Click on the blue Get Plan button to proceed with the purchase
On the next page, register the domain name if you haven’t already done so or enter an existing domain and complete the process.
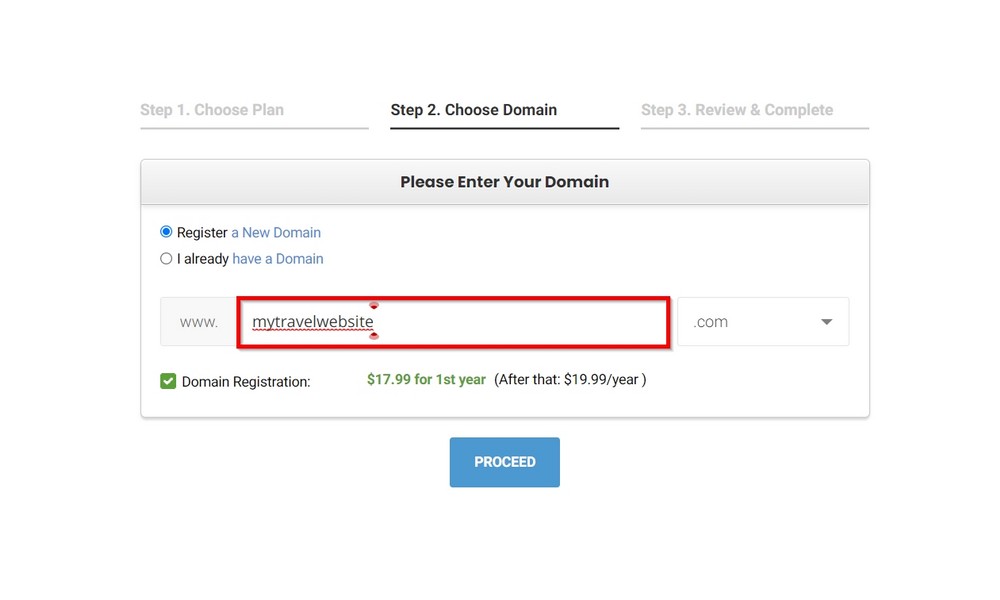
If you’ve bought your domain name and hosting plan separately, select the existing domain button instead.
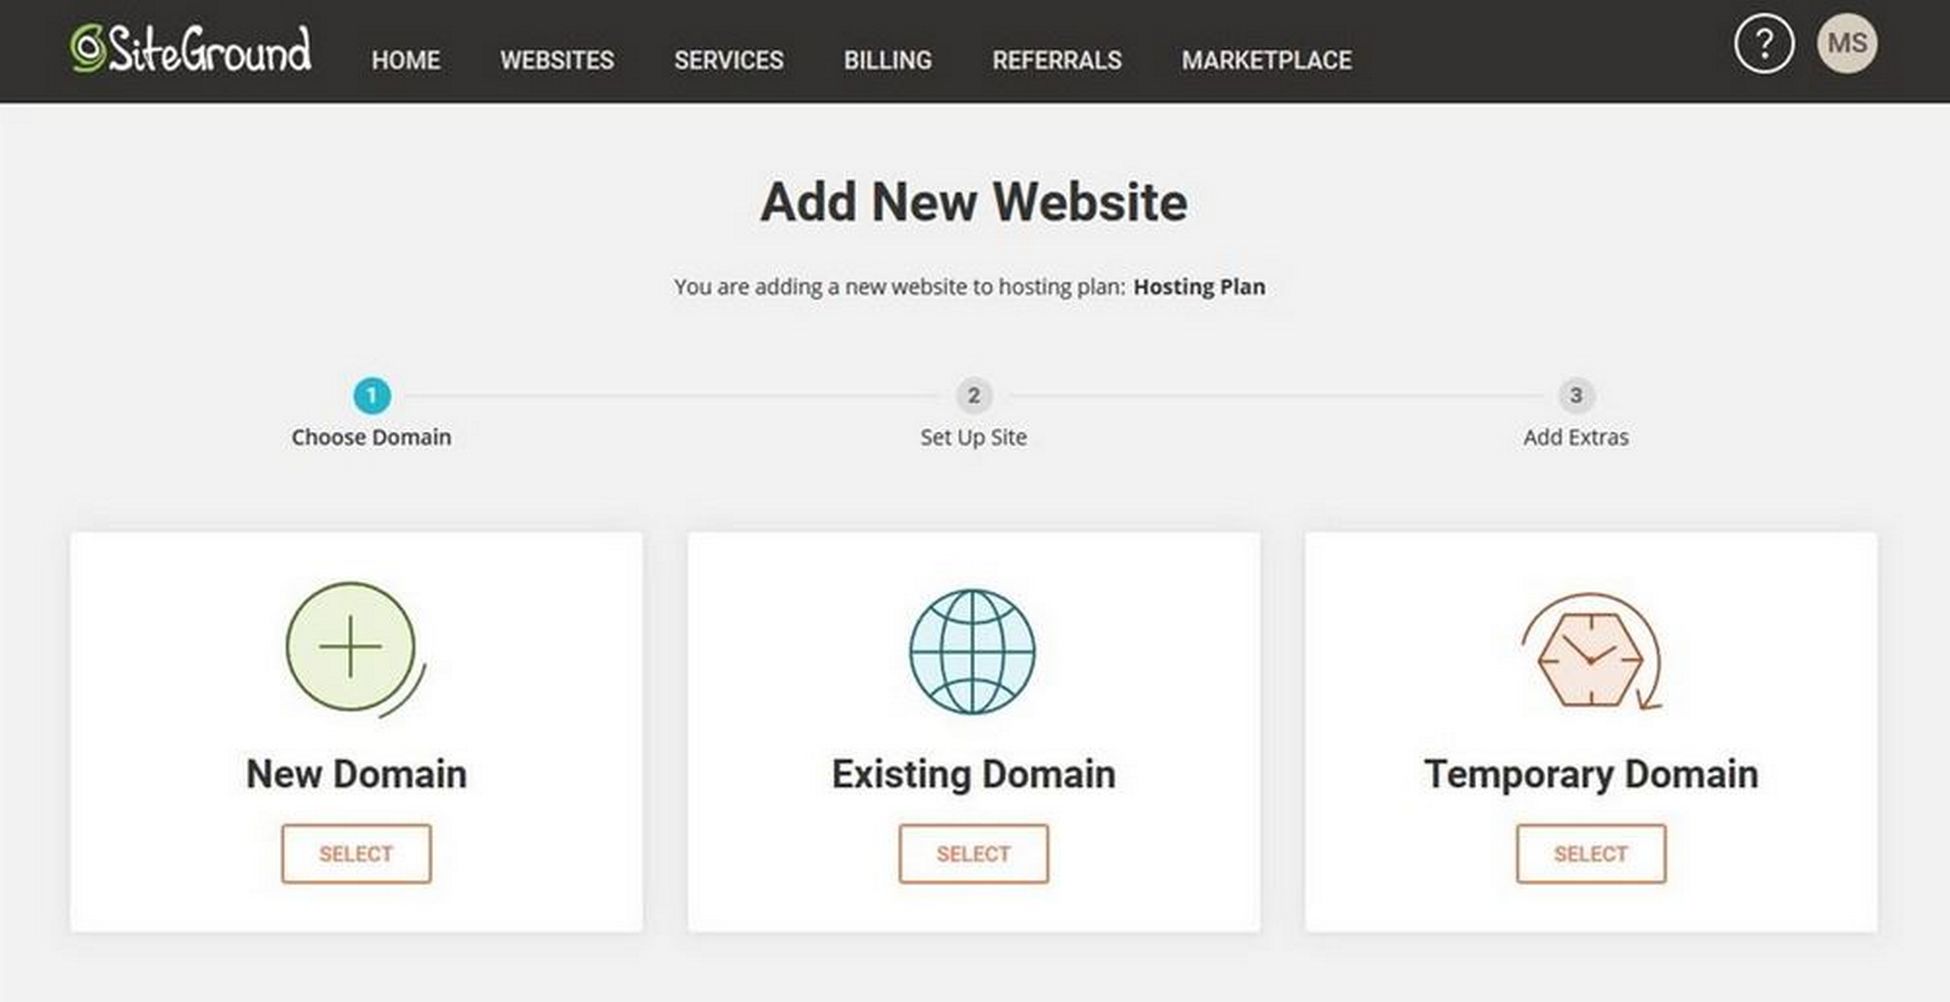
SiteGround will automatically perform the groundwork for your new website without you having to do much at all.
Step 3: Install and set up WordPress (Most popular CMS platform)
It’s now time to set up and install WordPress!
Setting up your WordPress with SiteGround is simple.
- Log in to your SiteGround dashboard
- Select Websites at the top
- Click on Add New Site
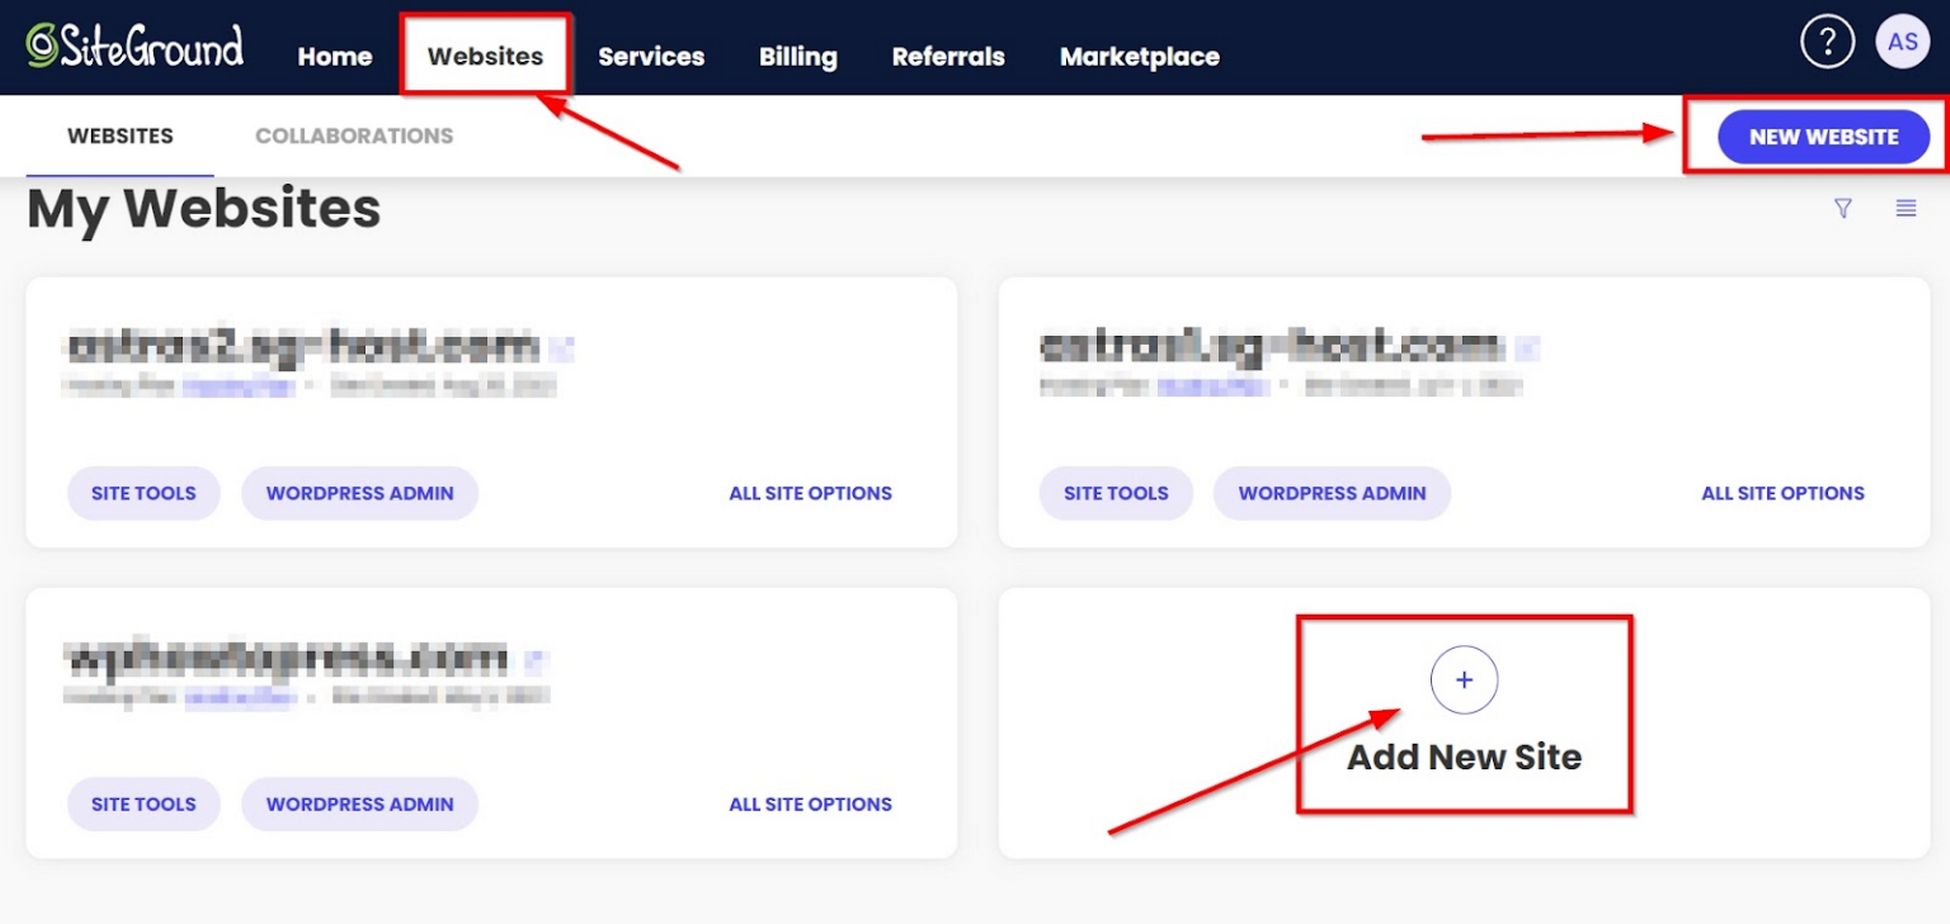
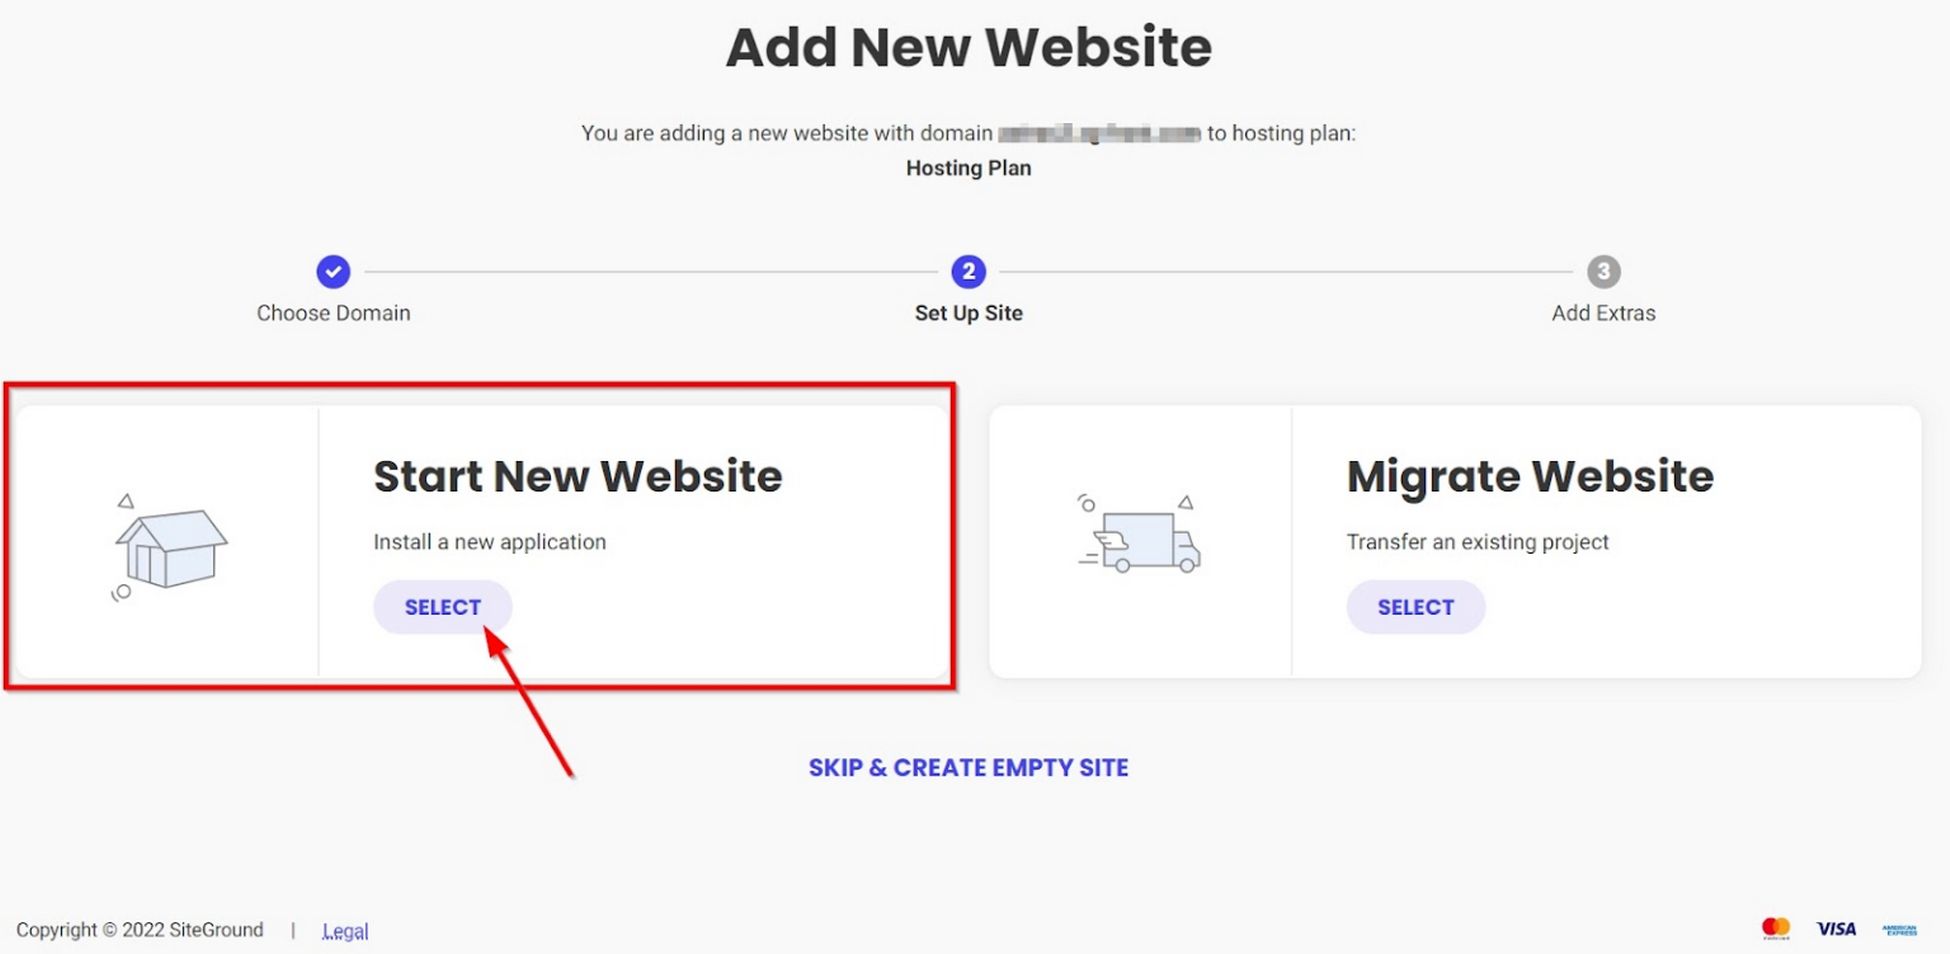
- Select the Start New Website option in the next window
- Choose WordPress as your application
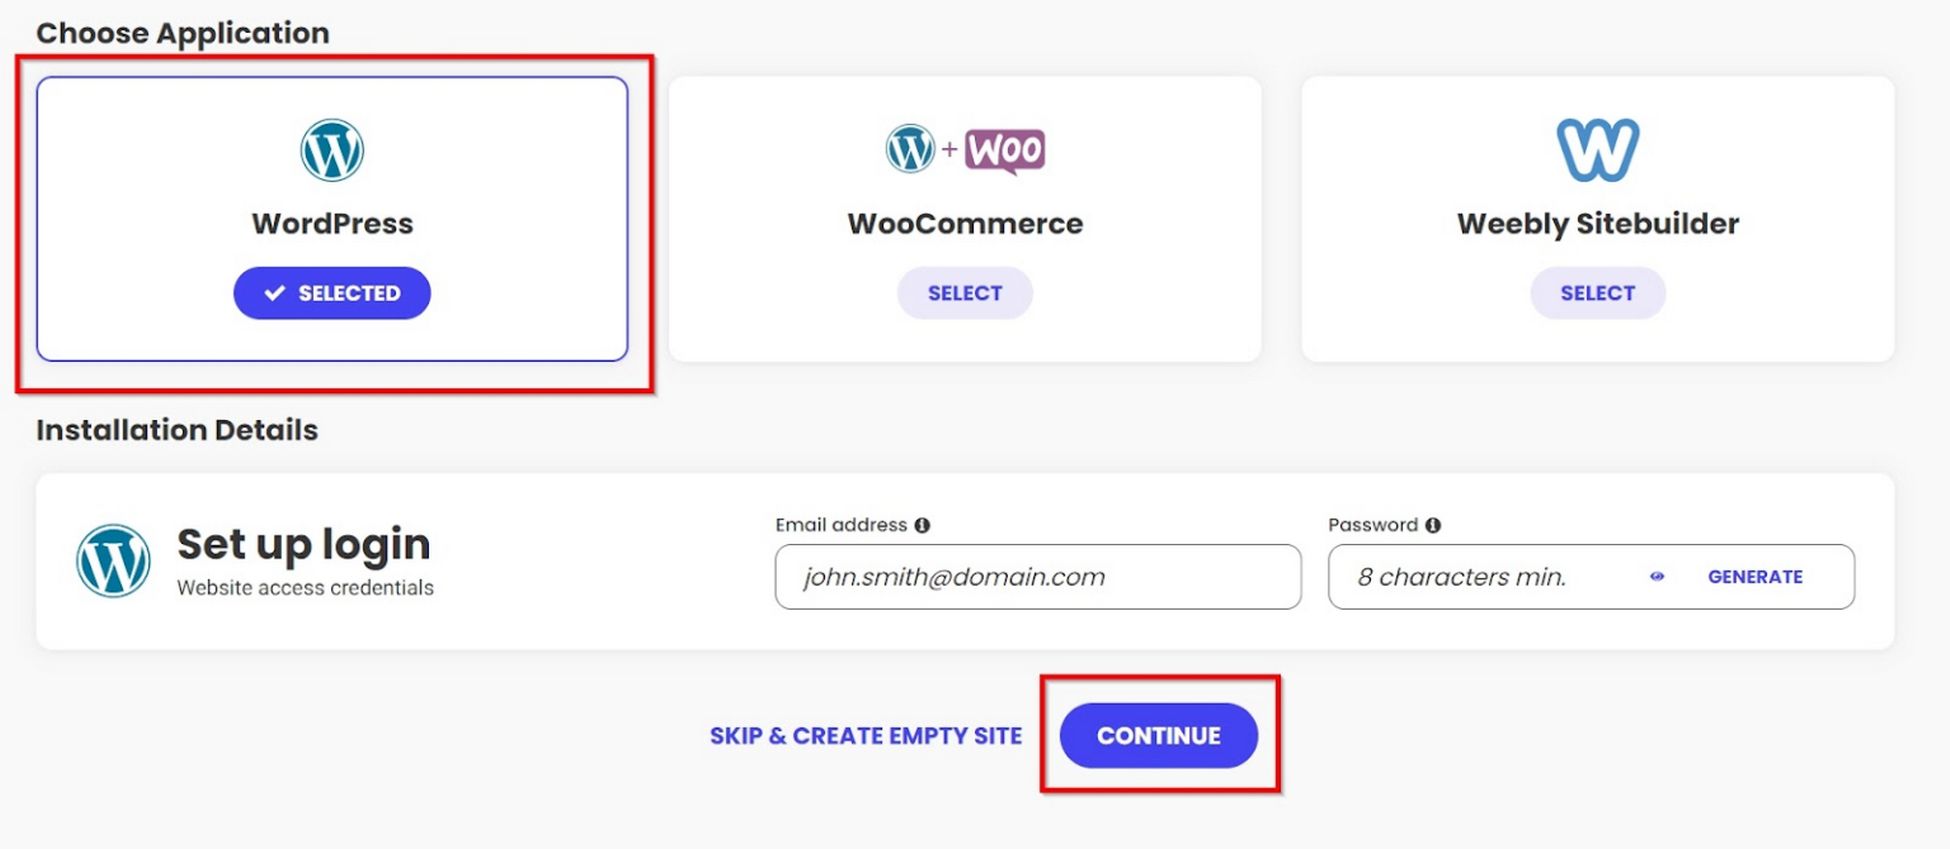
- Click Continue
- Click on the Finish button to continue
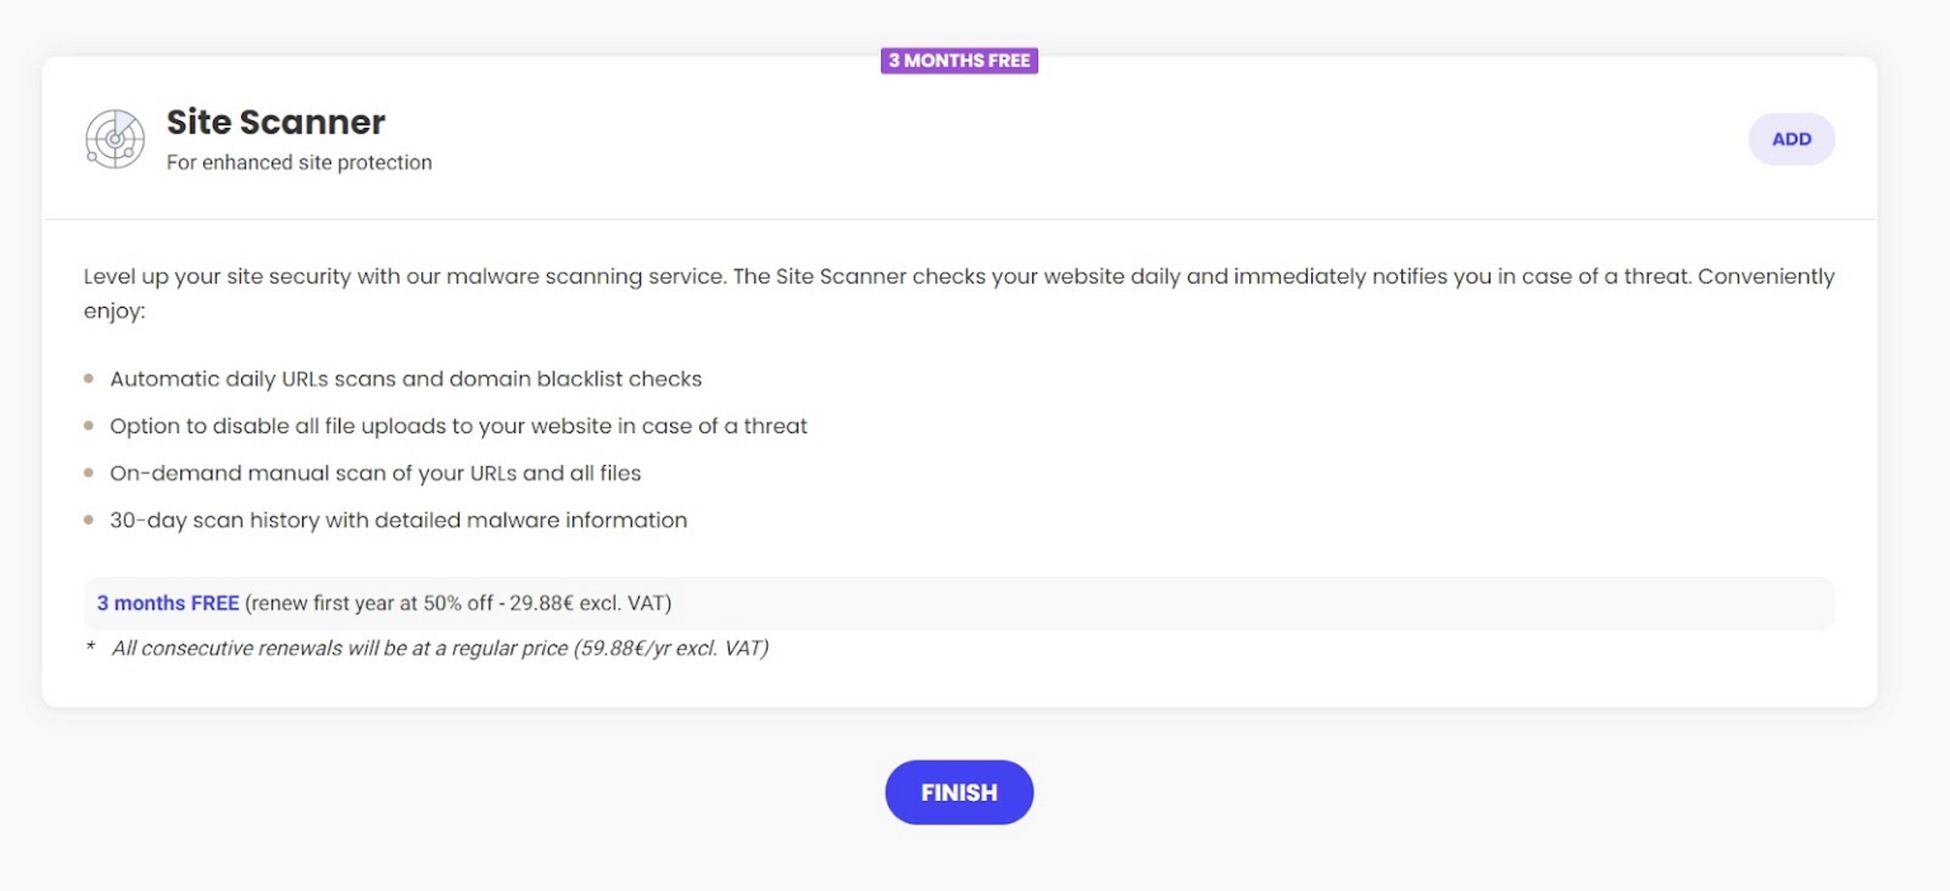
Now, the system configures and installs WordPress. Upon completion, you’ll see a confirmation screen saying ‘You Are All Set!’
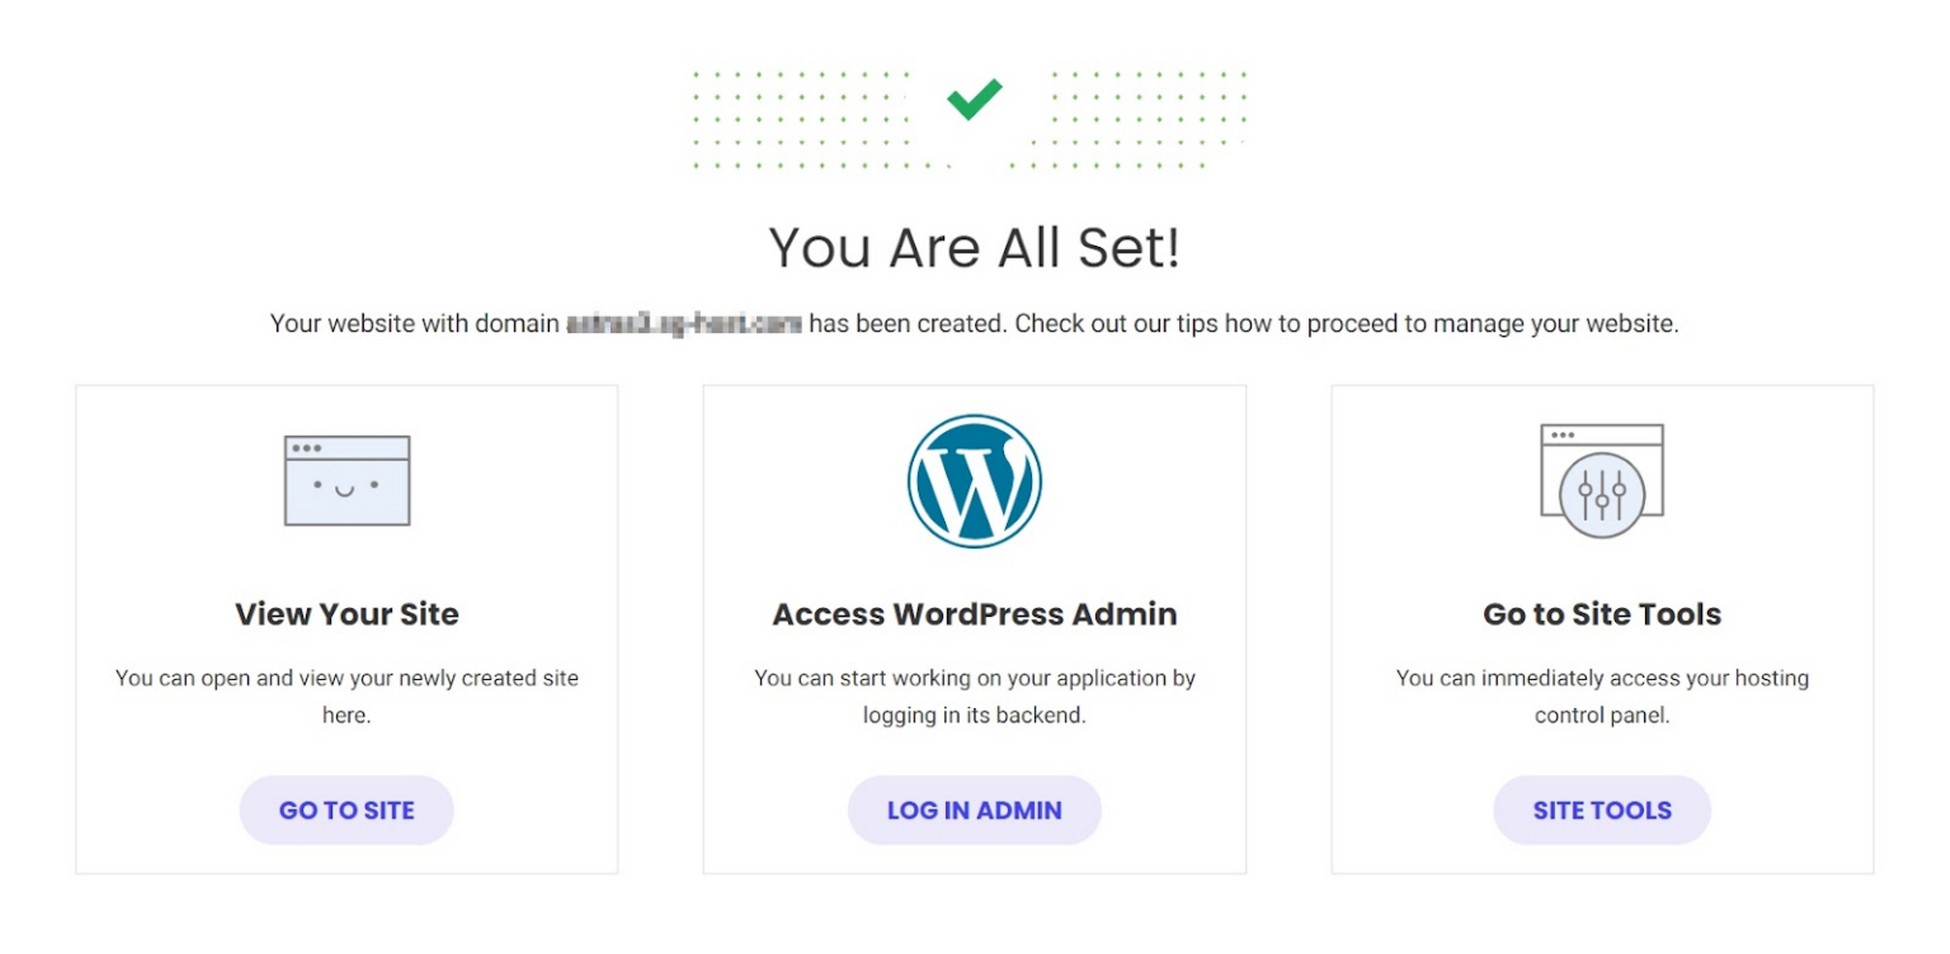
You’ll see a Log in Admin button in the center of the screen. Click it to log into your WordPress admin dashboard.
From here, you can set up your blog as required.
Step 4: Choose and install a WordPress theme
WordPress theme choice is one aspect of starting a blog that will take the most time.
When selecting a theme there are various key factors you need to consider.
- Is the theme responsive?
- Does it offer easy customization?
- Does it provide support?
- Is the theme browser compatible?
- How fast is it?
- Does it offer security and performance?
- Will my audience get a great experience using the theme?
Astra is a superb WordPress theme that has everything blogs need to compete in a global market.
It’s free, very easy to use, loads incredibly quickly, and has ready-to-import 240+ website templates that make it as simple as possible to use.
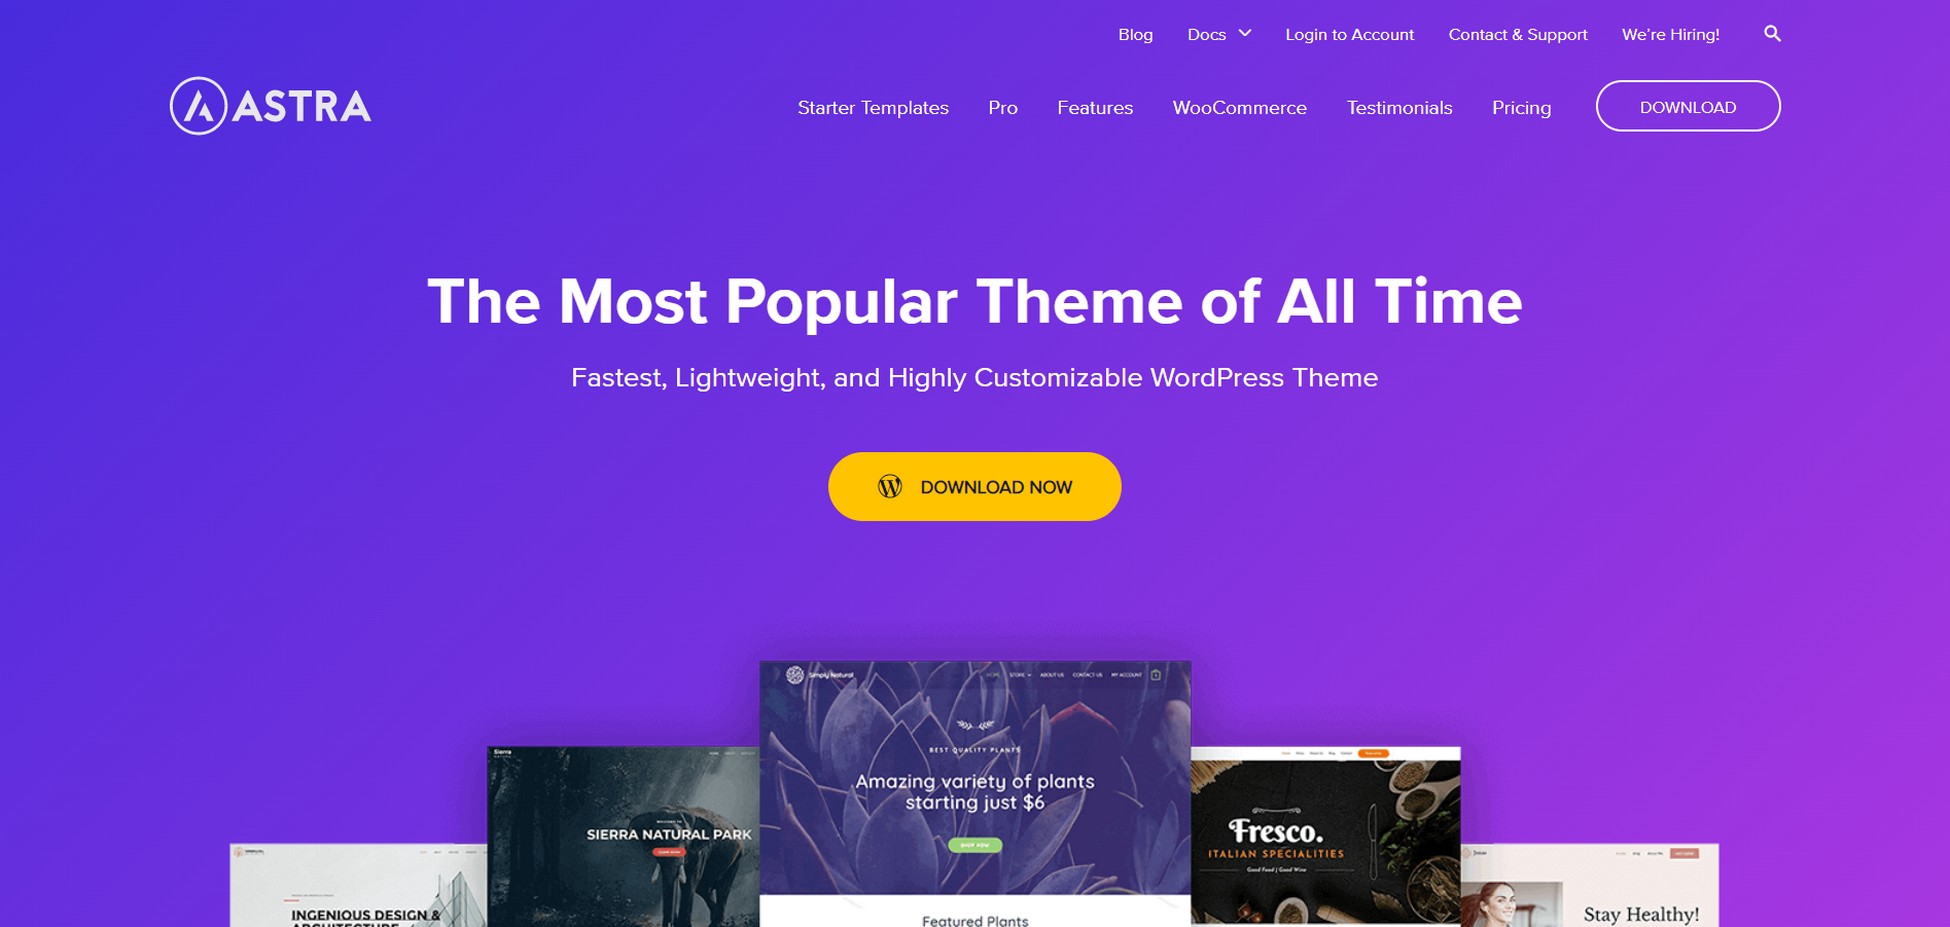
Astra was built by WordPress enthusiasts for other WordPress enthusiasts. While capable of a lot, it is intended to be user friendly and welcoming to beginners.
For all those reasons and more, we cannot recommend the Astra WordPress theme enough!
As we use the Astra theme on our websites, many of the following steps will use it too. You will be able to perform all steps with other WordPress themes but the options may be in different places.
If you want to see what else is out there, we have a list of the best free WordPress themes for you to choose from.
Once you decide upon the theme to use:
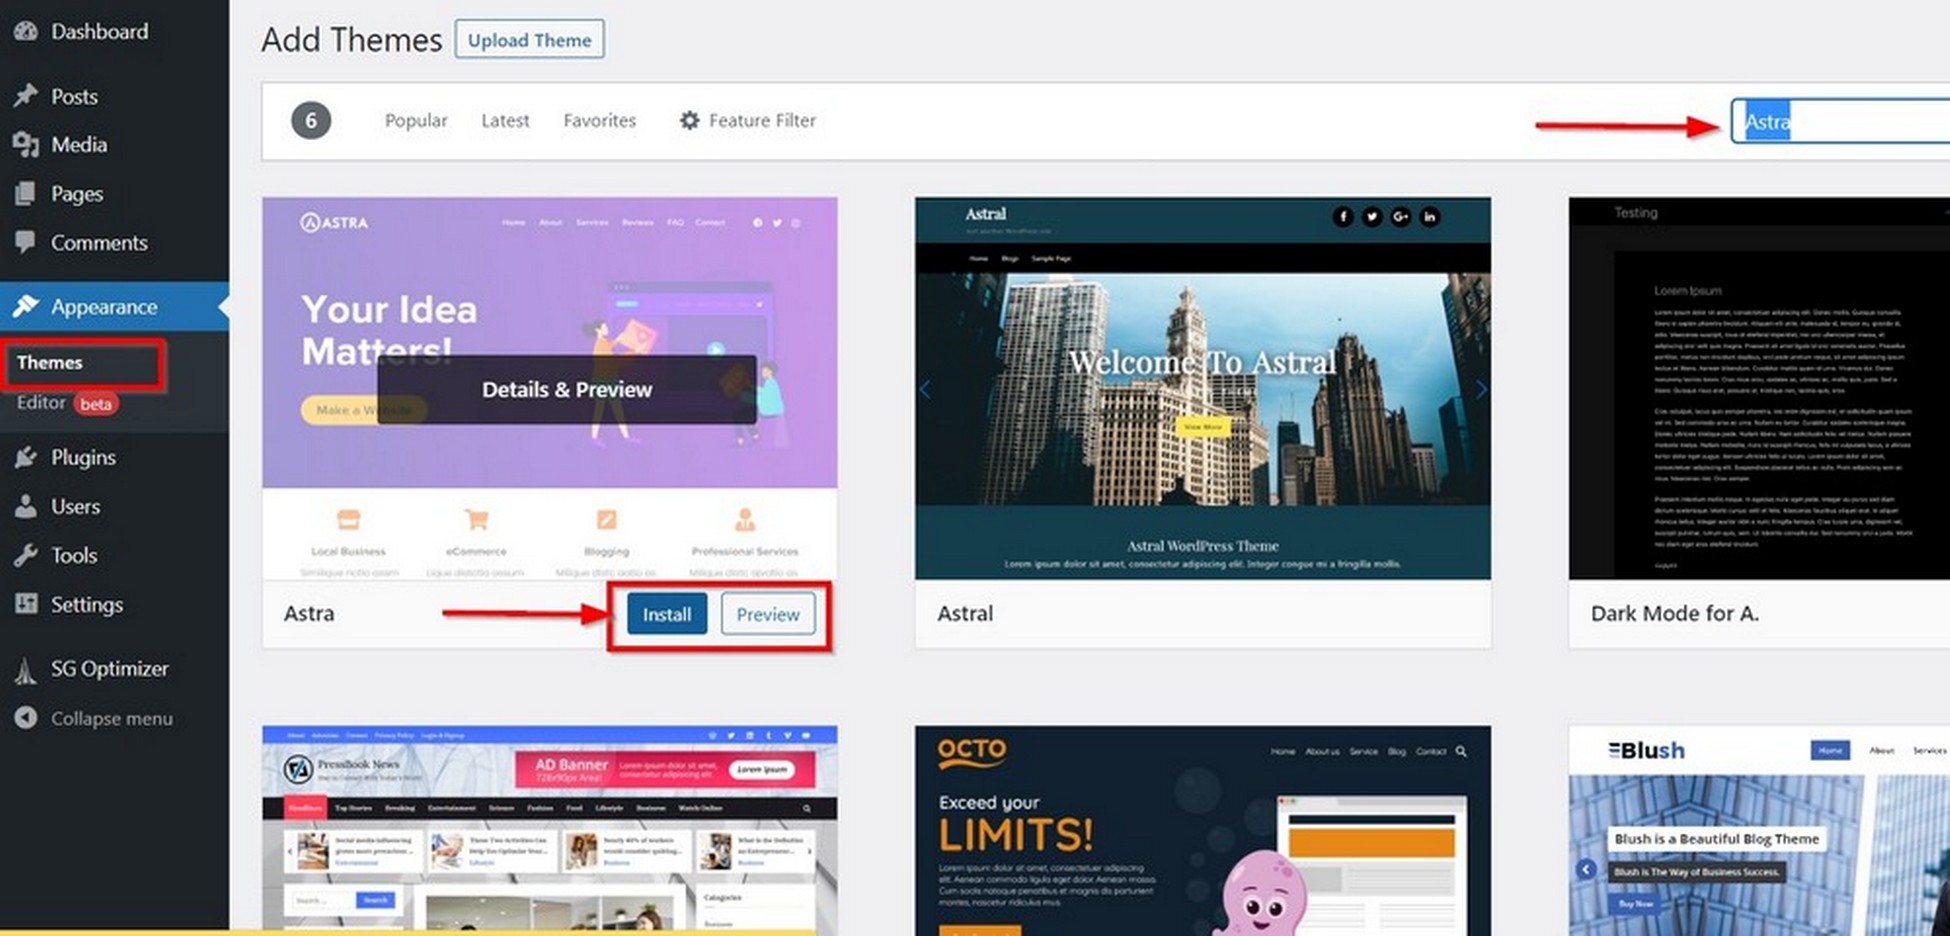
- Head to Appearance > Themes and click the Add New button
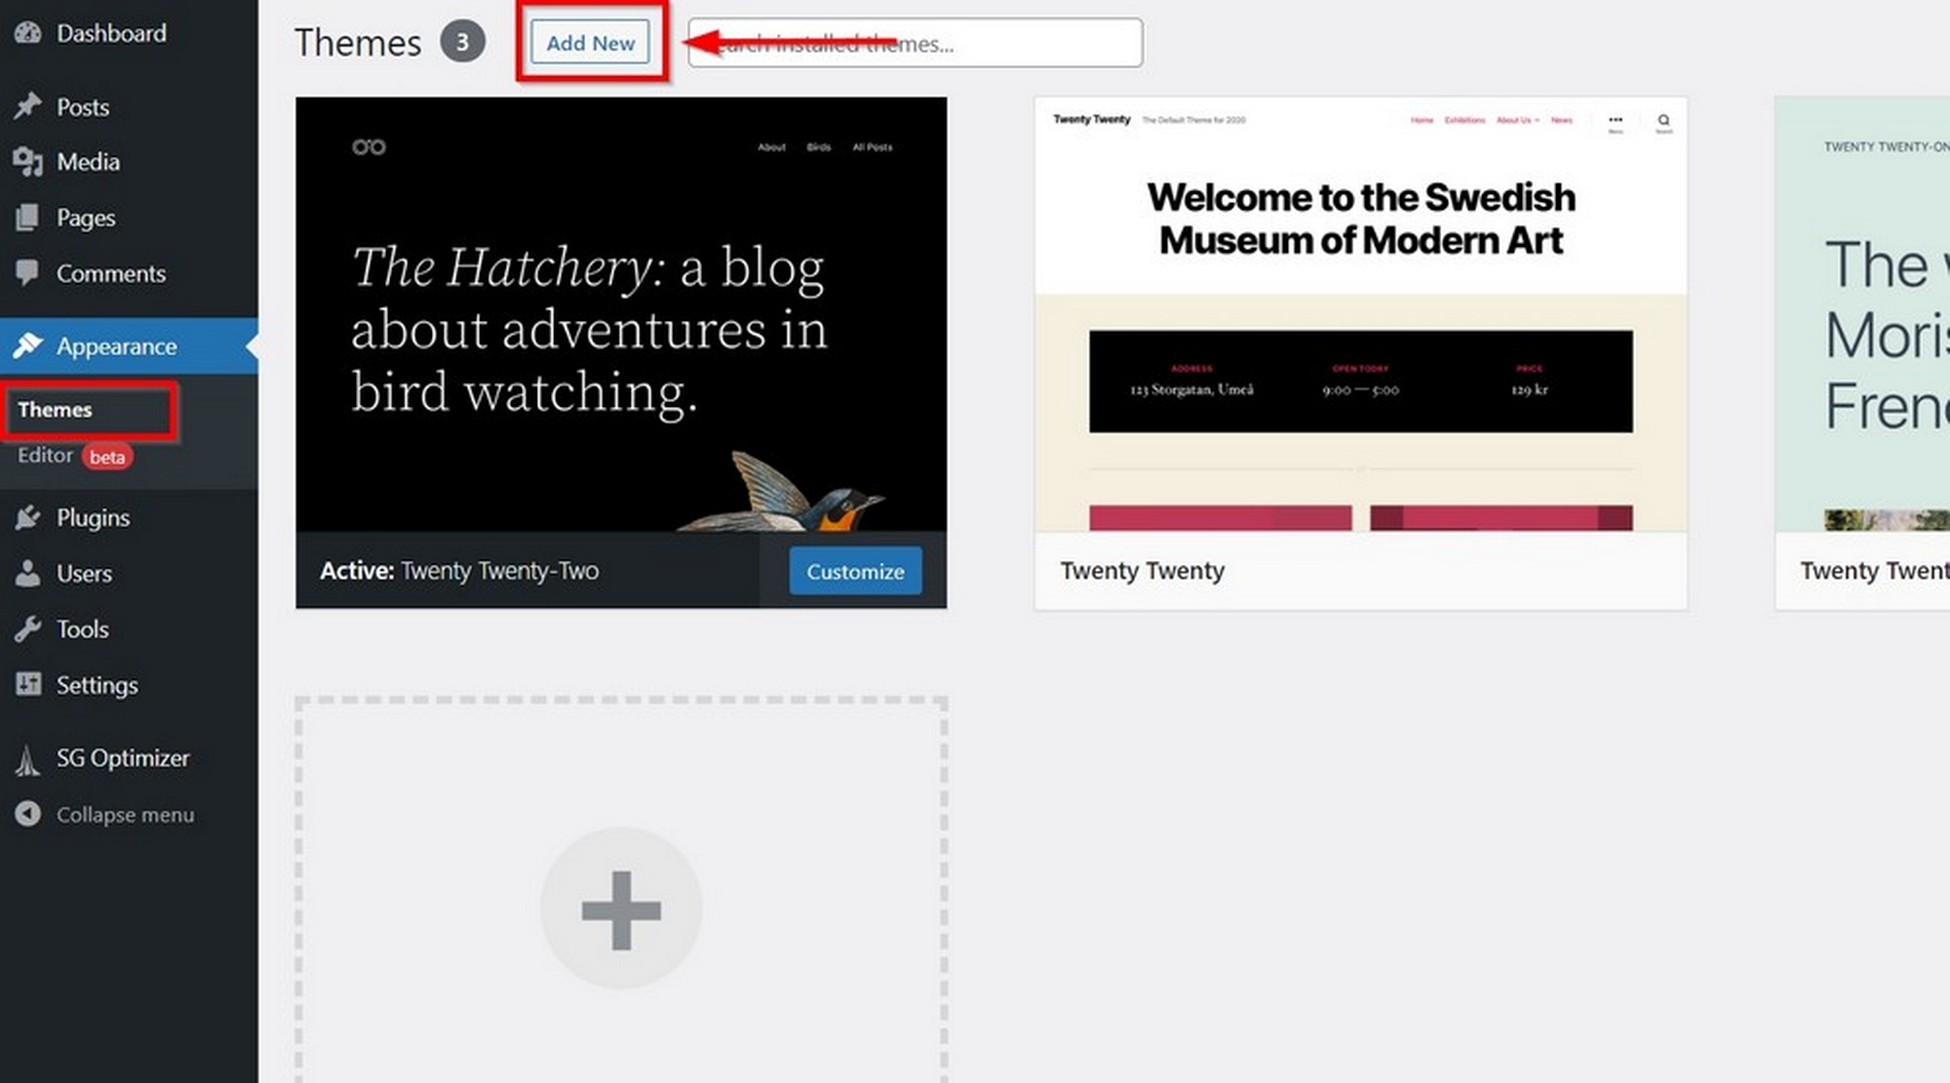
- Search for the theme in the theme search box
Once the theme appears:
- Install and Activate it.
Step 5: Design and basic blog configuration
It takes time to design a blog.
When we talk about design, we mean putting your blog together, choosing a theme, selecting fonts, colors, headers, adding pages, a favicon, authors, and all those elements you might see on successful blogs.
Designing your website means you’re building a framework for your blog.
As we use the Astra theme, the case with any other theme is no different. The options may vary in different places.
Here are the important steps we will be covering:
- Add a logo and favicon to your blog
- Use the right font
- Select the right colors for your blog
- Set up your blog header
- Create necessary blog pages
- Set readable permalinks
- Set your WordPress homepage
- Display images in rows and columns
- Add images to the WordPress sidebar
- Add a featured image to every post
- Add a sticky floating navigation menu
- Add a default Gravatar
- Use the inspect element tool to customize WordPress
- Add categories to posts
- Add multiple authors to your blog
- Split long posts into pages
Let’s get to the designing and basics of a WordPress blog.
Add a logo and favicon to your blog
A logo is an opportunity to make your blog unique. If you’re blogging for a brand or company, you’ll probably already have a logo.
If you’re blogging for yourself, you really should consider getting one.
You can use a text logo if you like though.
A favicon is the small graphic you see on a browser tab when you land on the website. It’s a small thing, but another way to personalize your blog and make yourself memorable.
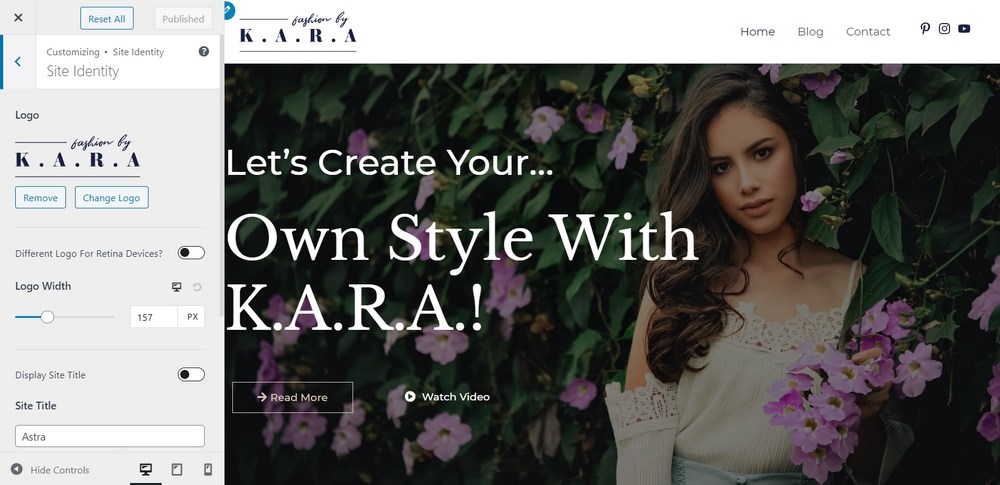
- Log into your WordPress dashboard
- Select Appearance from the left menu and select Astra Options
- Select Upload Logo from the center of the screen
- Select the Change Logo button on the left
- Upload your logo or select it from the Media Library
- Adding a favicon happens on the same page as changing the logo
- Select the Select Site Icon option in the left menu
- Upload or select your favicon from the Media Library
Your new logo should appear where the placeholder used to be. It’s one more step to making your blog your own!
Use the right font
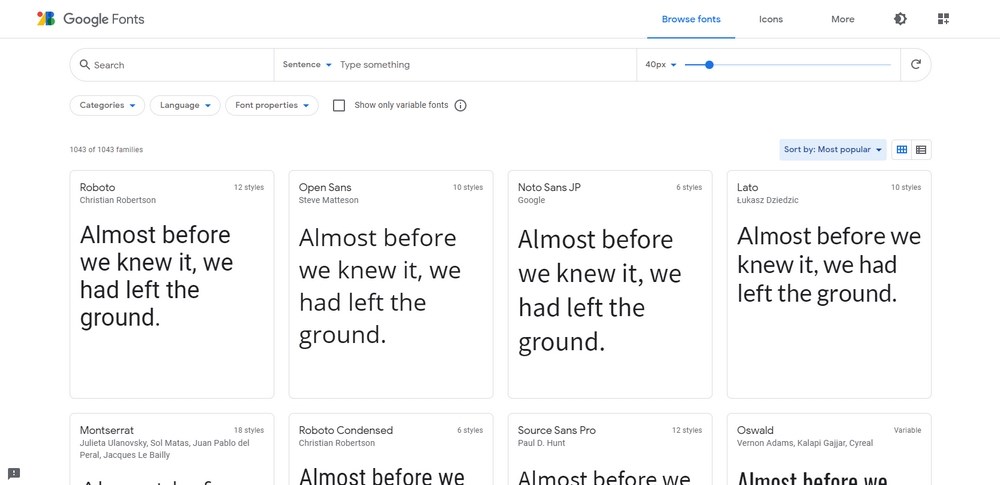
Most Astra themes will come with well-chosen fonts. If you want to change those fonts, you are free to do so.
However, you should give font choice a lot of thought as fonts can make or break a design.
Check out Typography for Designers to help with font choices.
Select the right colors for your blog
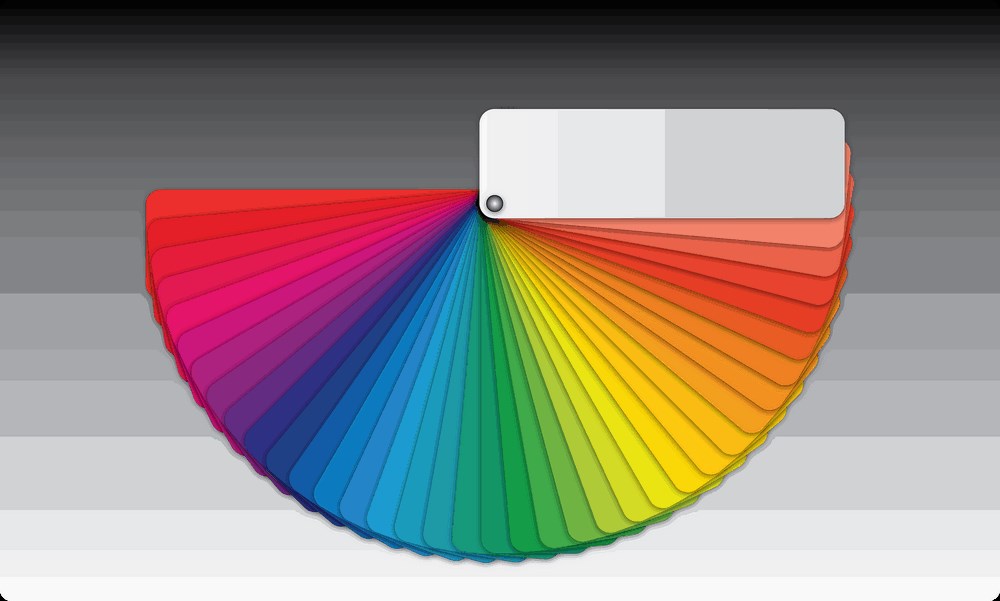
The design team at Astra puts a lot of thought into the color schemes of our WordPress themes but that doesn’t guarantee they will work for you. Like fonts, you can change any color, anywhere in an Astra theme.
Like fonts, you need to put a lot of thought into colors and color combinations.
Here are some resources to help:
- 50 Best Website Color Schemes of 2021
- How to Use the Psychology of Color to Increase Website Conversions
Set up your blog header
The header is a vital part of any WordPress blog design. It’s the area that includes navigation, social areas and any supplemental information at the top of the page.
It’s another of those small design touches that can make a real impact and is something you should set up from the very beginning.
Astra uses a number of tools to create headers.
Each theme comes with at least one attractive header for each design but you can also create your own if you wish.
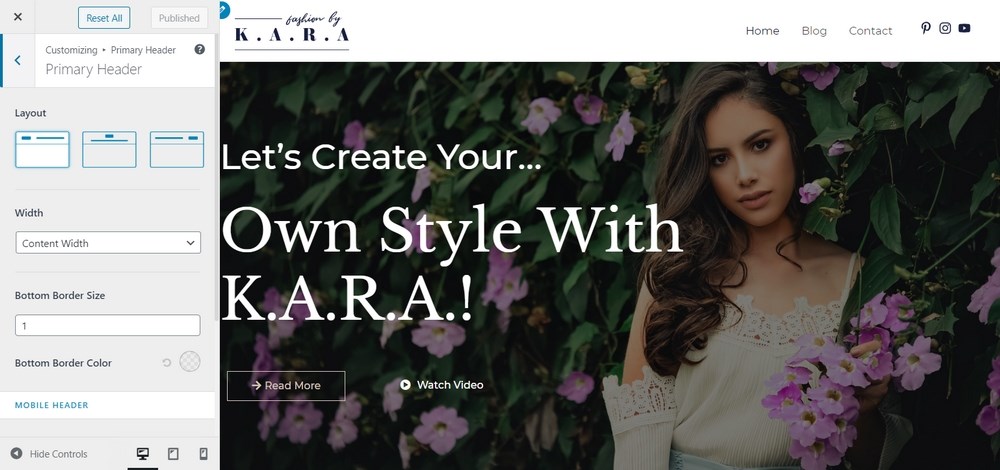
To modify a blog header:
- Select Appearance and Astra Options from the left menu of your WordPress dashboard
- Select Header Options from the center pane
- Select Header and Primary Header from the side menu on the next screen
- Select one of the layout options within the left menu
For more information, this page walks you through creating a WordPress header and footer with Elementor.
Create necessary blog pages
Now your WordPress blog design is coming together, it’s time to add the pages you need to make it work.
Some WordPress themes will create these pages for you, others will not.
The easiest way to check is to select Pages and All Pages from the left menu. If you see these pages in the list, you’re good to go.
If you don’t, we can create them.
You’ll probably need to create:
- Home
- Contact Us
- About
- Portfolio
- Resources
- Services
- Privacy Policy
Some blogs won’t need all of these pages but many will.
To create a new page in WordPress:
- Select Pages and Add New from the left menu of the WordPress dashboard
- Add a title for your new page in the Title area
- Add content in the center section
- Design the page and set it up to match the rest of your theme
- Publish your page
Set readable permalinks
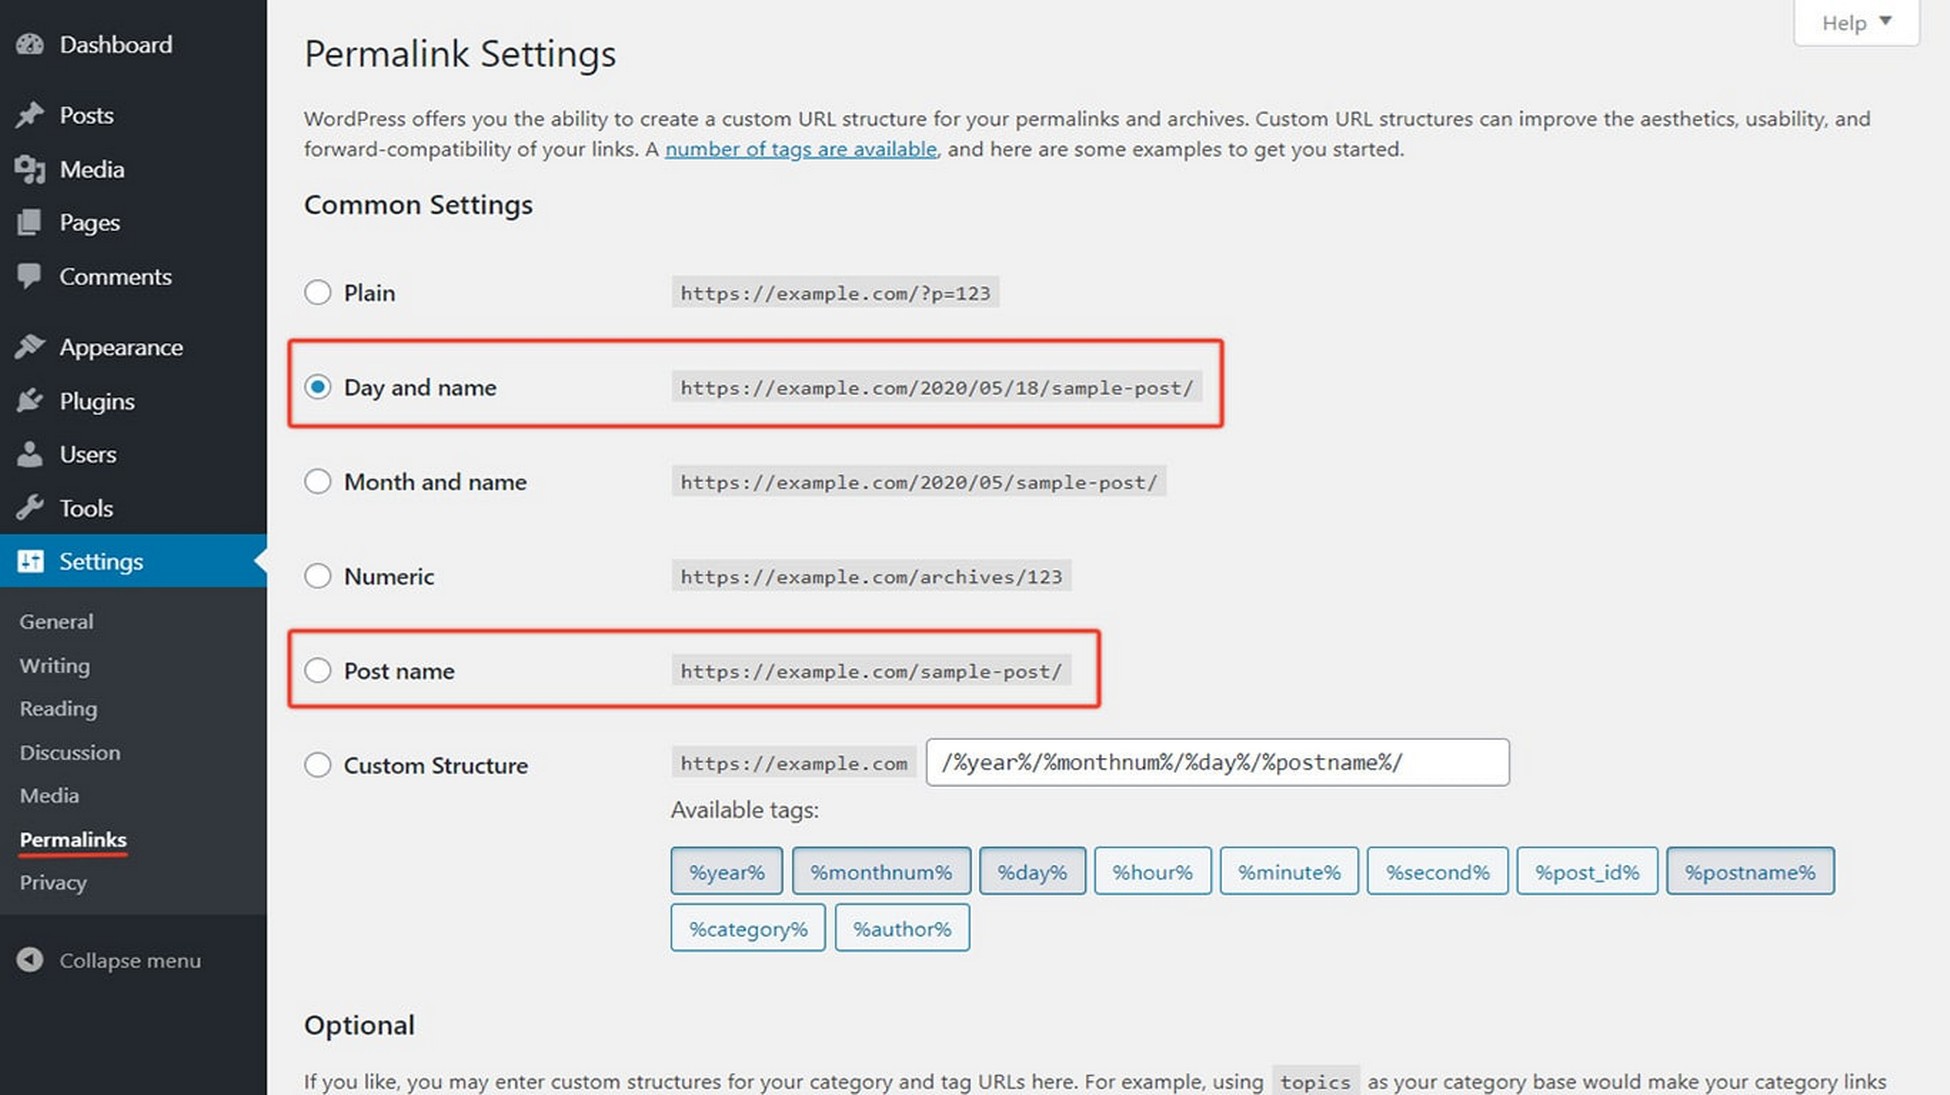
Permalinks are the permanent links you see in the browser window when on a blog page. A permalink should be readable by humans to help with usability and also be SEO-friendly.
WordPress has several permalink options but most people recommend using postname.
This provides a readable URL that both humans and search engines can use.
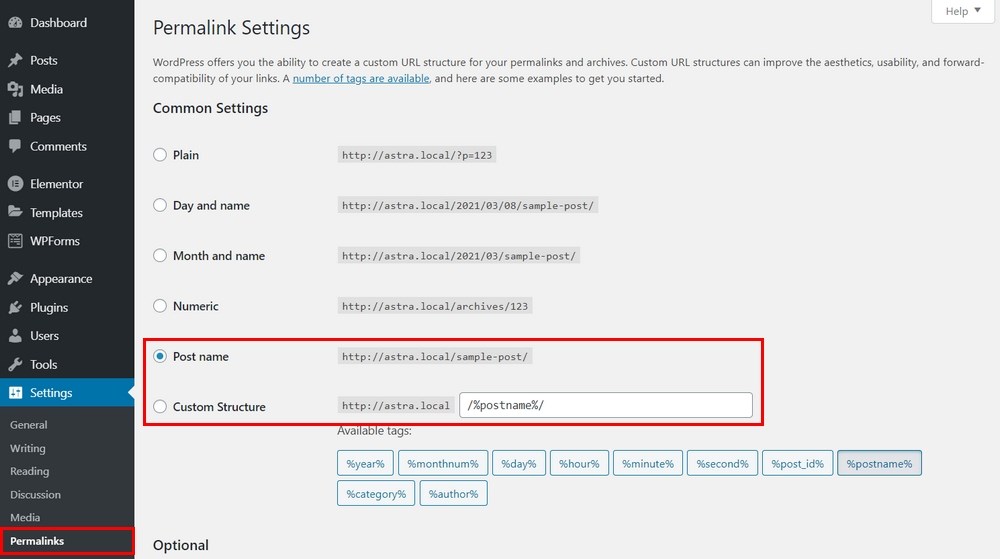
- Select Settings and Permalinks from the left menu of the WordPress dashboard
- Set Post Name as your permalink structure under Common Settings
- Select Save Changes at the bottom of the page
Set your WordPress homepage
When you install the Astra theme, it will automatically set your homepage to the theme’s main page.
Not all themes do this so it’s a good idea to check.
If you decide to create a custom homepage, you will need to set it manually.
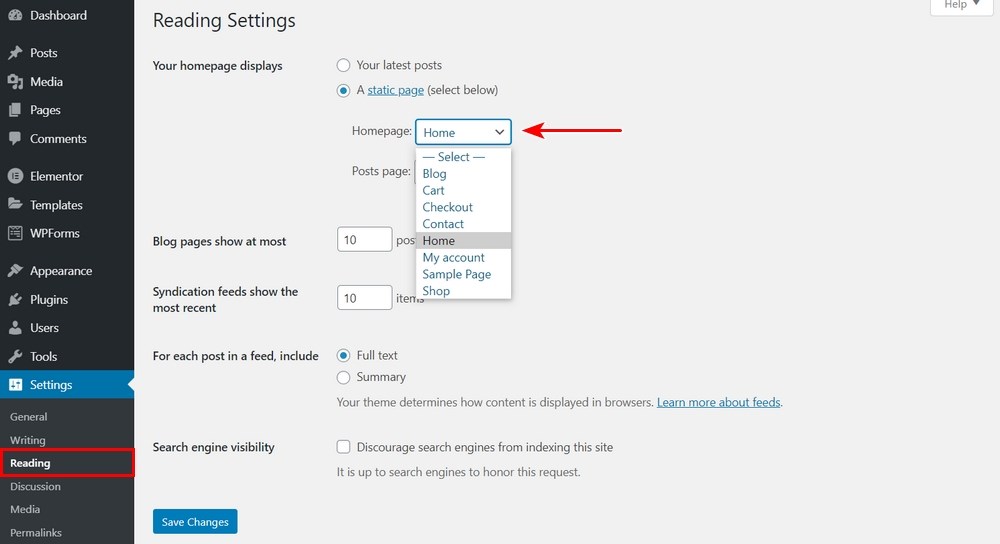
Here’s how:
- Select Settings and Reading from the left menu of the WordPress dashboard
- Select the page you want to be the main page from the dropdown menu by Homepage
- Select Save Changes at the bottom of the page
As you’re setting up a blog, you should also check that your blog page is also set correctly.
Select it next to the Posts Page. Save any changes you make.
Display images in rows and columns
This step is optional but if your blog is going to feature lots of images, layout is key.
By default, WordPress will arrange images in a column. That’s fine if you only have a few but if you’re displaying more than a few, the page becomes long and difficult to use.
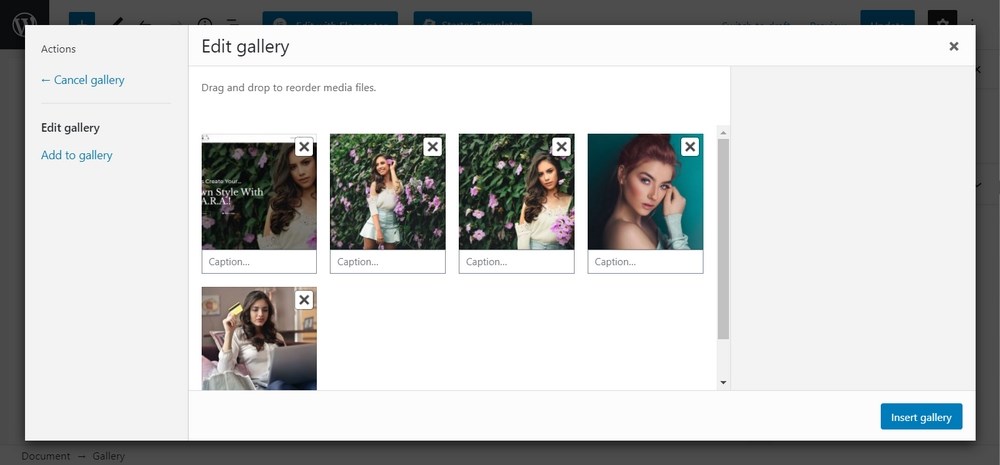
You can use built-in tools to create a more usable layout for images or you could use a WordPress gallery plugin.
Using WordPress tools:
- Create a new post and select Add Media
- Select Create Gallery from the left menu
- Select all the images you want to add to your page
- Set the number of columns you want to use on the right side
- Set any other settings you want
- Select Insert Gallery at the bottom right
- Finish your page as normal
We recommend using built-in tools if you’re not going to be making image-heavy pages often.
Otherwise, one of those gallery plugins or a WordPress portfolio plugin will make life much easier.

Add images to the WordPress sidebar
Sidebar images are another of those small but important elements of WordPress blog design.
Images can add interest to the page, provide self-hosted image links or showcase your work or WooCommerce products.
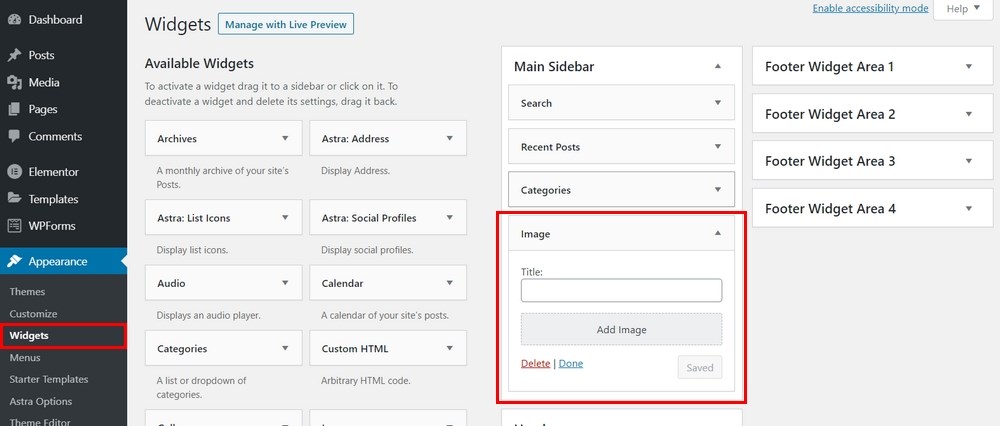
Adding an image to the sidebar is very straightforward:
- Select Appearance and Widgets from the left menu of the WordPress dashboard
- Select the sidebar you want to add images to on the right
- Drag the Image block from Available Widgets across to your sidebar
- Place it in position and add the title and image(s)
- Select Done when complete
If you want to do more with your blog sidebar, consider using a plugin like Lightweight Sidebar Manager.
Add a featured image to every post
A featured image is also known as a post thumbnail as it will be used by many themes to display your posts and in social media.
You should include a featured image in every post you publish.
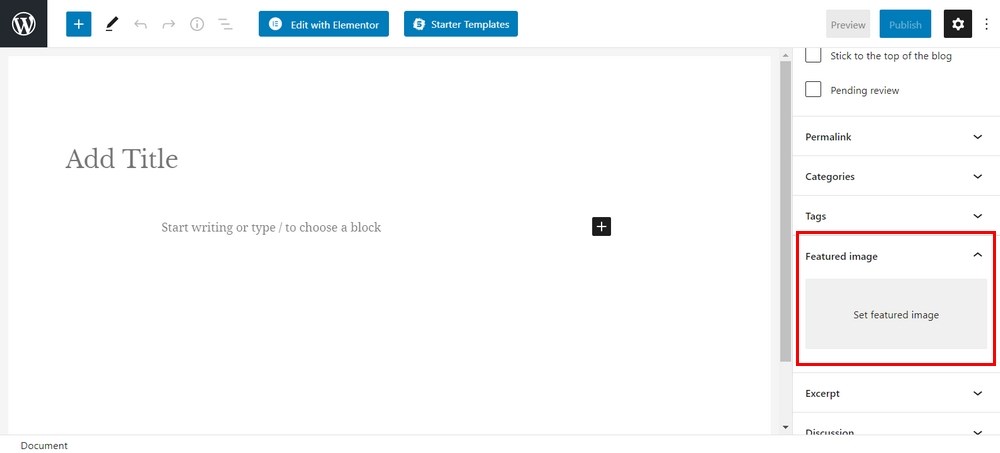
To add a featured image:
- Select the Featured Image box on the right menu of any New Post page
- Select Set Featured Image
- Upload or select an image from the Media Gallery
- Set the Alt Text and optionally add a caption and description
This page lists 20 websites to download high quality images to use on your blog.
Ideally, you want to include the highest quality images you can but make them as small as possible to help them load fast.
This guide on optimizing images for WordPress will help you strike that perfect balance.
Add a sticky floating navigation menu
This is another optional WordPress blog design step but is one well worth considering.
A sticky navigation menu is also known as a sticky header. It describes a website menu that stays at the top of the screen even when you scroll down the page.
It can be a valuable usability feature if you choose to use it.
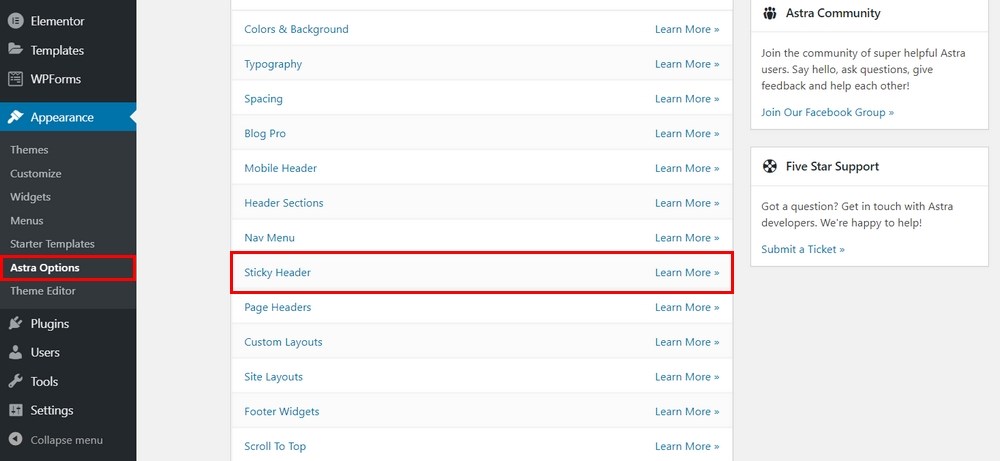
Astra supports sticky navigation and many other WordPress themes will also support it.
You will need the Astra Pro Addon plugin for this to work.
- Select Appearance and Astra Options from the left menu of the WordPress dashboard
- Select Sticky Header from the options list and Activate
- Configure your header according to your chosen theme using these instructions
Different themes will use different header designs so we recommend following the guide linked above to personalize the sticky header to your exact specifications.
Add a default Gravatar
Gravatar is short for Globally Recognized Avatar and is a user image that will appear in blog comments by the user’s name.
If you don’t set one, your users will see the gray ‘Mystery Man’ gravatar which is a little boring.
Adding gravatars is a small element of WordPress blog design that can enhance the user experience.
For that reason, we recommend using them despite the small speed penalty they may incur.
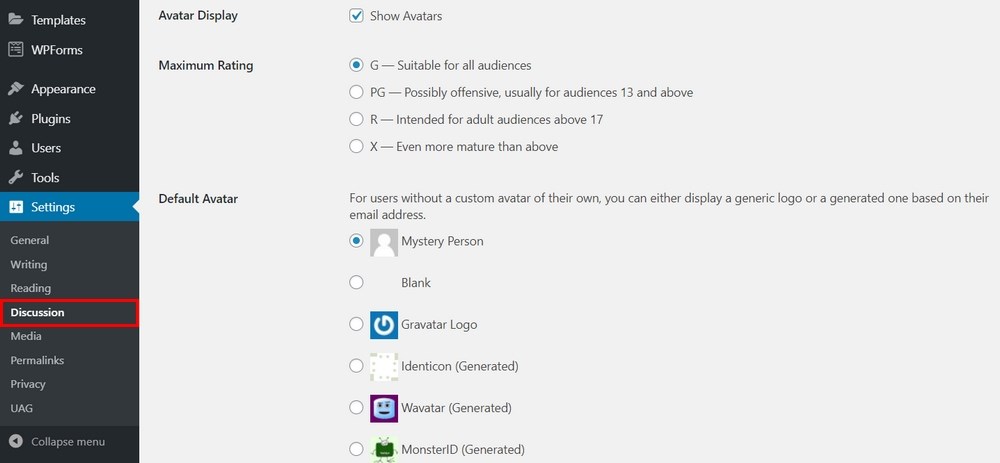
Setting the default gravatar in WordPress:
- Select Settings and Discussion from the left menu of the WordPress dashboard
- Scroll down to the Avatars section
- Select a gravatar type from the available options
- Select Save Changes
Use the inspect element tool to customize WordPress
Inspect element is a feature within most mainstream browsers that allows you to check web pages and make changes in real time.
Technically, this is a debugging tool but it can also be used for designing a blog.
You cannot save the changes you make but you can quickly see how a page would look in a different color, with different fonts and so on.
It’s a useful way to test out an idea before you take it further and something any blogger should become familiar with.
You can access the inspect element tool by using F12, right clicking the page and selecting Inspect Element or by using Ctrl + Shift + I.
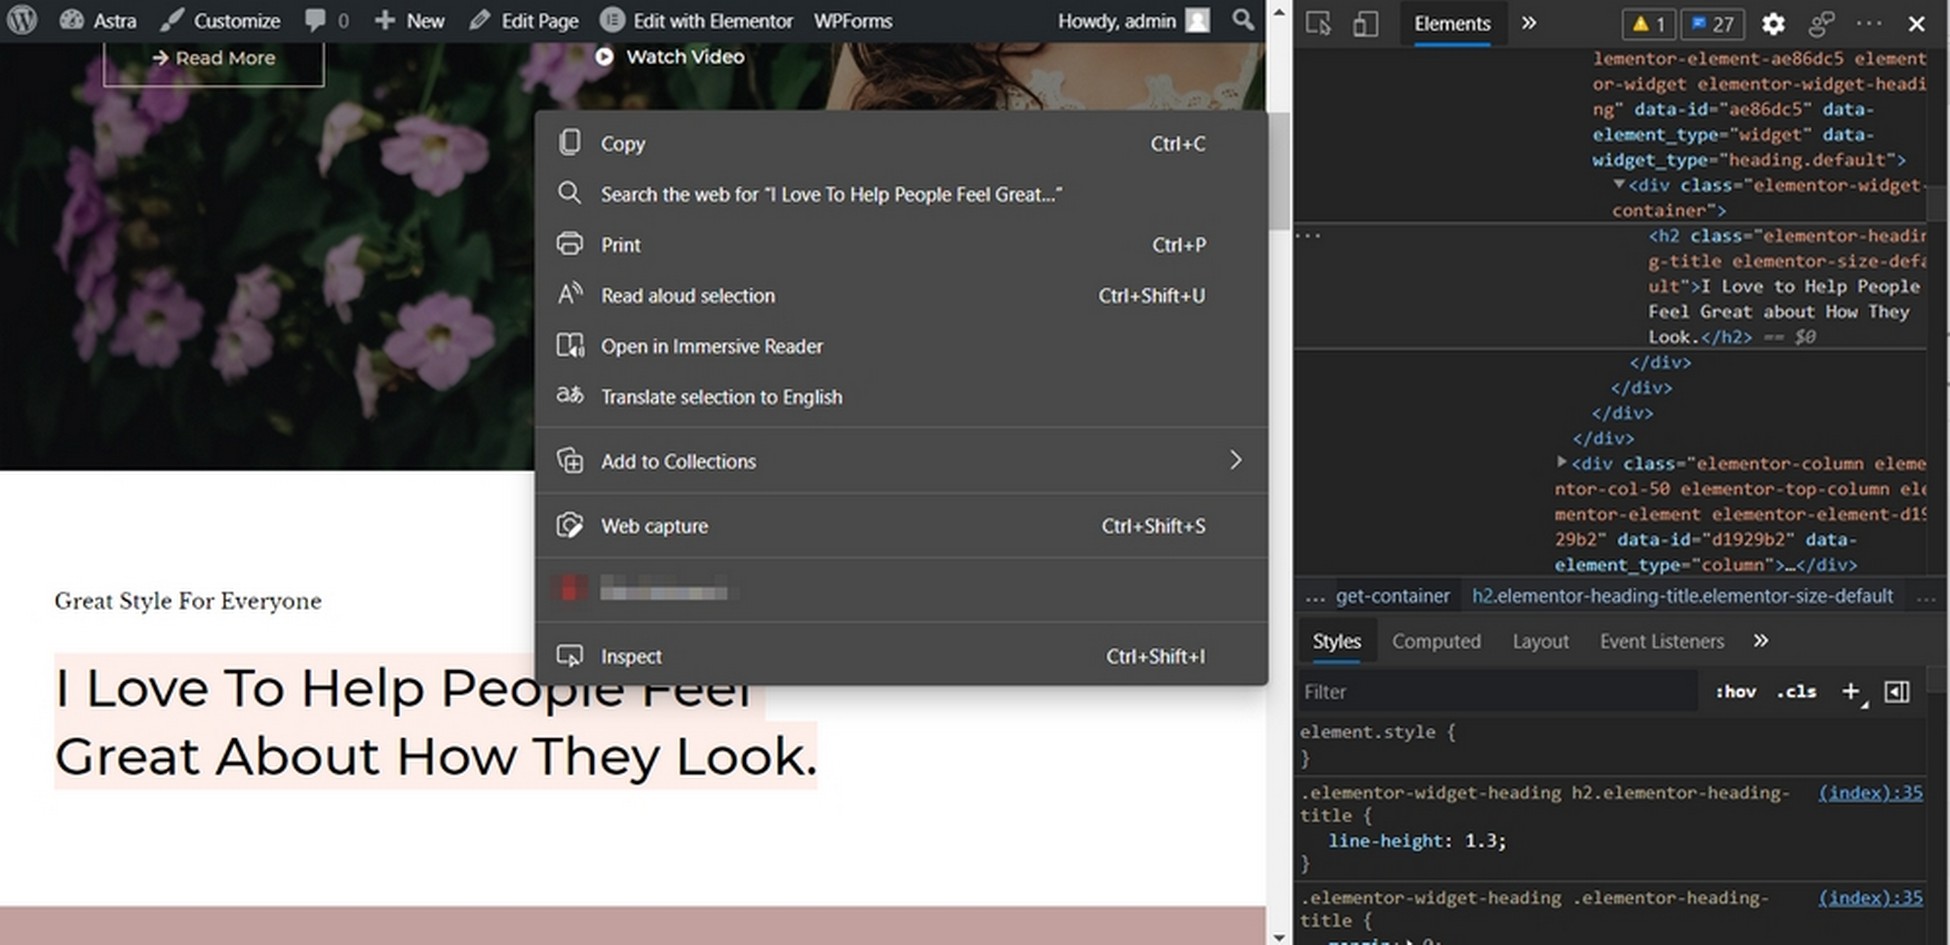
You should see two panes appear in your browser. There should be HTML on the left and CSS on the right.
Hover over any element within these panes and you should see the corresponding part of the web page highlighted above the inspection pane.
- Highlight a part of the web page you want to customize.
- Change the corresponding HTML or CSS in the lower pane to change.
The changes will not be saved but you can see in real time how your page can be customized.
It’s a very useful way to experiment without committing the change or creating a child theme.
You can also use inspect element to check pages for errors.
Simply select the Console tab at the top of the inspect element area to see any errors that appear on any page of your website.
Add categories to posts
Post categories are an essential part of WordPress blog design. They provide organization for your posts and make it easy for users to find what they are looking for.
Every blog should have a simple, logical hierarchy for posts and pages to help page layout and usability.
Creating WordPress categories is very straightforward. It will take more time to plan your hierarchy than it will to implement it!
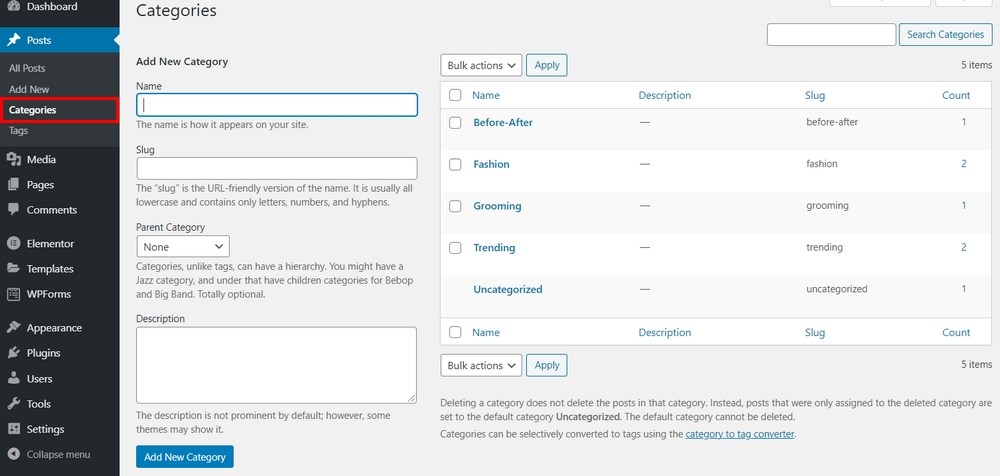
To add new categories in WordPress:
- Select Posts and Categories from the left menu of the WordPress dashboard
- Type the title of your new category under Name on the left of the main window
- Add a parent category and description. (Optional)
- Select Add New Category
- Repeat for all required categories
Once saved, you should see your new categories appear in the list on the right.
They will also appear on the Add New Post page on the right hand side. Simply check the box to select one or more categories for the post.
Add multiple authors to your blog
If you’re planning to let others contribute to your blog, you’re going to want to add them as authors.
There are two types of multiple author settings. One enables authors to create their own content on your site and publish it under their name. We’ll call this adding authors to your blog.
The second allows you to add multiple authors to a single post to attribute their efforts on the piece. We’ll call this adding multiple authors and we will need a plugin for this.
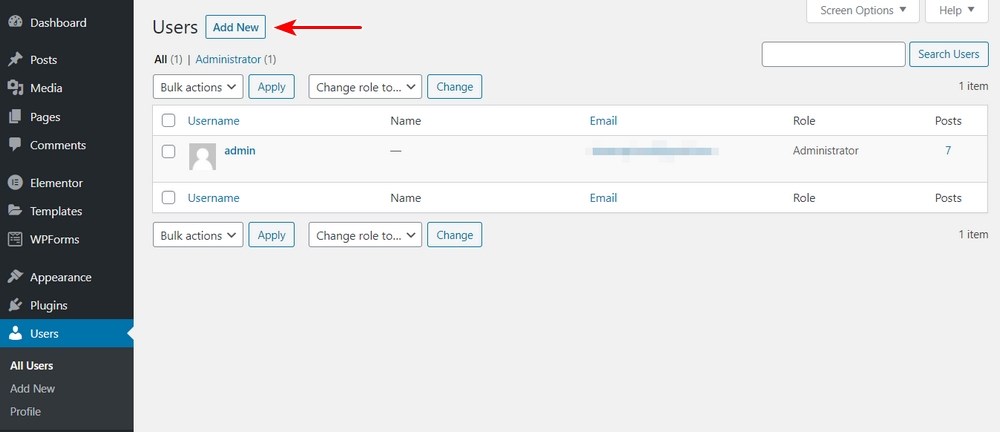
Add authors to your blog:
- Select Users and Add New from the left menu of the WordPress dashboard
- Complete the user form as required
- Set the Role as Author at the bottom
- Select Add New User
Split long posts into pages
Splitting longer blog posts into pages helps usability and breaks up very long posts.
It’s not an essential part of designing a blog but can be useful if you find yourself writing longer posts.
If you’re writing 5,000 – 10,000 word blog posts, it may be a good idea to split it up into more digestible pieces.
It will still be a single post and will still be accessible from the original link but won’t be quite so intimidating to users who don’t want to read a super-long post.
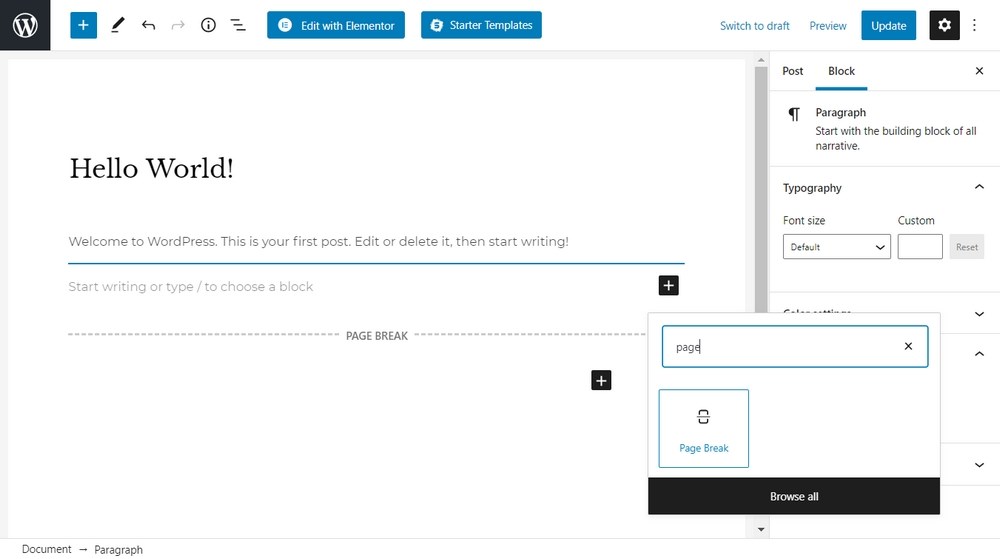
All you need to do is switch to text view in the Add New Post page and add the <!–nextpage–> tag in the post where you would like to split it into pages.
If you add the code in the standard visual view, the code will appear on the page but not create pagination.
If pagination doesn’t appear when you publish the post, check your ‘single.php’ file and add <?php wp_link_pages(); ?> at the end.
Step 6: Install necessary plugins
Plugins are the software addons for your website. They add new features, improve the existing ones, speed up your pages, provide backups, enable SEO tools and a whole lot more.
There are plugins that can help with social media sharing, image optimization, building photo gallery or for creating online portfolio to get a new job.
They work much like apps on your phone.
WordPress is a competent CMS. It can do many great things but it can’t do everything.
Plugins install into your website and can make your blog much more powerful.
Installing a WordPress plugin is easy:
- Login to your WordPress website
- Select Plugins > Add New from the left sidebar
- Type the name of the plugin on the plugin search box
- Install and Activate the plugin
Best free WordPress plugins for blogs
Here are a few of the best free WordPress plugins to power your blog:
- Starter Templates
- Spectra
- Yoast SEO
- Akismet Spam Protection
- Broken Link Checker
- Pre-Publish Checklist
- ShortPixel
- W3 Total Cache
- WP-DBManager
- Contact Form 7
Having these plugins on your blog simplifies the process of customization and edits, secures your website, increases the load speed, optimizes it for SEO, and a lot more.
Want more options? Here’s a complete list of necessary WordPress plugins that’ll help you with various website functionality.
Starter Templates
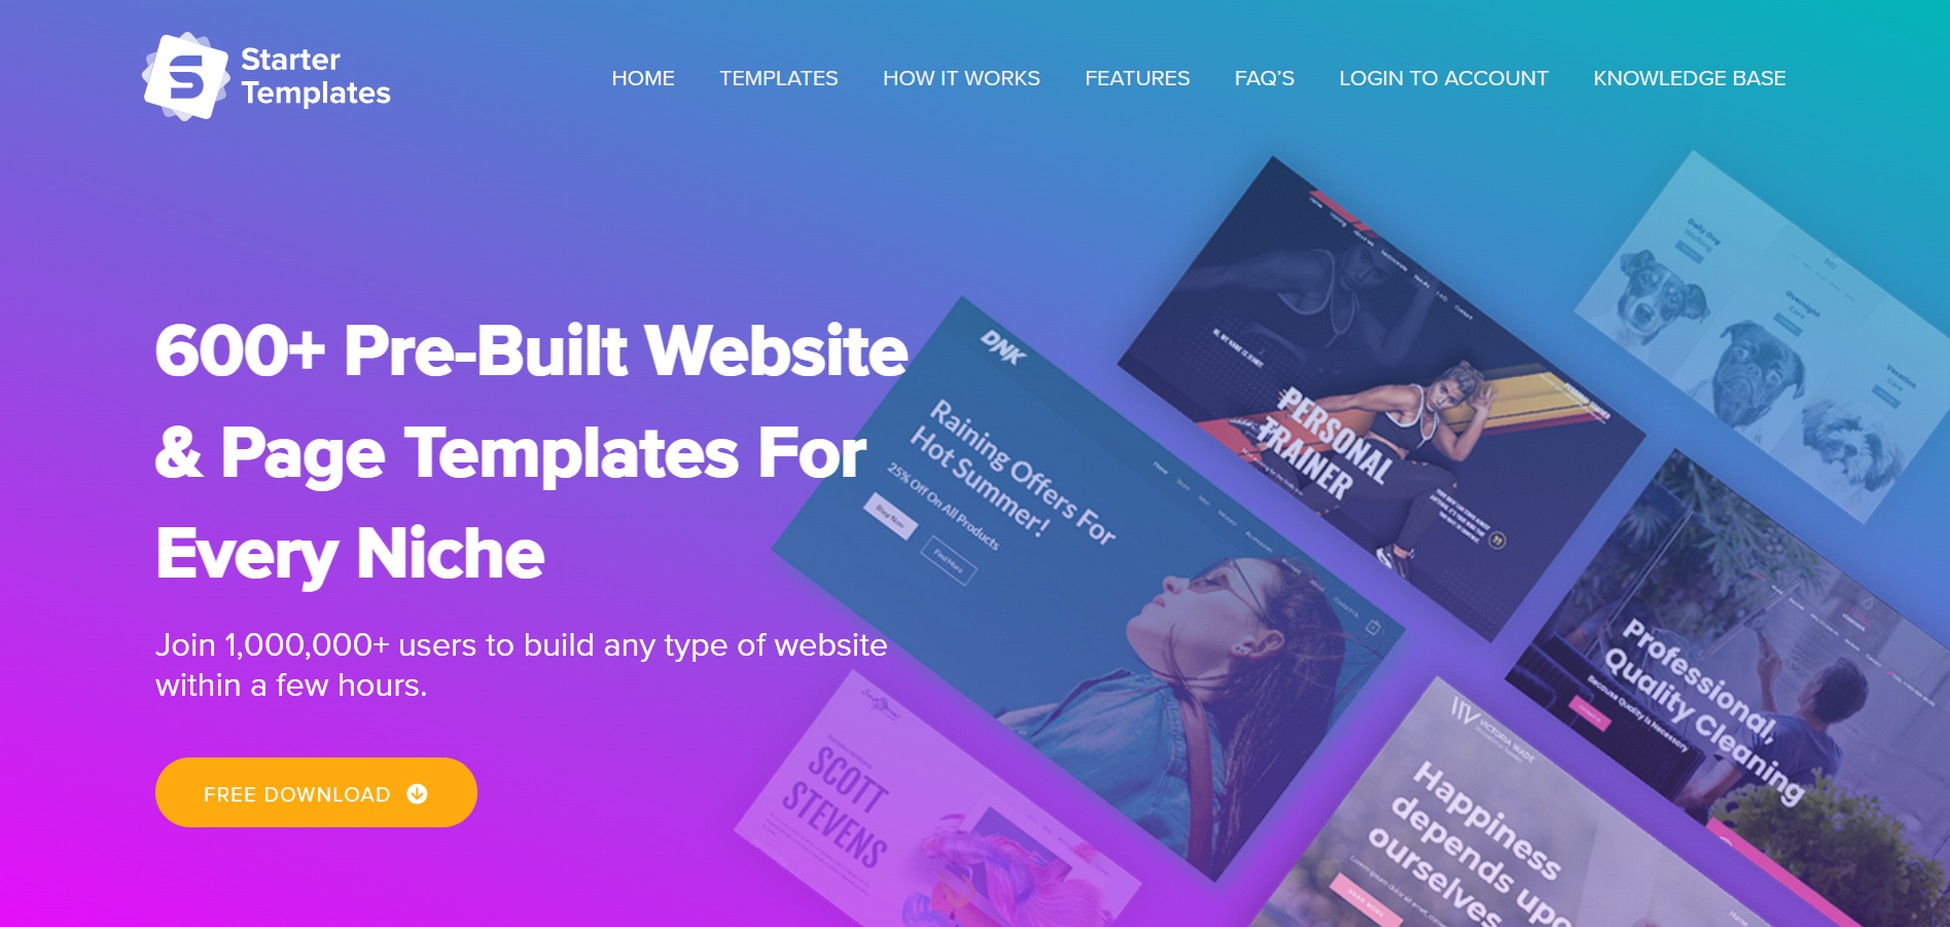
Starter Templates offer 600+ pre-built websites and page templates fitting the needs of every niche.
The plugin is compatible with the most popular page builders like Elementor, Gutenberg, and Beaver Builder.
You can quickly get started by selecting from the library of professionally designed templates. Simply preview the templates and import them to your website, customize them and your website is ready to go!
Key features of Starter Templates:
- Theme independent templates
- Unlimited customization possibilities
- Niche friendly website templates
- Helpful in-time support
Spectra
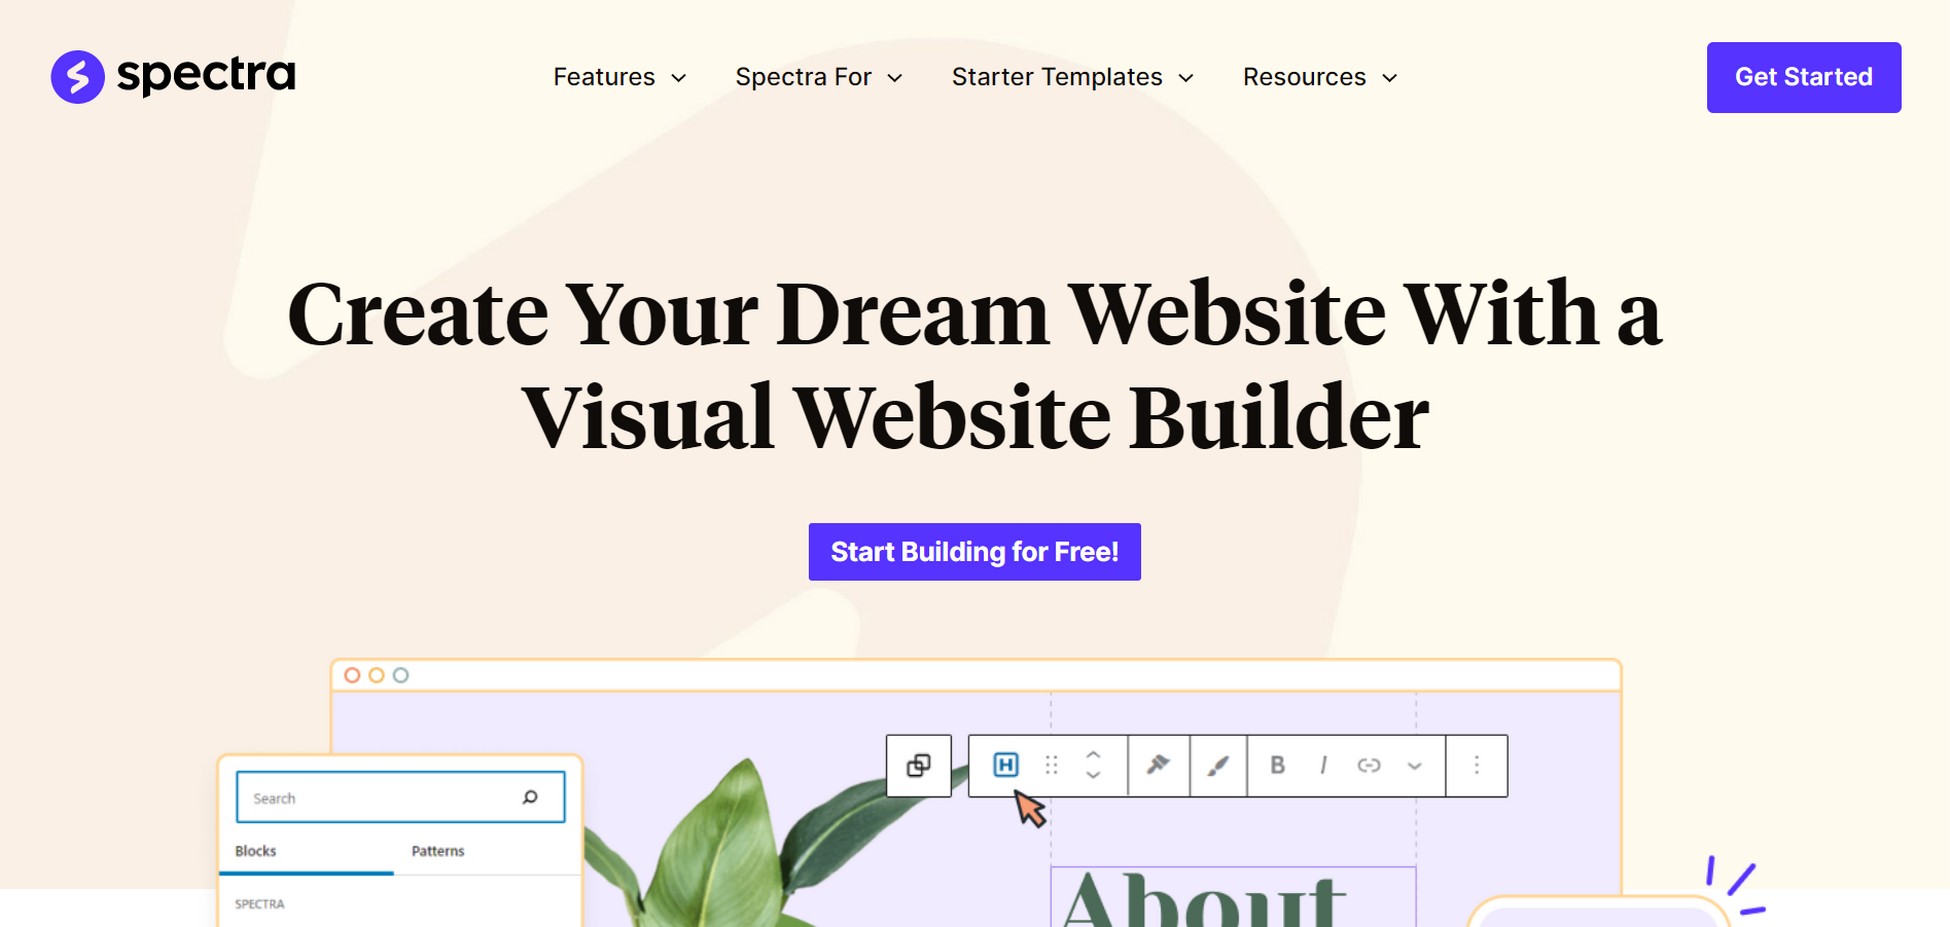
Spectra is a visual website builder that functions perfectly with the WordPress block editor. Using the plugin, you can build an incredible website using familiar tools.
You can select from 100+ pre-built templates and customize them as per your need. The plugin is 100% beginner friendly and enhances the default WordPress block editor.
Key features of Spectra:
- Most intuitive and lightweight website builder
- No coding knowledge required
- Powerful blocks to create websites with any combination of functionality
- Full control over designing your website by customizing every aspect
- 28 unique and creative blocks
Yoast SEO
Yoast SEO is a class-leading SEO plugin ideal for blogs or small businesses. If you want to get your website off to a great start but don’t want to pay for professional SEO services, this is what you use.
It’s an SEO plugin that makes it easy to optimize many elements of WordPress for search engines.
It helps you optimize content for keywords, optimize metadata, works with schema to ensure search engines understand your pages and performs many other SEO tasks.
The plugin also works with Schema Pro to help you define your blog website for search engines.
Key features of Yoast SEO:
- Excellent option for WordPress blogs to get started with SEO
- Makes sometimes complicated SEO requirements simple
- Includes both free and a premium version
- Very comprehensive suite of SEO tools
Akismet Spam Protection
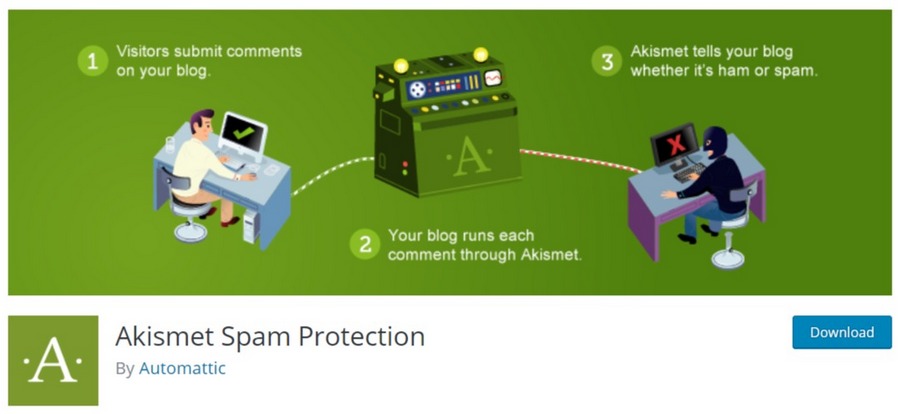
Akismet Spam Protection is so useful that it actually comes preinstalled with WordPress. It’s a very useful anti-spam tool that uses a global database to help prevent spam comments, spam form submissions and other annoyances to help keep your blog as clean as possible.
Akismet Spam Protection analyzes all comments and compares them to known spam terms or contributors. If it finds something it doesn’t like, it can automatically delete the comment or hold it for review.
It won’t capture everything as no single tool can do that. But it is very good at what it does. It’s also free.
Key features of Akismet Spam Protection:
- Very effective tool for fighting spam comments and submissions
- Free version is very good while premium is more powerful
- Made by Automattic, the people behind WordPress so integration isn’t an issue
- Comes bundled with WordPress so you don’t even need to install it
Broken Link Checker
Broken Link Checker is an essential WordPress blog plugin and one we heartily recommend for every website. Broken links are the bane of SEO and can impact usability. This plugin helps avoid that.
It’s a simple plugin that monitors internal and external links throughout your blog and alerts you to any broken links.
It adds a widget on the WordPress dashboard to highlight anything it finds. You can fix them quickly from the same dashboard too, which is a nice touch.
Key features of Broken Link Checker:
- Automatically scans internal and external links
- Adds a widget to the WordPress dashboard
- Alerts you to any broken links and enables you to change them from the WordPress blog plugin dashboard
- Free plugin
Pre-Publish Checklist
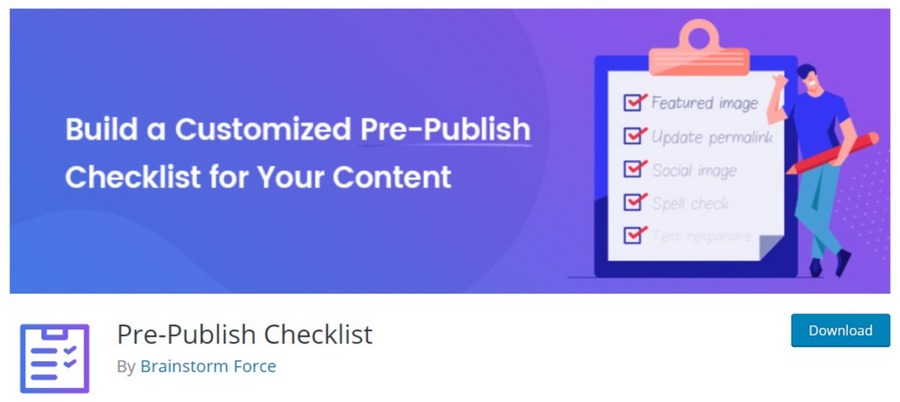
Have you ever published a post only to have to go back and make changes because you forgot to add an image or add metadata? Pre-Publish Checklist is designed to prevent that happening. This is one of our own plugins and we are rightly proud of it.
It’s a very useful tool for new bloggers that allows you to create a website checklist of all the tasks you need to complete before you publish a post.
You can configure your own checklists to include any custom post types or special tasks. It’s an extra step in the publishing process but can be a real help for new bloggers!
Key features of Pre-publish Checklist:
- Configurable pre-publish checklists you can customize to suit your needs
- Supports custom post types
- Can support different checklists for different user types
- Includes a progress bar to show how far through the checklist you are
ShortPixel
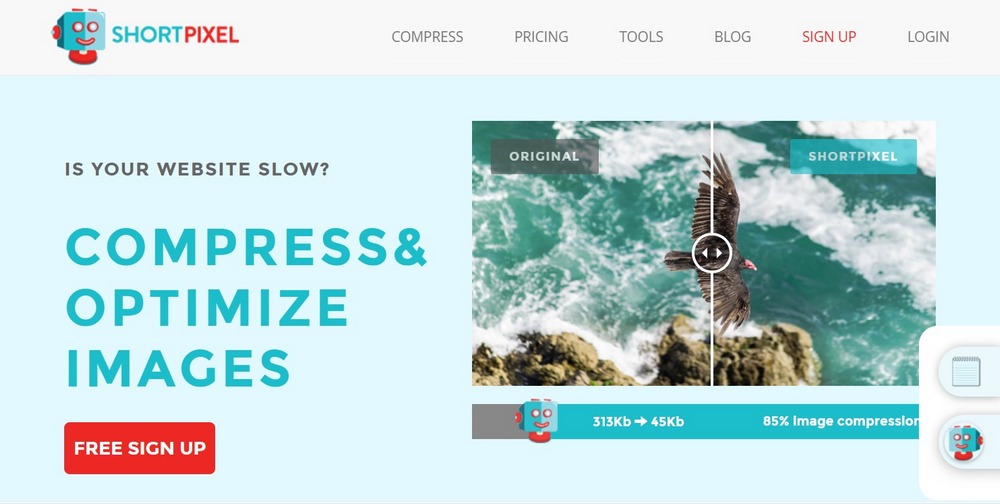
ShortPixel is an image optimization plugin that compresses images so they load faster. As page load speed is such a priority for all websites, plugins like this prove their worth immediately.
There are dozens of image optimization plugins, but this is one of the better ones. It uses smart compression tools to shrink image sizes without impacting quality too much.
It works quickly and can reduce image sizes by up to 90%!
Key features of ShortPixel:
- Supports most image types including JPG, PNG, GIF, PDF and WebP
- Supports batch optimization
- Can optimize library images as well as new ones
- Optimizes on your site rather than uploading to the cloud
W3 Total Cache
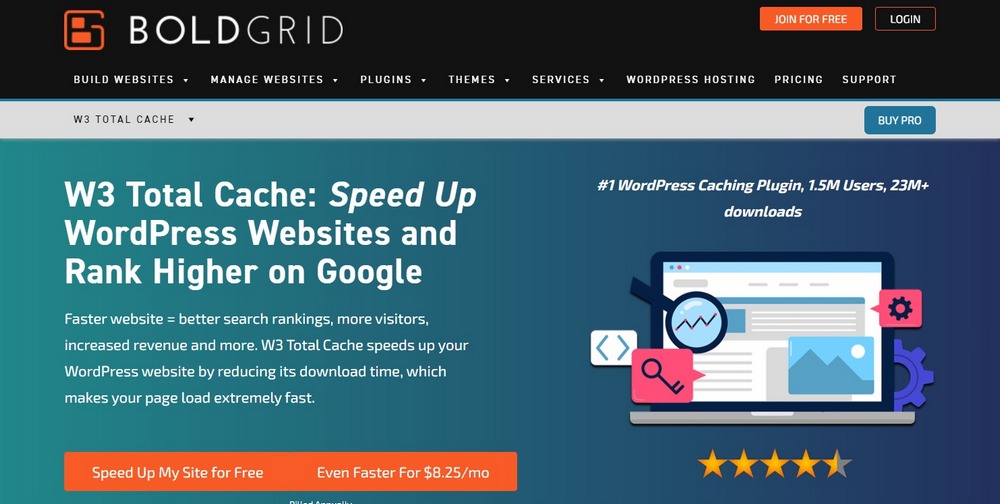
W3 Total Cache is probably one of the best ways to speed up your WordPress blog. It integrates into your website and optimizes all your files so they load faster for visitors.
W3 Total Cache can minify JavaScript and CSS so pages load quicker. It can also cache pages so they load faster, address blocking JavaScript files, provide statistics on caching, cache mobile AMP files, use Content Delivery Networks (CDN) for even faster page loading and a whole lot more.
Key features of W3 Total Cache:
- Very simple to use
- Automated configuration tool handles most tasks
- Works with mobile AMP files and SSL
- Free version is very good while premium adds more features
WP-DBManager
As WordPress is a database-driven content management system, effectively managing that database is key. WP-DBManager helps with that.
WP-DBManager can help optimize the WordPress database, back it up, repair it when things go wrong or you lose tables, restore backups, delete backups and manage database tables.
While most bloggers will never need some of these tools, database backup and restore tools are vital!
Key features of WP-DBManager:
- Optimizes the WordPress database
- Includes database backup and restore tools
- Can repair database and tables
- Can schedule database work for quiet hours
Contact Form 7

Contact Form 7 is a very useful blog plugin for WordPress if you want to use forms. It’s an alternative to WPForms and is known for being very easy to use. It has a library of default forms that would be enough for many blogs and an intelligent form builder for everything else.
Contact Form 7 is simple to set up and includes a drag and drop form builder so you can customize existing forms or create your own. Forms are light, responsive, can integrate with ReCaptcha and work with most WordPress themes.
Key features of Contact Form 7:
- Simple installation and setup
- Drag and drop form builder
- Useful library of predefined forms ready to go
- Works with ReCaptcha to prevent form spam
We suggest using as many plugins as you need to provide the beautiful user experience and the features you want.
There are many WordPress plugins for blogs. Some of them are free while others offer paid versions.
We recommend a practical minimum of a security plugin, backup plugin and a caching plugin on your blog.
Step 7: Write your first blog post
Now that you’ve prepared and set up your WordPress blog, it’s time to publish your first blog post.
Here, we will cover different aspects of writing like outlines, formatting, basic blog SEO, and everything important.
A blog isn’t about you, it’s about your readers.
Your audience should be the center of everything you write.
We suggest planning on giving the audience what they want. That’s the way your blog should grow fast!
There are several types of blog posts ranging from list posts to how-to posts to review posts to roundup posts to interview posts to infographic posts to tutorials and guides.

Writing your first blog post would rather mean you’re introducing yourself to someone new.
In such a situation, we tell each other who we are, why we are there, and perhaps what we do.
We suggest covering these elements in the first blog post:
- A friendly introduction
- What you do
- What your blogs are going to be about
- What your goals are
- How often you’ll be blogging
You can expand into what makes you qualified to write the blog, a bit of your background, skills, and an outline of your experience.
Planning is a must!
Here are a few things to bear in mind:
- Blogs are always about the audience
- Keywords are stepping stones to getting your website to rank
- The outline is the pillar of the blog
- Proofreading and editing improve the quality
- A catchy title catches attention
To add your first blog post:
- Head to Posts > Add New from the dashboard of your WordPress website
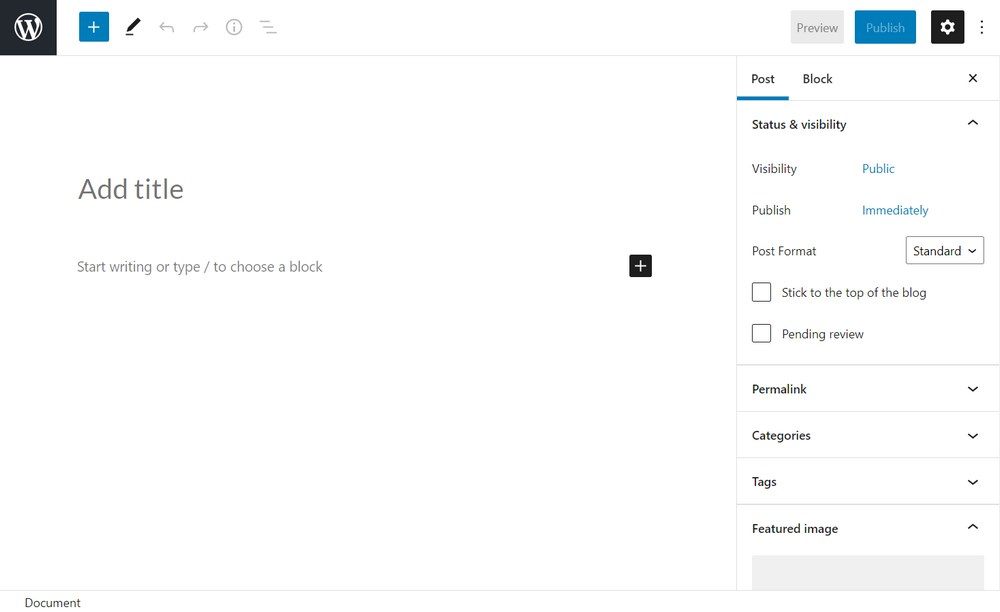
Add content to the center along with supporting sub-headers.
We suggest using short sentences and paragraphs, around 2-5 sentences per paragraph is ideal.
Using simple language ensures that your audience understands what you’re saying. Grammatical errors make you sound unprofessional, so avoid them as much as possible.
Adding elements like images, links, audio, and video gives life to your blogs, so we suggest adding them wherever possible.
Once you’re done writing your first blog post, click the Publish button.
We have a detailed tutorial on writing your first blog where we discuss each aspect in more detail.
Step 8: Optimize your website for SEO
We would all like our blog to rank on the first page of Google and other search engines. But is it possible?
You don’t know if you don’t try!
Search Engine Optimization (SEO) is the process of making your website visible in search. Good SEO results in an increase in organic traffic.
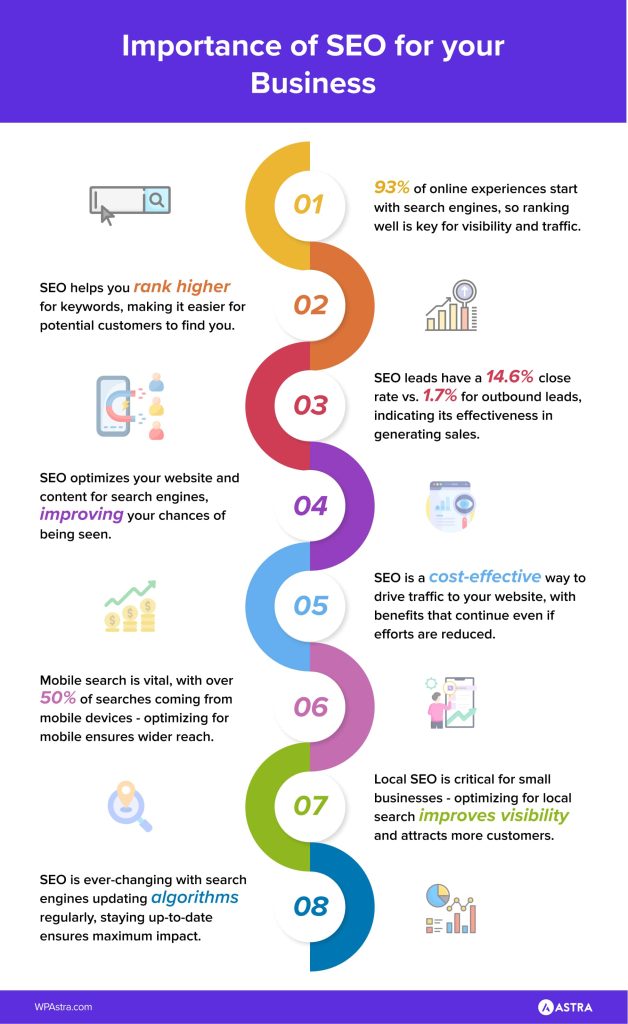
Here are a few ways to optimize your website for SEO:
WordPress website settings
There are a couple of settings you might want to check out that can influence WordPress SEO.
Enabling search engine visibility
One important step to check is ensuring that your site isn’t hidden from search engines.
Head to Settings > Reading and scroll to the boom on the page where it says Search Engine Visibility.
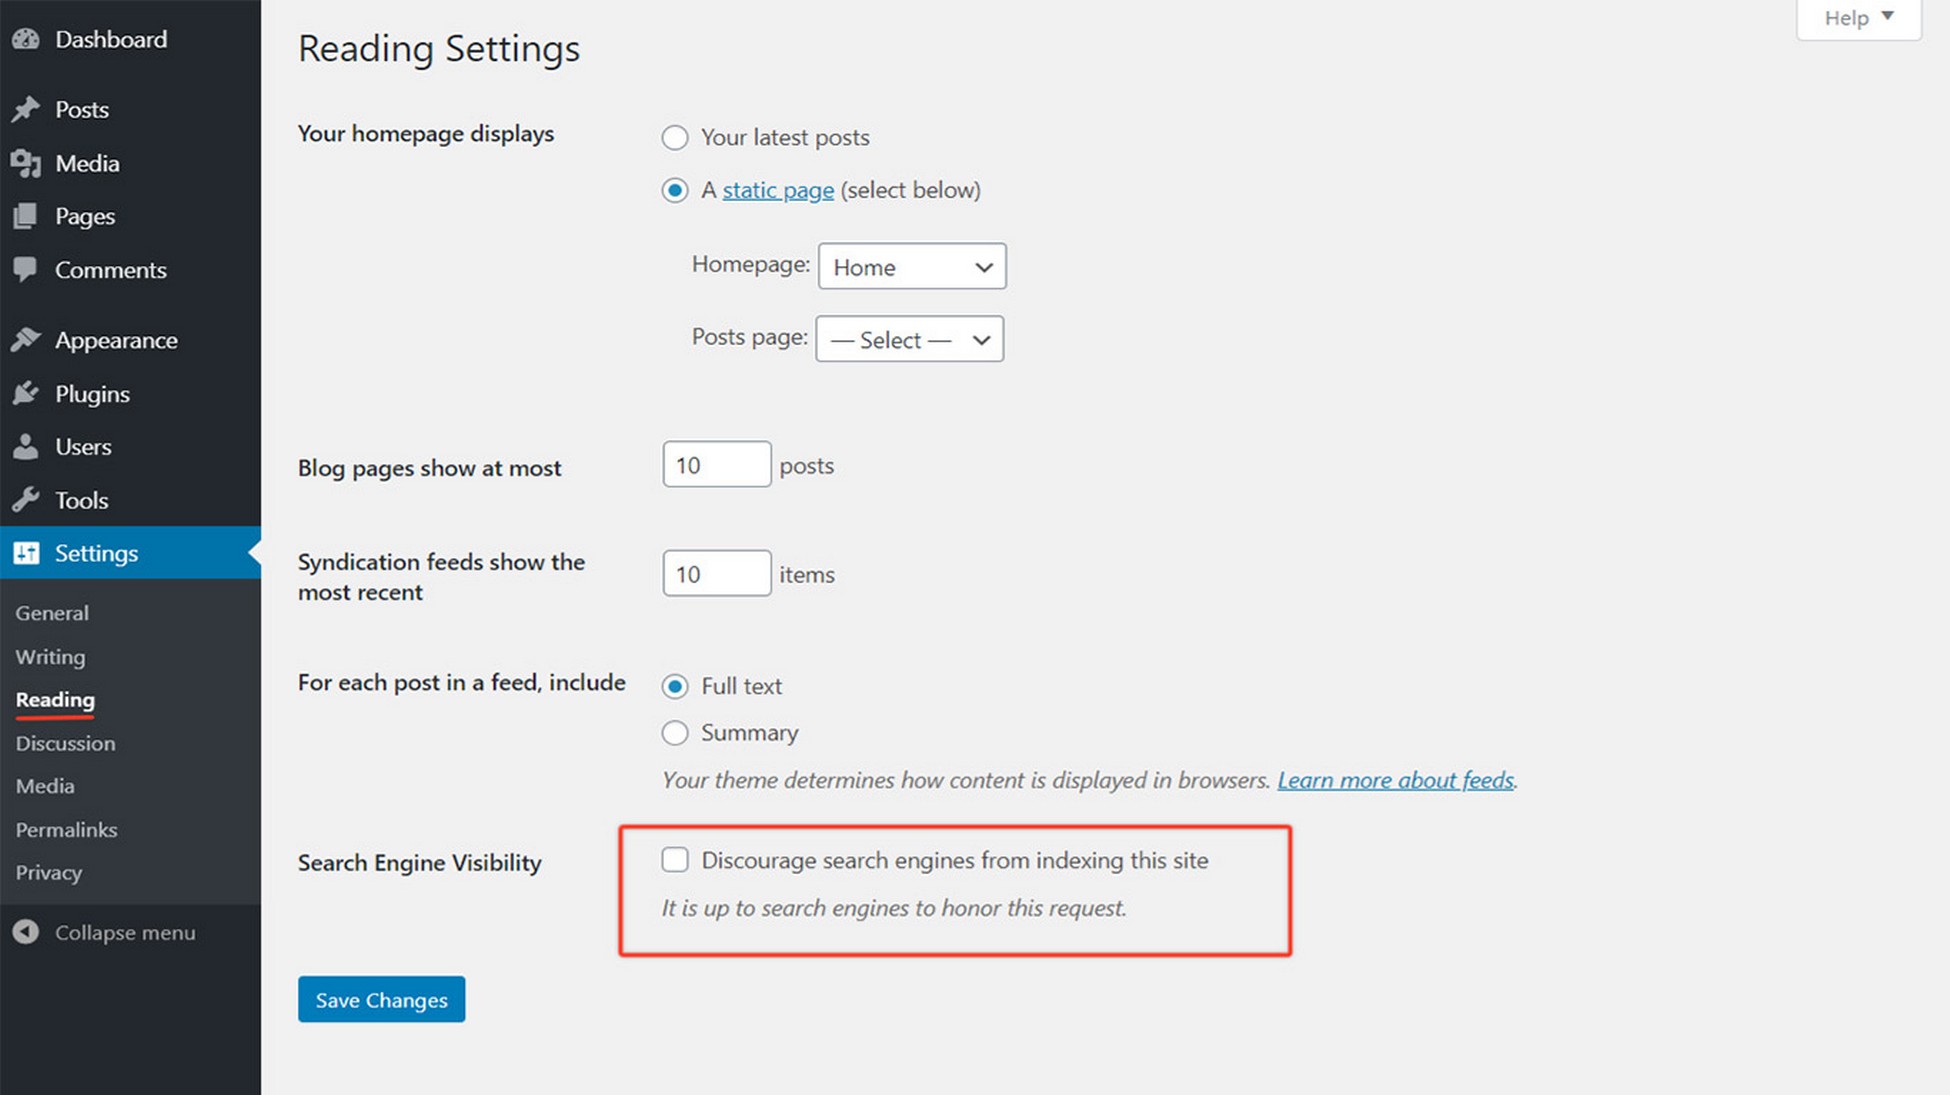
Make sure that the “Discourage search engine from indexing this site” is unchecked.
Permalink settings
A permalink is a permanent link to your website and we discussed this earlier.
The settings should rarely be changed on a live site as it can damage existing rankings.
Therefore, we suggest being careful of the option you’ll pick in the very beginning.
Navigate to Settings > Permalinks to choose the permanent structure for your blog.
Optimize website performance
Before jumping into optimizing your website, you need to be aware of how your website is doing at the moment.
It helps you keep better track of the efforts you put in on your website.
Increase website speed
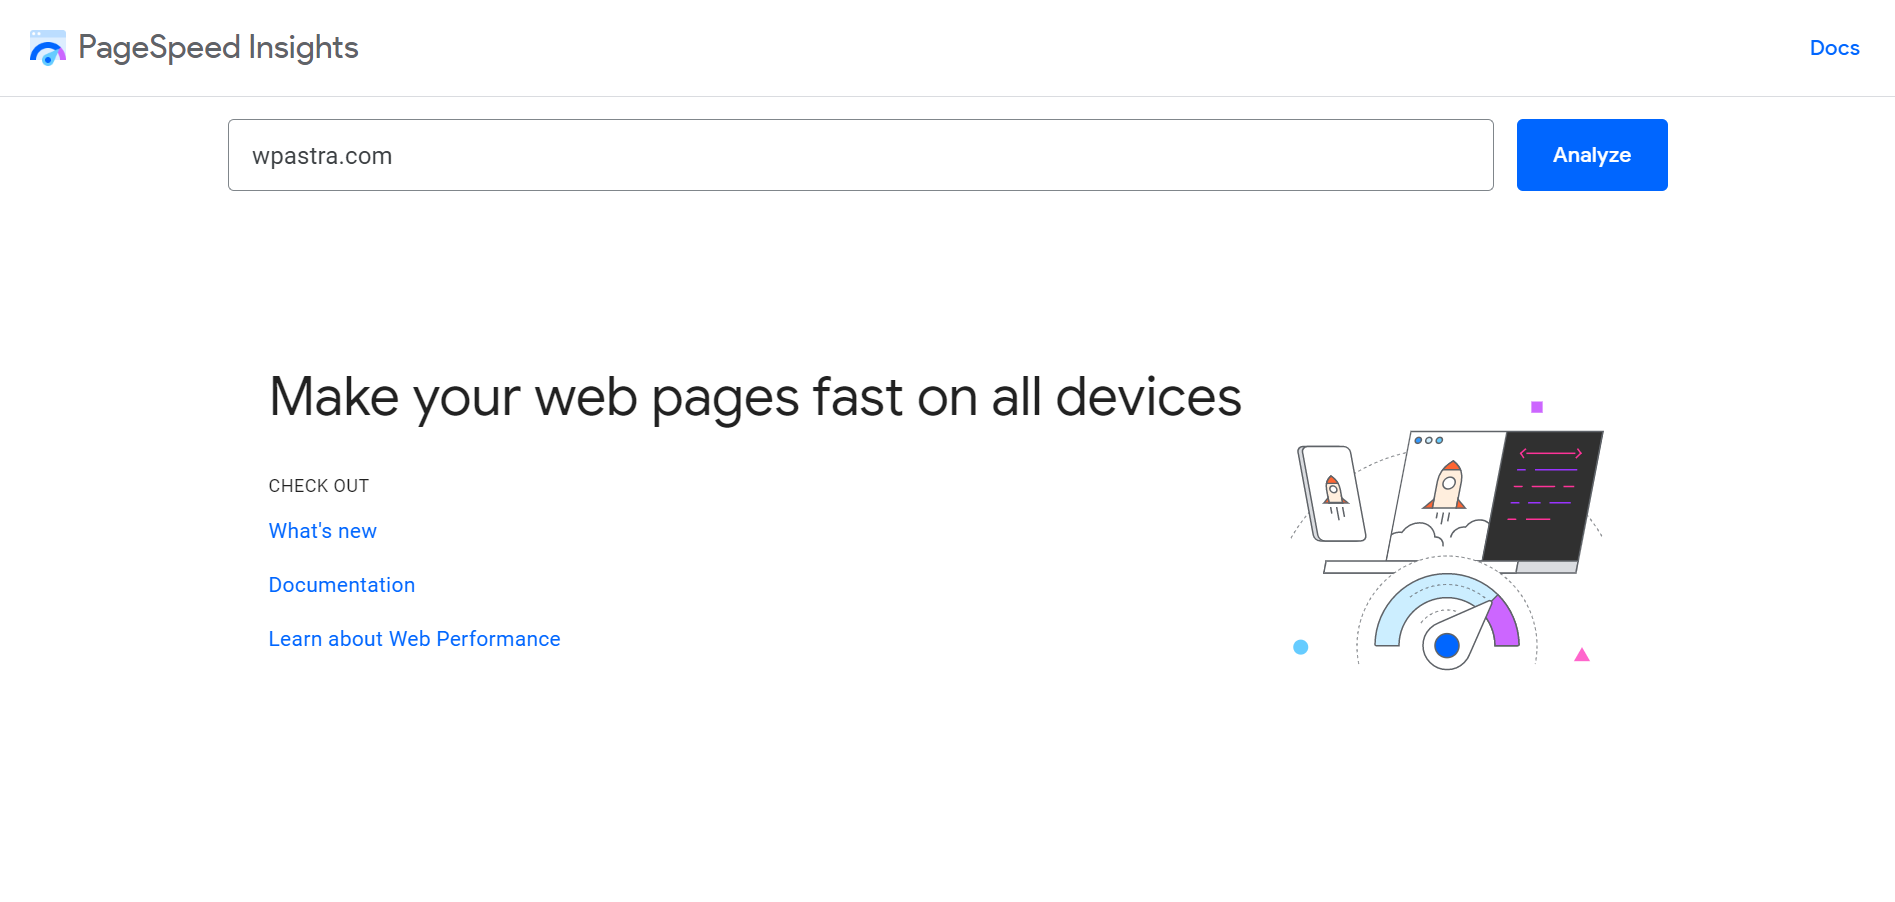
Various tools on the internet like Google’s PageSpeed Insights allow you to check website performance.
One of the most important aspects where you can consider the speed of your website is choosing a theme that uses the best coding practices.
Here is a recommended article to read on the speed up WordPress site.
Choose a theme that delivers the look and feel your readers will appreciate with the speed that search engines and users will love.
That theme will also need to be fully responsive.
- As of February 2023, 60.04% of all website traffic comes from mobile
- Over 75% of mobile searches occur at home or the office
- Search engines prioritize mobile-friendly websites
The factor that determines whether your website is mobile friendly or not is the theme you use!
Nearly all the themes claim to be responsive to mobile devices, but are they?
Here’s a link to test if a WordPress theme is mobile-friendly or not.
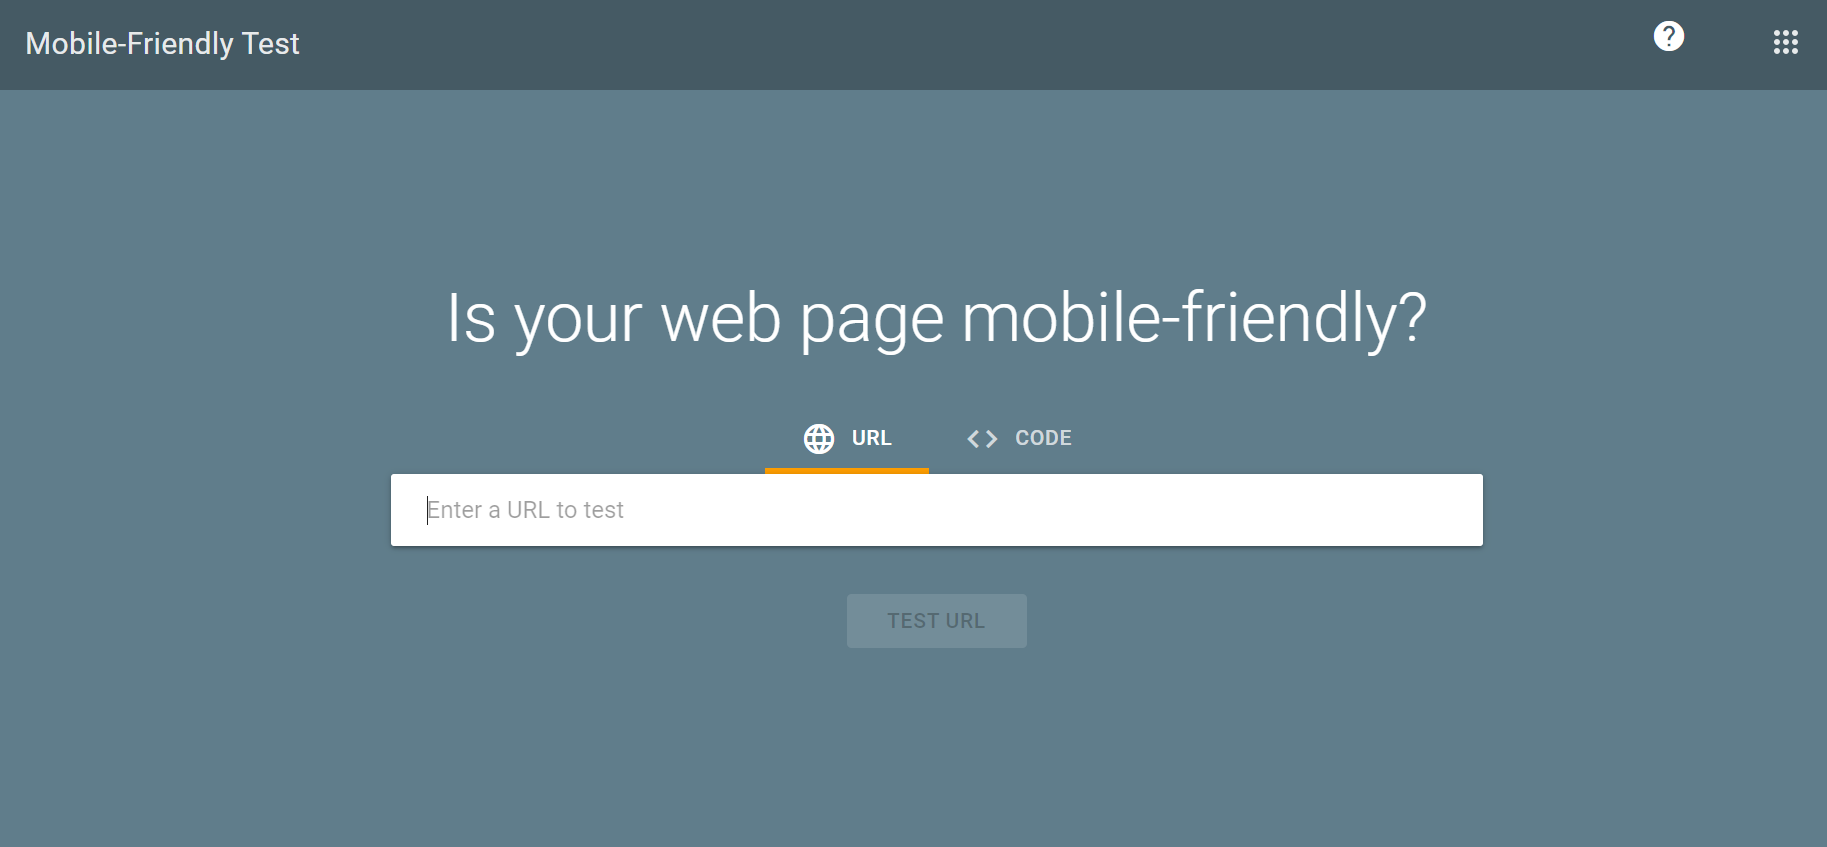
We suggest testing the theme for its mobile friendliness before using it on your website.
How to make money from your blog
Once you’ve taken all the necessary steps to build your professional blog, it’s now time to grow it.
With time, consistency, and patience, you can start earning from your blog.
Stats show that successful bloggers can earn more than $100,000 a year through blogging.
The sky’s the limit when it comes to earning money from a blog.
Here are some of the easiest ways to get you started!
Display ads
Ads are one of the easiest ways to monetize your blog.
Once you start attracting traffic to your website, you can connect with media partners and display ads.
When your visitors click on these ads, you get paid per click.
Each ad has a specific Cost per Click (CPC) that the business owners pay. It doesn’t pay much, but it’s a start!
The top three media buying companies that allow you to display ads on your website are Google Adsense, Ezoic, and Media.net.
Affiliate marketing
Affiliate marketing is where you recommend a product to your audience.
It uses a special tracking link known as an affiliate link.
When any of your audience purchases the product through the link, you get a percentage of the revenue generated.
When you write on your blog, you can find tons of products or services related to your field.
Amazon Associates Program, Commission Junction, ShareASale, Impact, and individual affiliate programs provide great earning potential.
Just make sure you’re clear about affiliate content as your readers need to be able to trust you!

Sponsored reviews
A sponsored review is an excellent alternative to ads. A company pays you to write a review of one of their products and you get paid for doing so.
It is somewhat similar to affiliate marketing except that you don’t need any tracking links.
Like affiliate marketing, you need to be transparent about sponsored posts so your reader knows exactly what they are getting.
Some other popular ways of earning money through blogs are selling physical and digital products, creating a membership website and premium newsletters.
What types of blogs can I create with WordPress?
Let’s look at the types of blog websites you can create using WordPress!
Fashion blog
A fashion blog website focuses on fashion-related content. It can be clothing, accessories, beauty products or style tips.
Global fashion influencer marketing is expected to expand at a compound annual growth rate of 35.7% from 2020 to 2027.
If you’re thinking of becoming a fashion blogger, WordPress is the perfect platform to get you started!
You can create a responsive website to share your personal style, showcase fashion trends and offer advice to readers.

Fashion blogs are usually a mix of text, images and videos that provide engaging and informative content.
They can also include features like a shopping guide, product reviews, and links to fashion-related resources.
The main goal of a fashion blog is to inspire and inform readers, and build a community around fashion and style.
Lifestyle blog

Lifestyle bloggers can make an average annual salary of $55,617 with $13,000 being the lowest and $145,000 the highest.
Lifestyle blogs focus on a range of topics related to personal lifestyles. It can be fashion, beauty, home decor, food, travel, and wellness.
Bloggers can share their personal experiences, opinions, and tips on various aspects of their lives.
They can include tutorials, recipes, travel guides, and beauty hacks.
Food blog
The food blogging niche has the most blogs, with 50,000+ monthly posts. It also has the highest median monthly income – $9,169, making it a profitable niche.
Food blog websites focus on food and cooking-related content. Topics can include recipes, tips, restaurant reviews, and food-related news.
Food bloggers create a website to share their culinary experience and showcase their cooking skills.
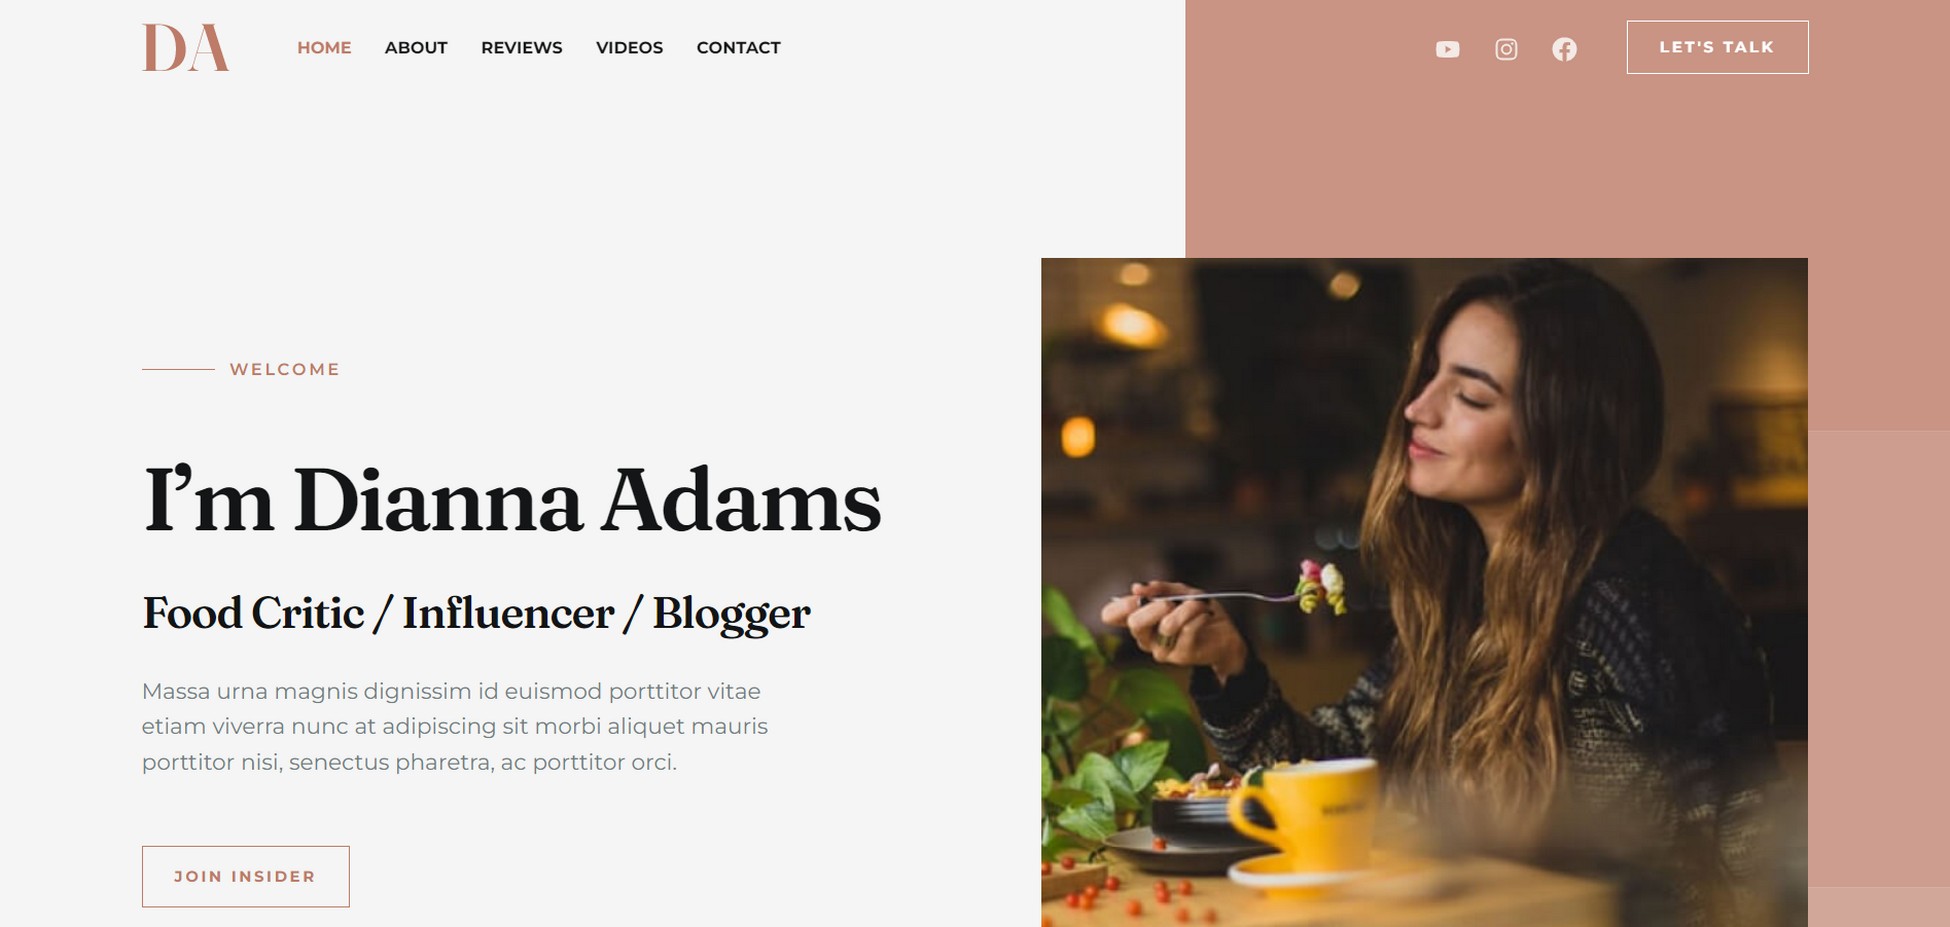
The goal of a food blog website is to inspire the audience on how they can have a better food experience.
It can be a restaurant review where you might suggest a dish to try out or a recipe to cook a certain dish or even tips on how food can taste better.
Travel blog
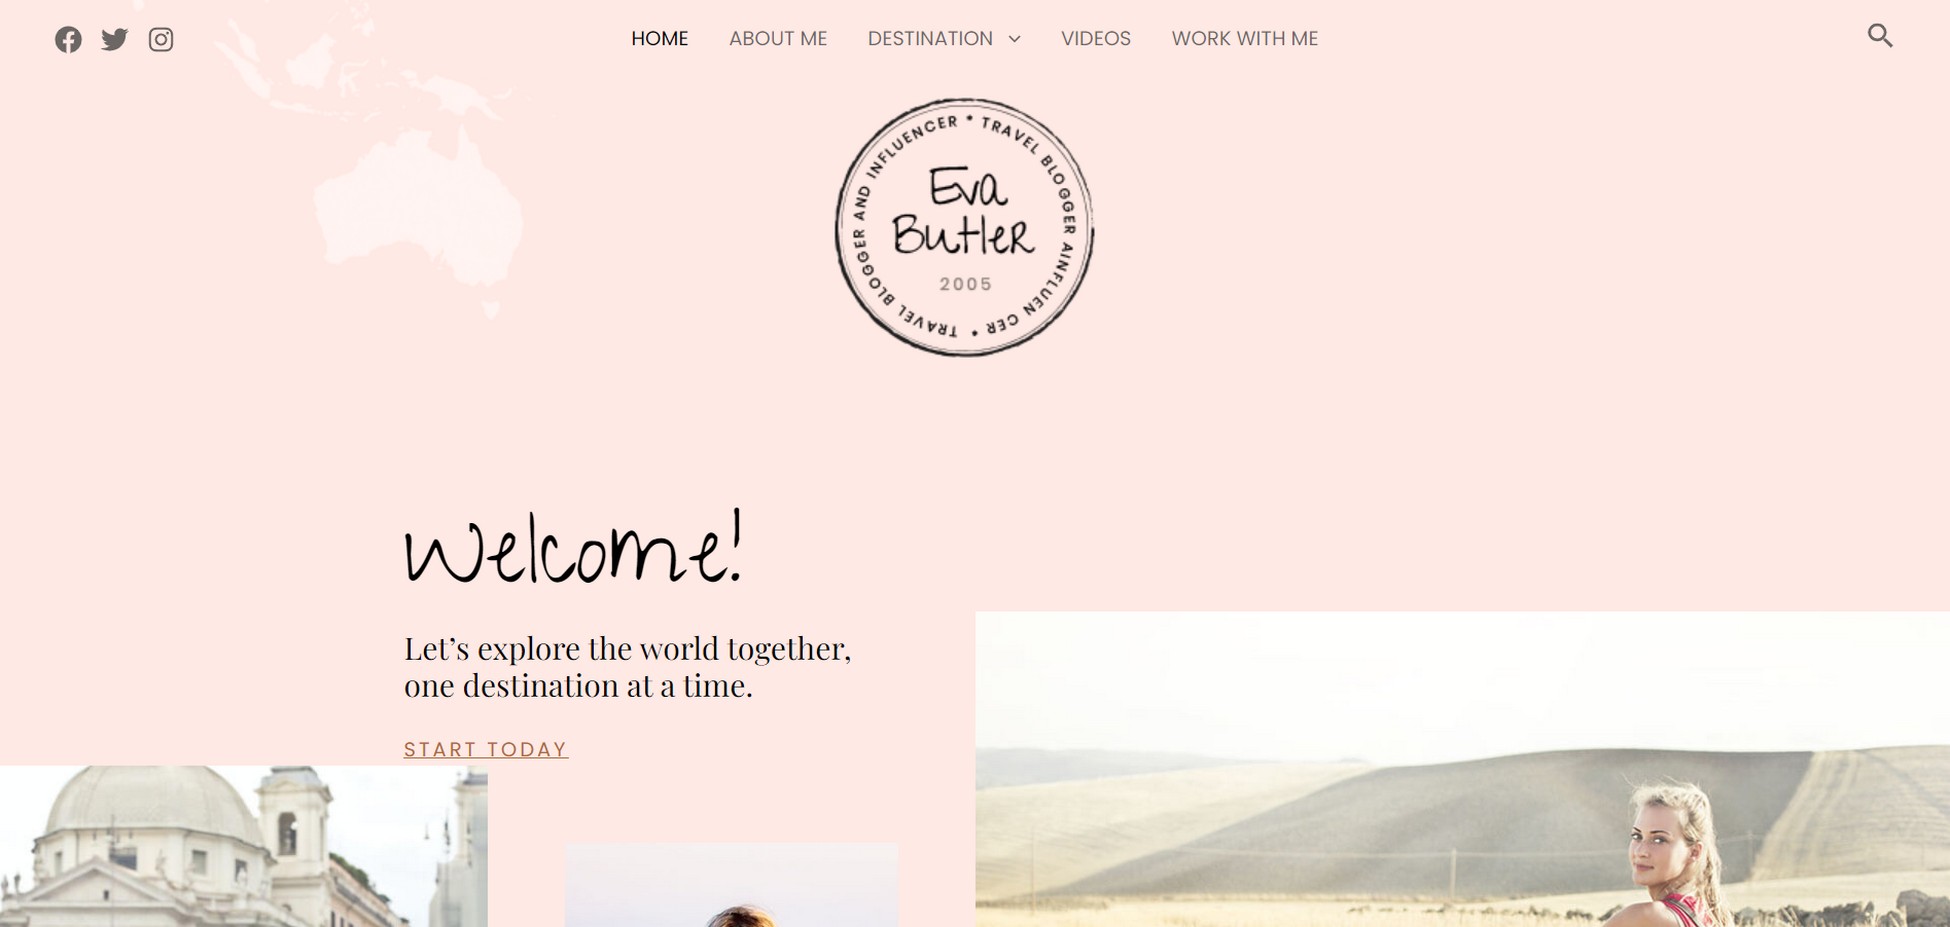
You can easily create a travel blog with WordPress!
The average income of travel bloggers is $5,000 per month. That can be composed of ad revenue, affiliate income and the sale of products and services.
You can find a variety of content varying from destination reviews, travel tips, personal travel experiences.
Travel bloggers use their websites to share their travel with others and inspire them to explore new destinations.
The website features a mix of images, videos, and text providing informative content.
Creating a WordPress Blog FAQs
If you still have questions on creating a WordPress blog, here are a few more answers.
Wrapping Up
There’s nothing quite like running your own blog. It’s a taste of independence, an outlet for creativity and a place for community.
It’s also easier to set up than you might think and while running it takes effort, when you break everything down, each individual step is actually very straightforward.
Don’t forget, you’re not alone on this journey. We’ll be with you every step of the way to explain, encourage and entertain.
I hope you’re as excited as we are to begin our blogging journey!
Disclosure: This blog may contain affiliate links. If you make a purchase through one of these links, we may receive a small commission. Read disclosure. Rest assured that we only recommend products that we have personally used and believe will add value to our readers. Thanks for your support!




I have gone through the article. It appeared nice and encouraging to me. I loved the words “you’re not alone on this journey. We’ll be with you every step of the way to explain, encourage and entertain.”
Hello Mottakin,
So glad to hear that you find our words so encouraging and the article useful. 🙂
Thanks for share your article.