If you’re wondering how to set up a WordPress AMP page, you’re not alone.
Website managers, in an attempt to optimize their site for mobile users, research Google AMP, only to find more questions than answers.
What in the world is AMP? Why do I need it for my website? If I want AMP pages, how do I even get started?
We’ll be answering these questions and more in this AMP guide.
Here’s what we’ll cover:
What Is Google AMP?
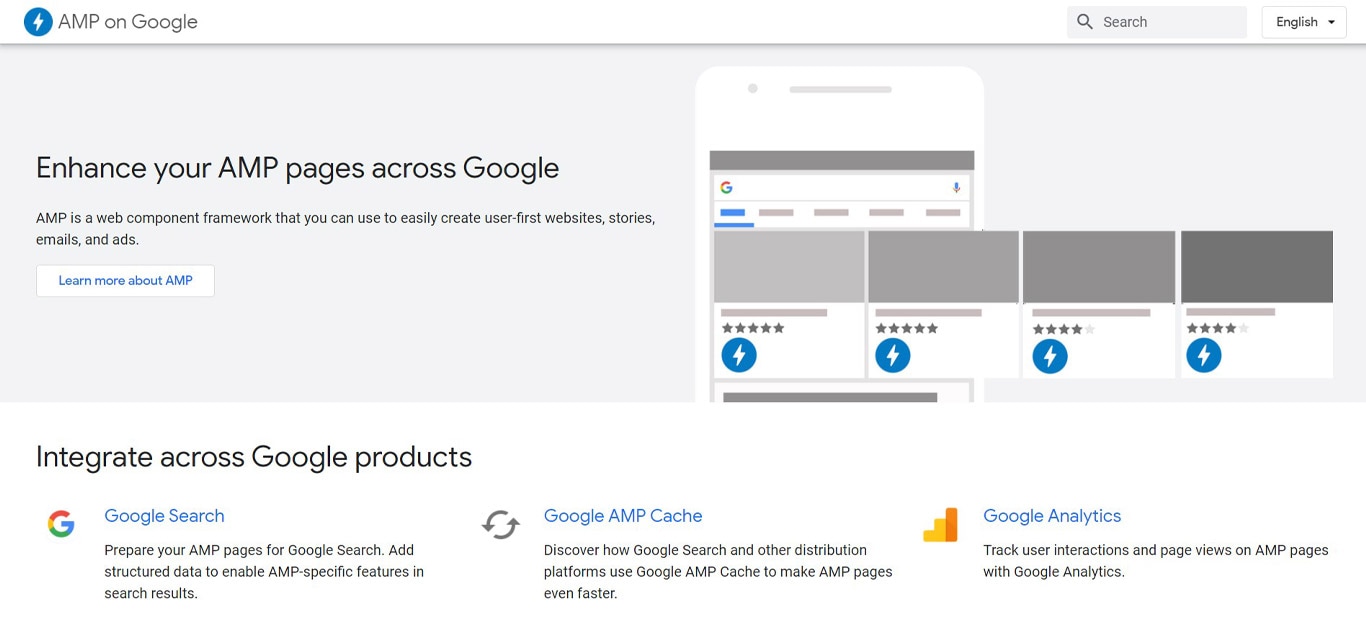
Google AMP stands for Google Accelerated Mobile Pages and it’s an open-source catalog of website pages that are mobile-friendly. AMP is meant to make these mobile pages load faster and easier to scroll through.
In reality, what happens is that Google AMP creates a duplicate of your website in AMP HTML format, which is built upon previously existing web technologies.
This strips away a lot of the elements on your site that make it load slower, in turn, making it faster. On top of that, Google then “flattens” your site to make it load even quicker.
Google released AMP in October 2015 with its main focus being speed. That makes sense because 53% of people leave a website if it takes longer than three seconds to load. And 73% of mobile users say they’ve visited a website that was too slow.
But how do these numbers affect your bottom line? Why does AMP matter?
AMP matters because of this statistic: a one-second delay in load time can result in a 7% loss of conversions.
Today, many businesses rely on their websites to convert, as is probably the case with your business. So you can see why a fast load time can potentially make or break your company’s growth.
Here’s another reason AMP is important: if a search engine sees that your site won’t load quickly enough for mobile users, Google won’t show it at the top of the search results.
This is why many of the well-known companies have implemented AMP on their sites, including WordPress, Pinterest, LinkedIn, and Reddit.
In keeping up with this new innovation, our own theme, Astra, is actually one of the very few themes with native compatibility to AMP. Announced early this year, it’s one of the bigger leaps that we have taken to make sure that your WordPress site is up-to-date with speed, across all devices and platforms!
Pros of Using AMP in WordPress Website
How can using a WordPress AMP site benefit your traffic and business? Here are the upsides of optimizing for AMP.
AMP Is Free
Since AMP launched, it has been completely free to use for anybody. It’s one of the many free tools Google offers for website managers. Basically, Google wants people to have a better experience using their service, and your site is a part of that experience. So why charge you to make your site easier to use?
Search Engine Optimization Boost
Google prefers to show users sites that are a part of AMP, so having AMP pages on your site gives you a better chance of showing up on the first page of search results.
Also, using AMP helps bolster your page speed, which is an important factor when it comes to SEO. The faster your site loads, the more likely Google will give it a better ranking in the search results.
Plus, Google AMP makes sure your site appears in the Google News carousel, which is a higher priority than above-the-fold results on mobile.
Better User Experience With AMP WordPress Websites
Using AMP not only loads your website faster, but it’s also more convenient for site visitors. Speed is one of the most important factors for a website. As we mentioned above, most people leave a website if it doesn’t load fast enough.
So giving your users a better experience with AMP means you could see fewer bounces, happier customers, and a possible increase in sales.
Improved Server Performance
Because AMP strips away the elements of your page that slow it down, the necessary bandwidth goes down. And the less bandwidth your site requires, the better your server can perform.
Prevents Large Frameworks
Participating in AMP can help prevent sites from using big Cascading Style Sheets (CSS) and JavaScript (JS) frameworks.
Advertising Options
If your site is in AMP, you have advertising options that can be exclusive to mobile users visiting your site. Ads will appear differently on your AMP pages than on your regular site, which means you can create and share mobile-specific ads.
Automatic Image Optimization
When you create an AMP version of your site, all of your images are optimized for mobile users, including converting images to WebP format when needed. So you can still deliver an easy-on-the-eyes blog post or page to your mobile visitors.
It’s Easier Than Expected
Implementing AMP on your WordPress site is much easier than a lot of other website-building platforms, thanks to some very helpful plugins (more on that below).
It’s Open-Source
Because AMP is open-source, it continues to improve. Plus, it’s more secure because everything is public, which means there’s less chance of someone or something being able to corrupt the whole system.
Did you know, Astra is actually one of the very few themes, aside from the default WordPress themes that natively support AMP. So why not give it a go and try AMP on Astra?
How To Setup Google AMP for WordPress – Enable AMP in WordPress
Now let’s go through the steps to set up Google AMP for your WordPress website. It’s not super complicated, so this walkthrough should eliminate the chance of errors.
We’ll be using the official WordPress AMP plugin and the AMP for WP as examples.
1. Install and Activate the AMP Plugin
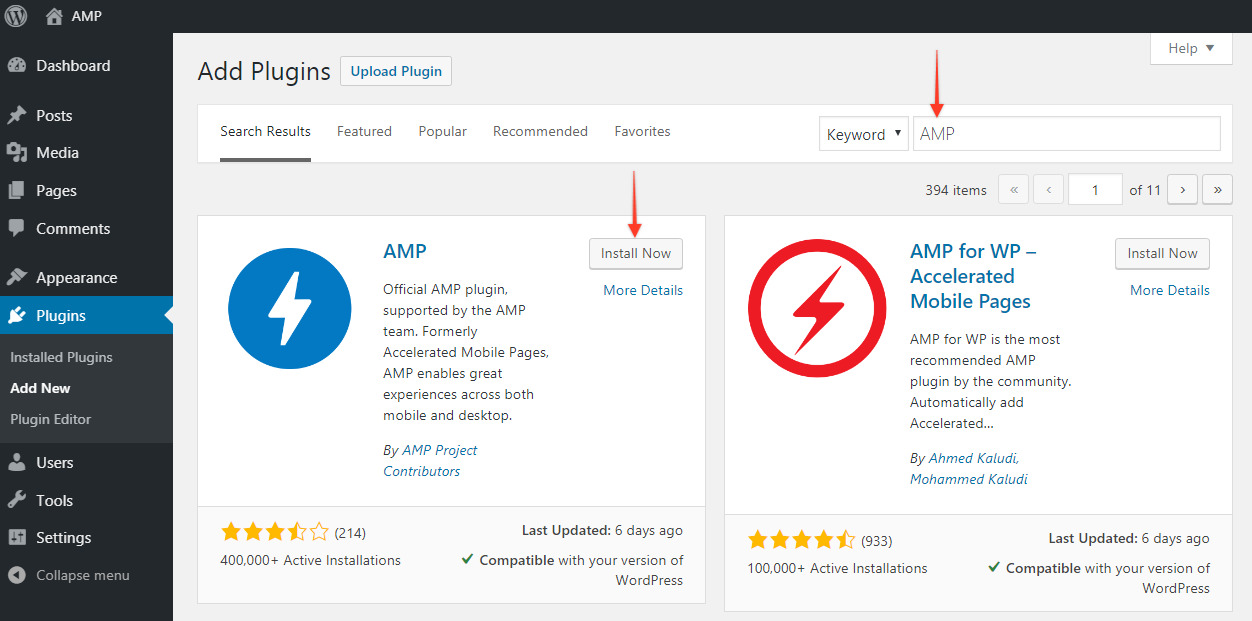
If you’re using WordPress.com, you won’t be able to install any plugins unless you upgrade to their business plan.
However, if you have a self-hosted site on WordPress.org, you’ll be able to install any plugin you need.
To install a plugin, you can use the search function by going to Plugins → Add New, then typing “AMP plugin” in the search bar. Once you find the plugin, click “Install Now.”
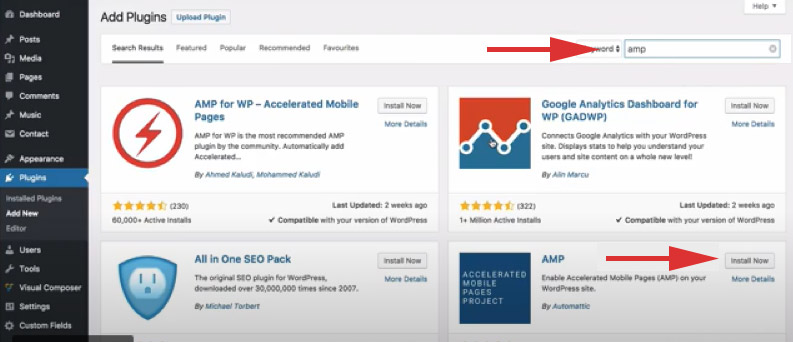
If you want to upload the AMP plugin from your computer, simply hit the “Upload Plugin” button at the top of the page and upload your plugin.
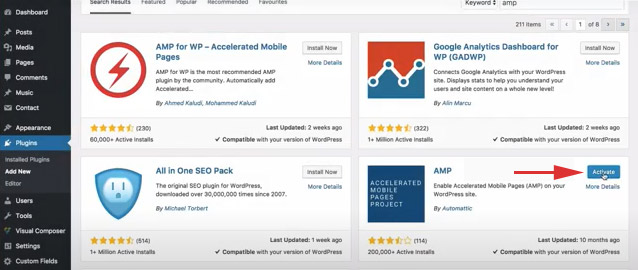
Next, you’ll need to activate it. On the “Installing Plugin” page, hit the “Activate Plugin” link to make the plugin start working on your site.
2. Adjust the Settings
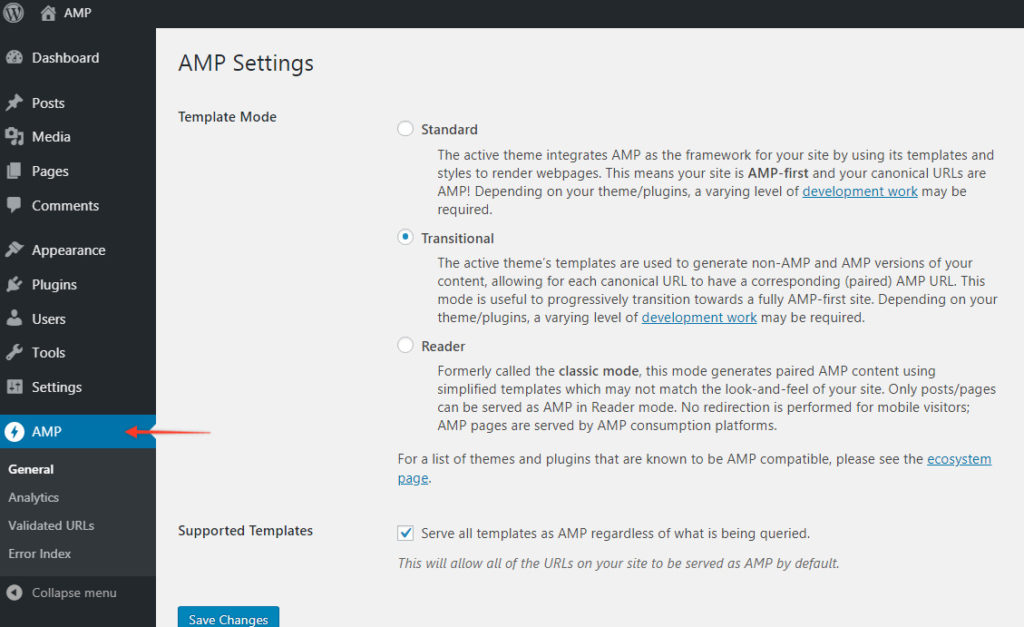
After you’ve activated the plugin, you can now adjust the settings in order to customize how your AMP pages look.
Go to the AMP > General tab in the dashboard. This is where you can configure the plugin.
Once you’ve adjusted the settings to your liking, hit the “Publish” button. Your AMP site will now be visible to users and discoverable by Google.
You’re also able to choose if your posts, pages, or both will display on your AMP site. Deselect the checkbox for Supported Templates and you will see more options.
Choose required options and click “Save Changes.”
If you’re still looking for other customization options you can use several plugins like the Glue for Yoast SEO & AMP to integrate the Yoast SEO plugin into your AMP setup. Through good collaboration with Google the functionality of this plugin is now part of both Yoast SEO and the official AMP plugin.
But to add this plugin simply go to “Plugins”, click on “Add New”, then search for the “Yoast SEO & AMP”
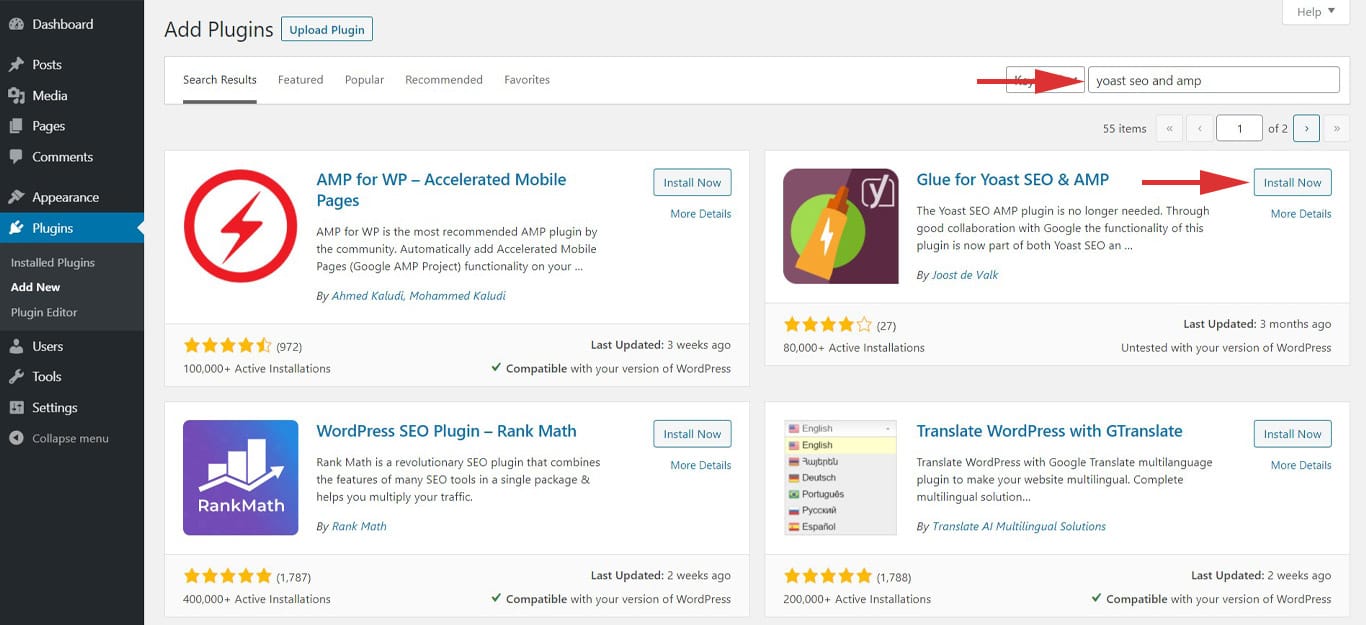
Click on “Install Now” and then “Activate”. After activating the Yoast SEO plugin, navigate to “SEO” then click on “AMP”. It will provide you with other customization options for your page, just don’t forget to click on the “Save Changes” button.
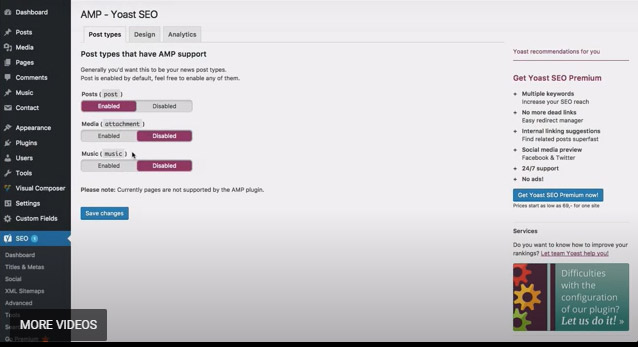
3. Preview Your AMP Pages
Now you can preview your AMP site before you publish it. Just visit any one of your pages or blog posts and add /amp/ to the end of the URL.
Here’s an example:
http://yoursite.com/blog-post-title/amp/
With that, you’ll know if your AMP site is ready to go.
How to Setup Google AMP for WP Plugin
If you’re looking for more advanced design and functionality, easier Google Analytics integration and other additional tools like WooCommerce, Alex for your SEO strategies and OneSignal push-button notifications, among others.
1. Install and Activate the AMP for WP plugin
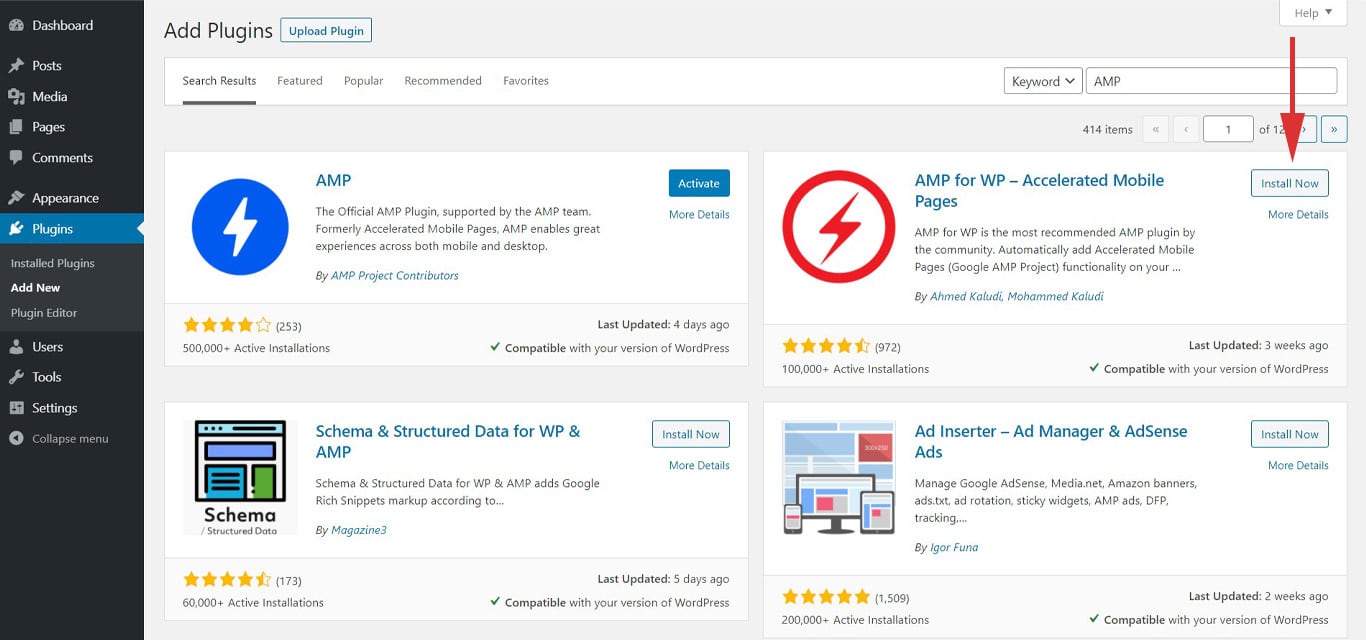
To install this AMP for WP plugin also navigate to “Plugins”, click on “Add New”, and then search for “AMP for WP”. Click on “Install” and then “Activate” the plugin.
2. Adjust the Settings
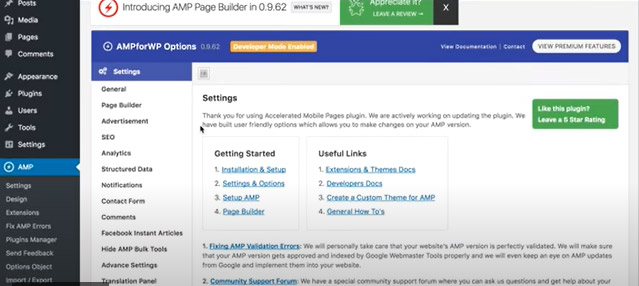
Now you can use the AMP for WP plugin, simply navigate to “AMP” in your WordPress dashboard. This will open the customizer divided into two sections which is the Settings and the Design section.
The Settings section shows mostly the backend features of the plugin which includes, among others, the following:
- SEO – for meta description and integration with SEO plugins.
- Performance – for toggling file minification on and off for site speed.
- Analytics – for integration with Google Tag Manager.
- Advanced Settings – for custom HTML for headers and footers, setting up mobile redirection and toggle retina images on and off.
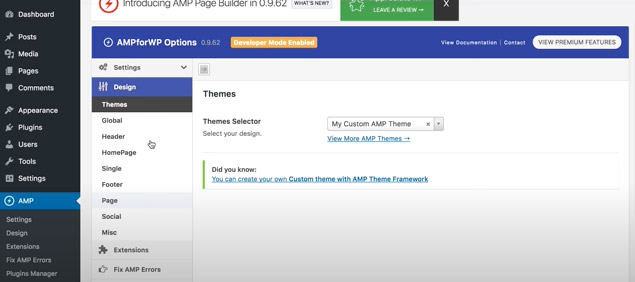
The other important section is the Design section which controls the look and feel of the AMP output which includes, among others, the following:
- Theme Selector – for selecting themes from the drop-down menu.
- Design, header and footer, and homepage sidebar – for color schemes and typography
- Social – for social media display selection.
Always click the “Save Changes” button when you’re done customizing your AMP website.
How to Test That Google AMP Works Correctly
Now you need to make sure your AMP site is working okay. There are two main ways you can validate your WordPress AMP, both of which will give you a readout of your code and any errors you’ll need to correct.
Google’s AMP Testing Tool
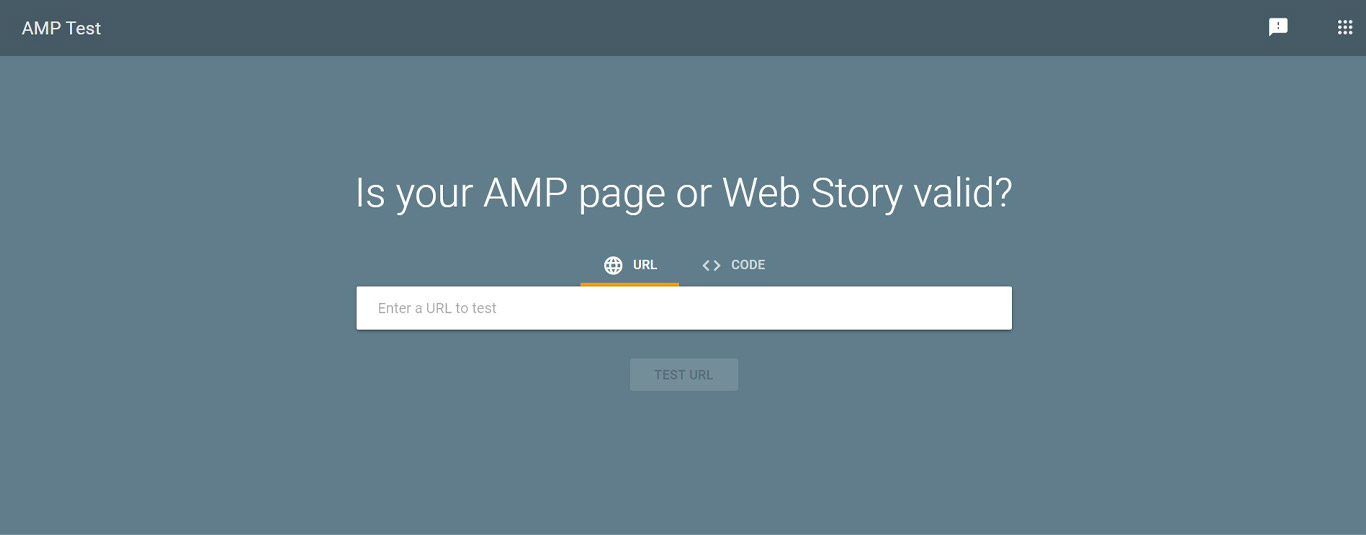
The way you test your Google AMP site is through Google’s AMP testing tool. They launched it in October 2016, just a year after AMP itself launched.
So how do you use the Google AMP testing tool?
Well, once you land on the testing tool frontpage, simply enter the URL of your site, page, or post into the box and hit “Test URL.” Alternatively, you can paste the code of your website and click “Test URL.”
The Googlebot will then analyze your site’s AMP optimization, including the validity of your AMP markup and structured data.
If you have a valid AMP-optimized site, this tool will show you a preview of how your AMP pages may look on the Google search results page.
This tool makes it much easier to find any AMP errors on your site, and it can help show you the code that’s causing the problem. You can also easily share the analysis results with your team members by clicking the share button in the bottom-right corner.
Manual Validation
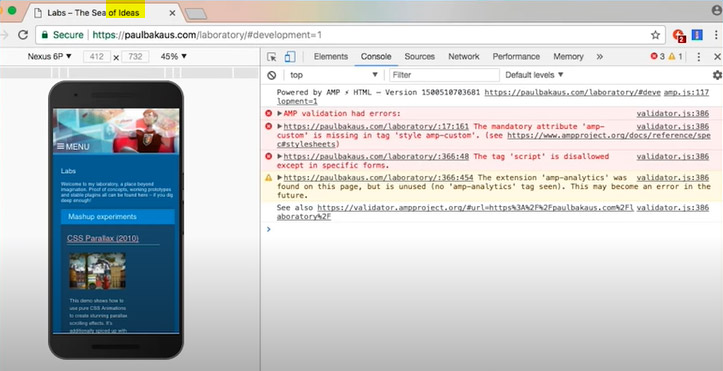
You can also validate your WordPress AMP manually.
First, open one of your AMP pages. Then add the following to the of the URL:
#development=1
Next, open up the developer tools console in your browser. If your AMP page has any errors, this is where you’ll see them highlighted in red. You’ll also see an explanation of the cause.
Many times, validation errors happen because of invalid prefixes, incorrect code and/or tags that aren’t allowed. Most of the time, the solution is given right next to the error explanation.
But that’s not always the case. When that happens, you’ll need to know how to correct those problems.
Top 4 WordPress AMP Plugins For 2026
Manually setting your site up on Google AMP is complicated. Fortunately, there are plenty of AMP plugins for WordPress that make this process very simple.
So let’s take a look at the four best WordPress AMP plugins.
- AMP (The Official WordPress Plugin)
- AMP for WP
- AMP WP by Pixelative
- AMP on WordPress – weeblrAMP CE
1. AMP (The Official WordPress Plugin)
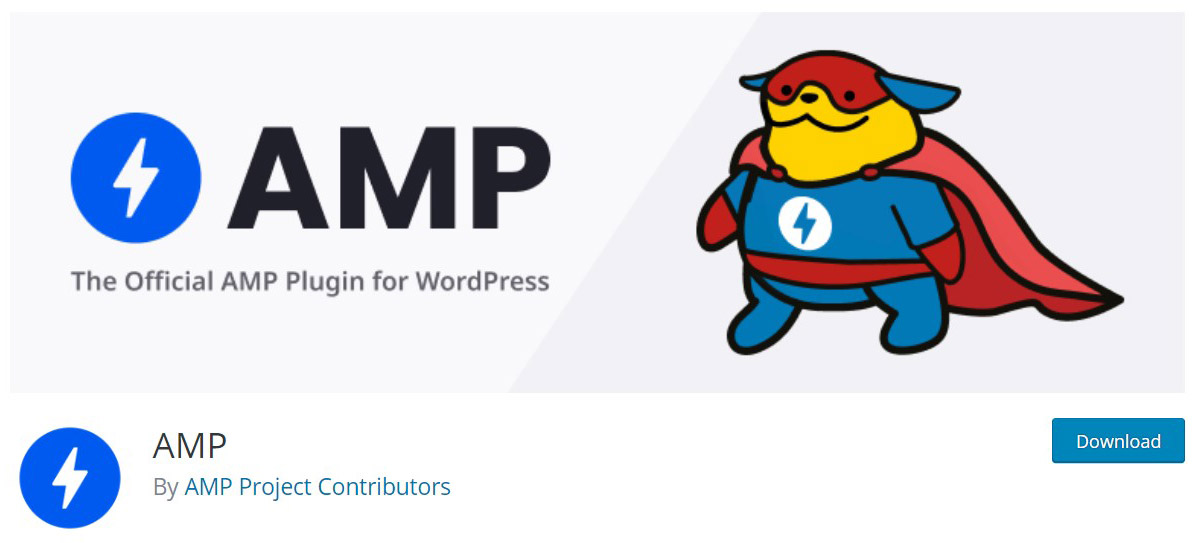
WordPress’ AMP plugin is good for both beginners and those who are looking to up their AMP optimization on a WordPress site. However, WP beginners may run into more of a learning curve than experts as it does require some simple coding.
This plugin gives you a guide that shows how you can customize your AMP site. Even though it may not be as user-friendly as some of the other open-source plugins, they are constantly developing it and improving it.
2. AMP for WP
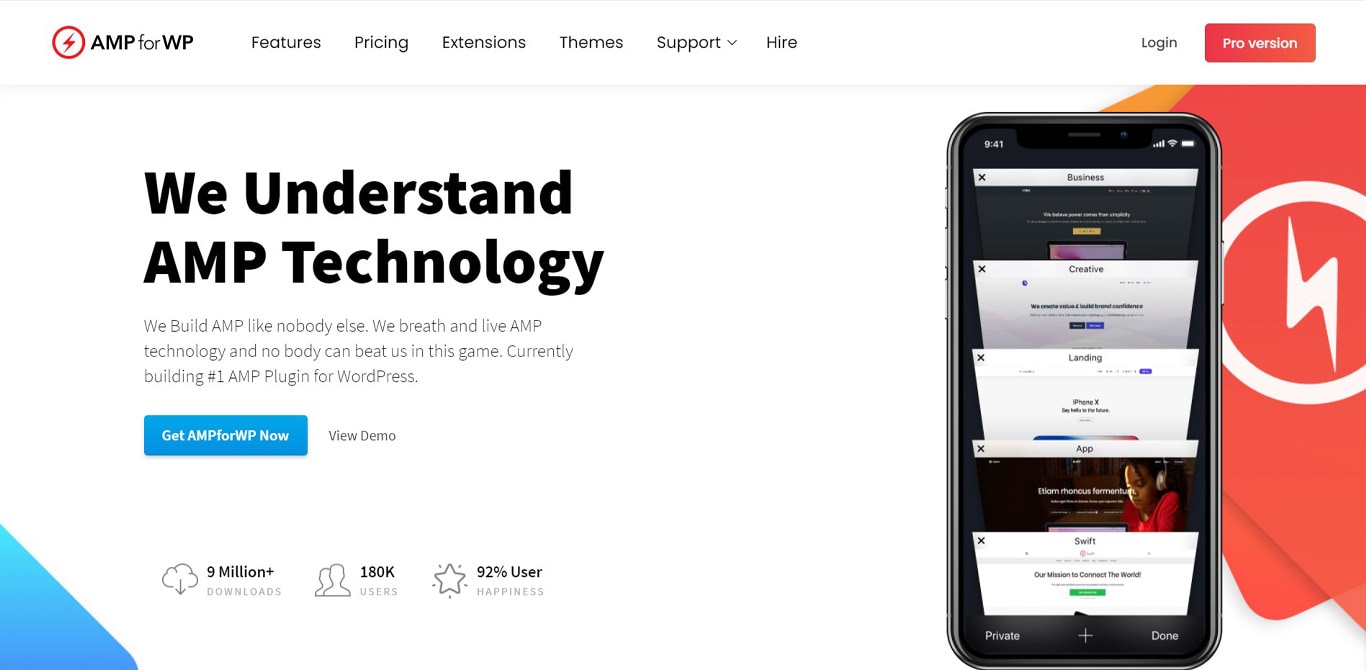
AMP for WP is a plugin that optimizes your site for Google AMP. It comes with extensions, design tools, and additional support.
The developers regularly update it to remove bugs and add new features, so you won’t get stuck with a plugin that never gets better. It’s ideal for WordPress novices as it operates without requiring much experience.
AMP for WP allows you to create an AMP design that’s different from your regular website design, thanks to the drag-and-drop Custom AMP Editor feature. This gives you complete control over what your mobile users see rather than leaving that up to Google.
3. AMP WP
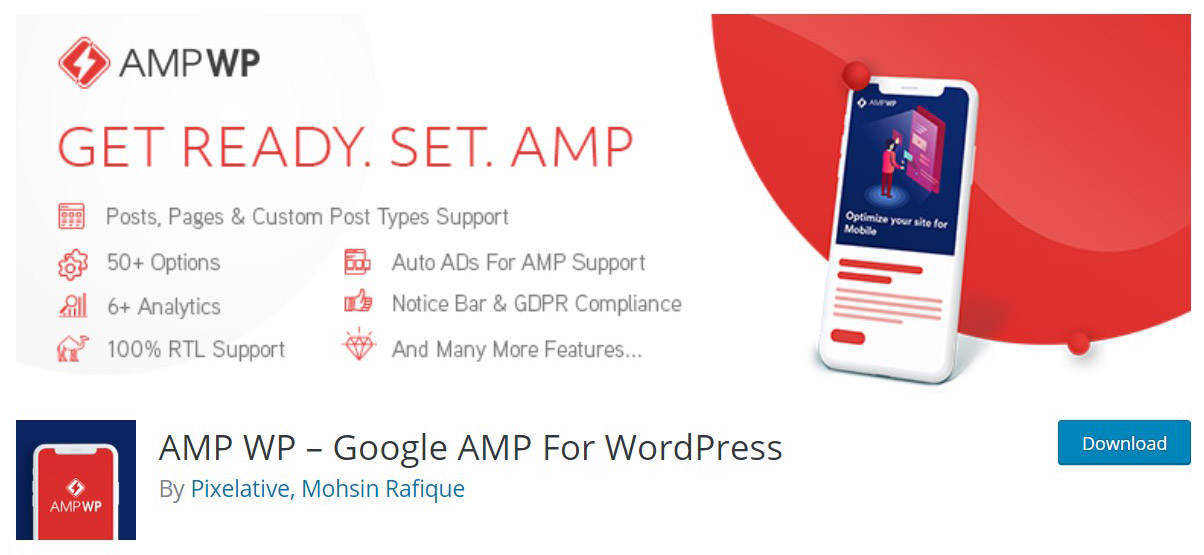
AMP WP says it can make your mobile site load 5X faster by using its features. That sounds like a bold claim, but it’s actually believable.
The list of free features is quite long and includes things like “Full Google AMP Support” and “Automattic AMP” Plugin Compatibility.”
When you install the plugin, you can choose automatic installation, which is where WordPress transfers all files for you and you won’t have to exit out of your web browser.
4. AMP on WordPress
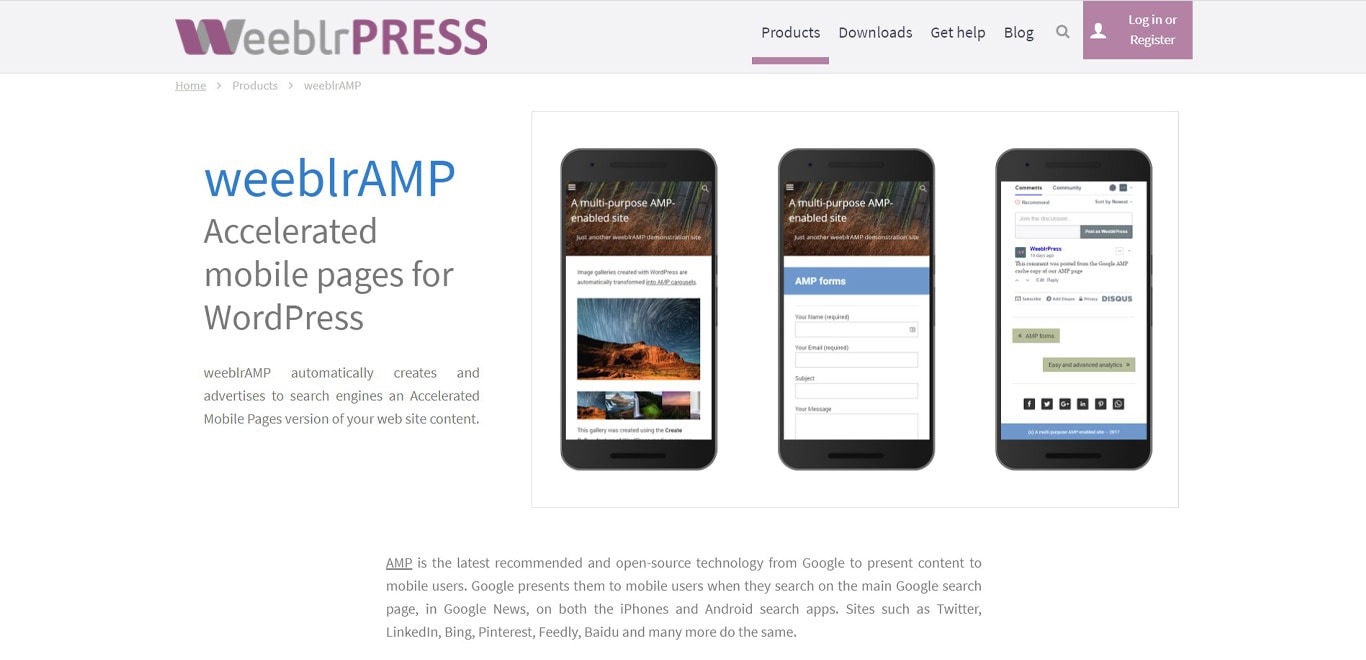
The AMP on WordPress – weeblrAMP CE plugin has both a free and a paid version for creating AMP pages. You can create a complete AMP version of your website, optimizing posts, pages, tags, categories, and even archives.
If you get the premium edition, you can automatically convert forms so users can easily still use them, including MailChimp signup forms, Contact Forms 7, WooCommerce, WPForms, and many more.
weeblrAMP comes with default settings, so it can start working for you right away. And if you’re a developer, you have control over every part of the AMP — you can override templates, filters, and actions. This means your AMP site will look and act as similarly as possible to your actual site.
Whether you’re a free user or a paid user, the interface is simply designed, although it is catered toward developers and designers.
Resolving Google AMP Issues
On top of giving you a readout of validation errors, Google will often notify you directly of any AMP issues as well as steps to correct them.
But you should be aware of the common AMP errors and how to fix them because Google doesn’t always provide the answer.
So below, you’ll see the most common AMP issues and how to resolve them. You can also see a full list of Google-specific AMP errors here.
- 404 Error (URL Not Found)
- AMP Blank Pages
- “A Value for the Logo Field Is Required”
- “Invalid URL for HTML Attribute ‘href’ in tag ‘a’”
- Duplicate .js Scripts
- Content Mismatch
1. 404 Error (URL Not Found)
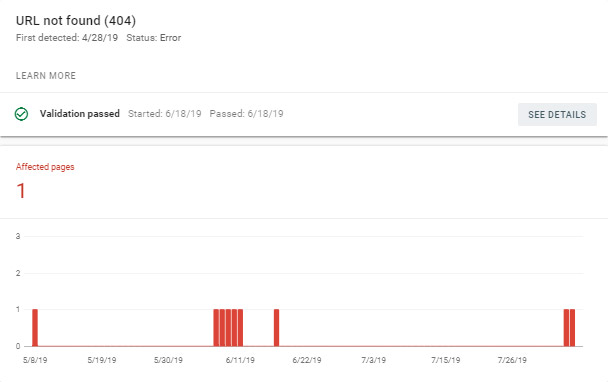
Like we talked about above, you should be able to add /amp/ onto the end of your AMP pages after installing the AMP plugin. However, it’s possible you’ll see a 404 error right after you install the plugin. Fortunately, it’s a minor problem with an easy fix.
You simply need to refresh the permalinks. To do this, go to Settings > Permalinks. Then, without making any changes, click “Save.”
This basically refreshes the permalink structure, including the AMP versions of the page. This should correct the 404 AMP issue instantly.
2. AMP Blank Pages
Depending on the AMP plugin you use, you may see your AMP site loading blank pages or just not loading at all. This usually means your AMP pages are there, but they have errors.
First, refresh the permalinks like you did with the 404 error. Settings > Permalinks > Save.
If that doesn’t correct the issue, then you’ll need to go to AMP > General. Ensure that both the “Templates” and “Pages” checkboxes are checked, then hit “Save.”
This should correct the problem. View the AMP version of any blog post or page to make sure.
3. “A Value for the Logo Field Is Required”
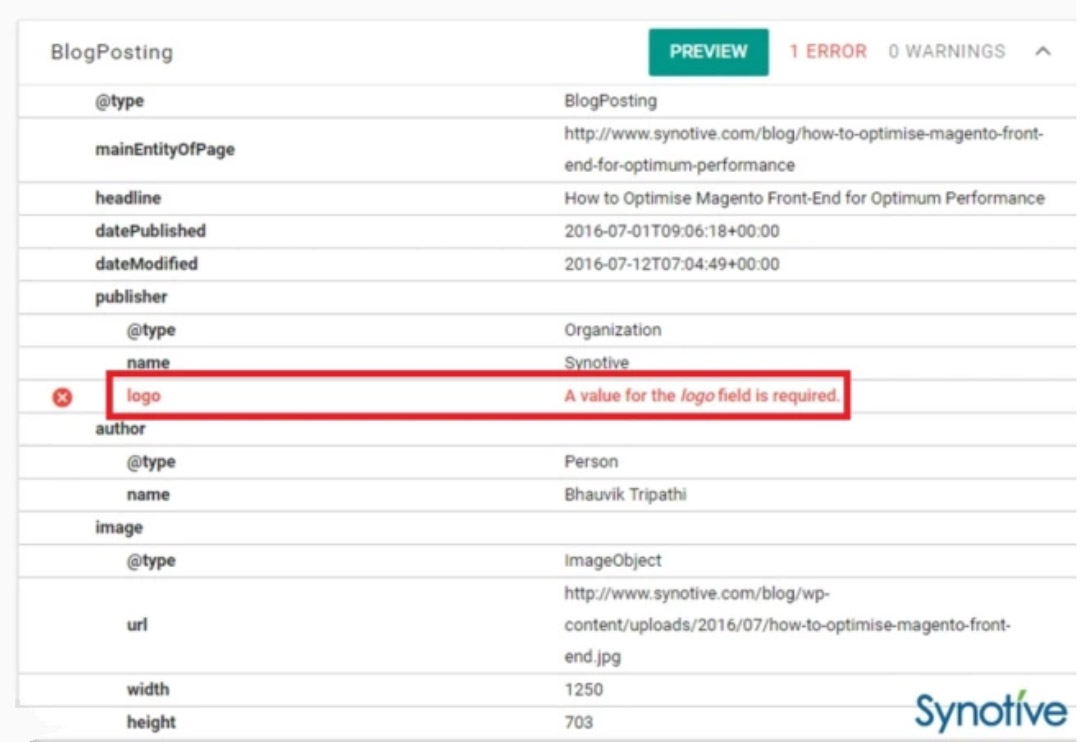
One of the most common AMP issues in WordPress is getting the error message, “A value for the logo field is required” in the error report.
This one has a simple solution. It means you haven’t added a favicon or logo to your AMP site.
To add a favicon, go to Appearance > Customize > Site Identity. Under “Site Icon,” click “Select Image” to upload your logo. Once uploaded, click “Publish.”
4. “Invalid URL for HTML Attribute ‘href’ in tag ‘a’”
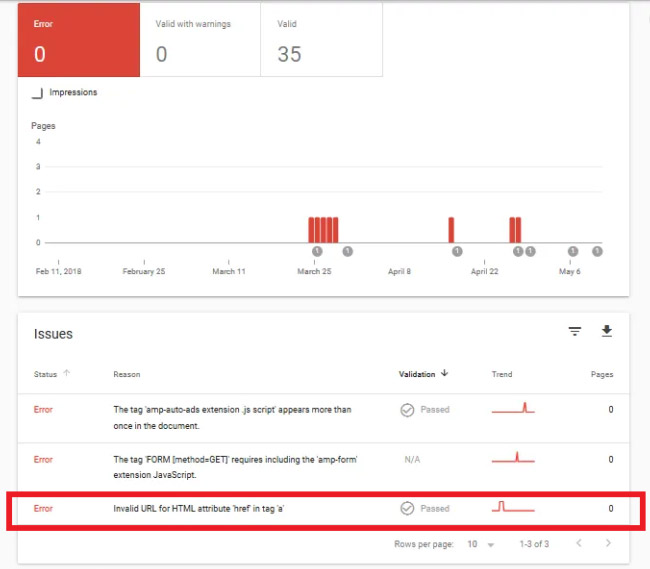
If your error report shows “invalid URL for HTML attribute ‘href’ in tag ‘a’” or something similar, this means your AMP site has a link that points to a nonexistent or 404-error website.
To fix this problem, click on the error and view the live version. Doing this will test your AMP page in HTML format and the line where the error is will be highlighted.
If understanding HTML codes sounds overwhelming, you can instead visit the AMP page and test every link, then fix or delete any broken links.
5. Duplicate .js Scripts
When you add a .js script to your AMP page, double-check that you didn’t accidentally add it twice. If you did, it causes an error.
To fix it, simply remove any extra .js scripts until you have just one.
6. Content Mismatch
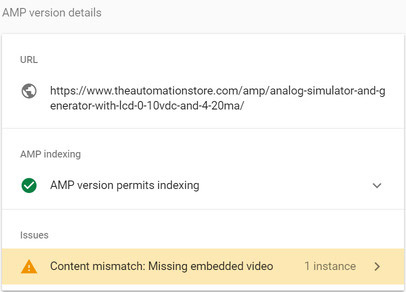
When you get a “content mismatch” error in AMP, that means there’s content that was on the web page that’s missing in the AMP version. Usually, this is an embedded video that may have been deleted.
So not only does that look bad, but it will also generate this error.
To fix it, just remove or replace the video or whatever the page element is.
Cons of Google AMP
By now, you might think that participating in Google AMP is a no-brainer. But, just like anything else, there is a negative side to it.
CSS and JS Restrictions
Even though limiting CSS and JS frameworks helps sites load quicker, it can end up removing branding elements, like graphics, animations, and high-definition images. And one thing that makes a site unique and friendly on the eyes is the branding. You might have written a blog post that uses infographics — with Google AMP, those may be removed.
Shows Only Cached Pages
AMP only displays cached pages, meaning users may not be able to get access to your newest content. Why does this happen? Because Google can show results faster by loading your cached pages.
Limited Ad Revenue Options
Google AMP lets you advertise, but the process is complicated and offers limited integration with other ad platforms. Here’s the step-by-step process for using ads on AMP.
Can Hurt Engagement
Even though the idea of Google AMP is to increase engagement, some people report that using AMP leads to much worse bounce rates and fewer page sessions.
Tracking Issues
Statistics for your AMP pages are tracked and stored separately and differently than your actual site. So, unless you’re very careful and organized, you may end up losing track of your site stats.
Wrapping Up
If your website loads even a second or two slower, it could drastically affect your website traffic. Your bounce rate could increase. The user experience is poor. And Google may not rank your site well because it notices it’s slow.
Speed is the main positive for implementing a WordPress AMP plugin. Even though using AMP can help with SEO, improve your server’s performance, and optimize your images, having a fast website is the most compelling reason to use it.
If you’re thinking about giving your site a little speed boost, try it with the Astra theme. From the get-go, this theme is already optimized for speed and security. Boost that with its native compatibility with AMP and you’ve got something really powerful in your hands.
Disclosure: This blog may contain affiliate links. If you make a purchase through one of these links, we may receive a small commission. Read disclosure. Rest assured that we only recommend products that we have personally used and believe will add value to our readers. Thanks for your support!




I tried two of the above plug ins. In any case by using Elementor and having things like WooCommerce will put your CSS and JS way over the minimal requirements. I use Astra as it is very fast. Yet for anyone other than an expert AMP is out of reach due to the amount of js, inline js css removed to effectively keep your site looking like a site at all.
Hello Neil,
Thank you for sharing your views.
As someone who have an online store via woocommerce, I find these must-have plug-ins very interesting. I never pay attention on abandoned cart on my site, but because of this article I will consider adding this plug-in.
I really appreciate that you take time on collecting these helpful tips for us online store owners, I do hope that you will continue sharing tips and advises for us to grow our store and keep on loop especially with the important updates.
I will give this post a 5 star! Thank you!
Yeah, there are really lots of AMP plugins for WordPress available and I don’t know which one to choose for my website. Good thing you made the selection of the top AMP Plugins and how they are different from one another coz I definitely wouldn’t want to try each one for me to decide what’s best for my website.
Thank you also for sharing about the Google AMP testing tool, I would definitely need that to see if this stuff really works.
5 Star for this article. Thank you for sharing. God bless.
I’ve tried the official AMP plugin but I decided to shift to the AMP for WP. For me AMP for WP works better with my site. It gives me more customization options and always there are updates and new features that I got to enjoy using. it goes with Google analytics and WooCommerce easily.
Thank you for your tips on resolving Google AMP issues. I’m experiencing some of those issues from time to time and I always end up listening of audio tutorials on how to solve it.
This is very helpful. Great job!
Are those ads safe? Will it pop-up to my mobile phones annoyingly? My site is just for my articles and I hate ads. But thank you for this detailed guide on how to setup AMP, I really want my friends to view my articles in their mobile phones. I thought it was difficult to install, but with your help I have now the idea on how to go about it and what to expect.
I’ll share here my experience after installing the plugin and hopefully I won’t be able to experience those AMP issues. This is a very informative article. I’ll save it for future reference. Thank you
Hello Ronny,
Glad that you found this article useful. We are referring to ads like Google Ads. And yes, the ads are safe, and no it wouldn’t pop up on your website.
So that’s how you fix that invalid URL for HTML error. Thank you for this helpful guide.
The best article!
Wow great Job. This is a very detailed guide with illustrations. Thumbs up for the hard work you put on this article.