The process of adding code to your WordPress theme can be a little confusing. Even if you know where you want to add the code, it can be difficult to figure out how to put it there.
This is often the case with the header and footer of your WordPress website. While they are on every page of your website, it is not obvious how to actually add or modify the code there.
But, don’t worry — in this post, we’ll show you how to quickly and easily add code to your WordPress header or footer. Depending on your situation, there are different methods of adding the code. The entire process will only take a few minutes, tops.
Let’s get to it!
Reasons Why You May Need to Add Code to the Header or Footer
Before jumping into the methods themselves, let’s briefly cover why you might want to add code to your website header or footer.
Connecting Google Analytics
One of the most common reasons for adding code to the header file is to link Google Analytics to your WordPress website. While there are many apps that do this, sometimes you may want to just add it manually.
Adding CSS Markup Code
CSS, which stands for Cascading Style Sheets, is the markup language used to apply colors and other design elements to HTML code. In simple terms, it is how you change the way your website looks.
Even if you aren’t a computer wizard, you have probably seen CSS code before. It looks like this:
p { color: blue; }
The first element p stands for paragraph. Everything within the brackets is applied to all paragraph elements in your document. The color parameter changes the text color, and blue makes it blue. You can learn more about CSS here.
It is usually best practice to add CSS code to a child theme or a designated part of your theme. For example, in Astra, you can add code in the Customizer. However, very rarely, you may want to add it to the header of your website directly.
Adding JavaScript Code
JavaScript is another technology that is commonly found on websites. It is used to add dynamic elements to web pages and modify HTML.
As with CSS, JavaScript is typically best added via a special place in your theme’s customizer or similar features. In Astra, for example, you can add JavaScript via Astra Hooks or with the Custom Layouts module.
Adding the Facebook Pixel
Finally, you may want to add a Facebook Pixel to your WordPress header. The Facebook Pixel is used to connect your site to your Facebook account, typically for analytics purposes. Learn more about the Facebook Pixel on the official website.
While there are plugins that can do this for you, sometimes you may want to just add the code directly yourself.
Methods to Add Your Code
There are many ways to add code to the WordPress header and footer. Let’s walk through the different methods available.
1. Astra Custom Layout Module

If you are an Astra Pro customer, you can use Custom Layouts to easily add code to the header or footer. Learn more about Custom Layouts here or purchase a paid plan to gain access to them.
Step 1: Make Sure the Astra Pro Plugin is Installed
First, download and install the Astra Pro plugin. If you aren’t an Astra customer, you can sign up here. Once you’ve installed the plugin, activate it.
Step 2: Go to Appearance > Astra Options
On your WordPress sidebar, go to Astra > Dashboard. Scroll down and find Custom Layouts and then enable it.
Once you activate it, you’ll see a new item under Astra. Click on it.

Then, click Add New to create a new item. You’ll be asked to Choose Custom Layout Type
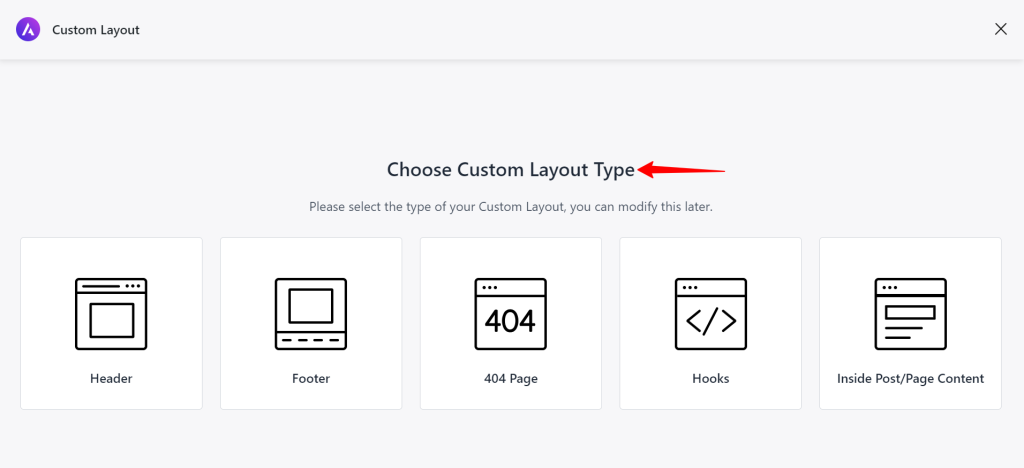
Choose the custom layout of your choice. Add a title and your code snippet. Below, you’ll see the Settings panel. You can choose where you want the snippet to be added.
Once you select an option, you’ll see more settings.
Let’s briefly cover each one. The settings are the same for Header and Footer.
- Stick: This will make your header or footer “sticky” and keep it at the top or bottom of the screen, respectively.
- Display On: Here, you can choose what pages the code snippet will be displayed on (or excluded from.)
- User Roles: This lets you choose which types of users will see the snippet.
Finally, save your snippet and publish it. Done! It is now active.
2. Create an Child Theme

A child theme allows you to modify your WordPress theme without affecting the files of your main theme (parent) and keep them separate from your regular (parent) theme. Child themes are useful because your modifications won’t be erased when you update your main theme.
There are many ways to create a child theme.
There are three basic ways to create a child theme:
- With the Astra Child Theme Generator. Note that this is designed primarily for the Astra theme, but you can easily modify the contents and screenshot image to match your theme.
- By using a plugin. There are many free plugins which allow you to create a child theme. Some of our recommended plugins for this include Generate Child Theme, Child Theme Wizard, and Child Theme Configurator.
- Creating a child theme manually. This is a more complicated process, but is easy to do if you understand FTP and editing files. You’ll just need to create a copy of the file you wish to change (header.php or footer.php), modify it, then upload it via FTP.
3. In the Customizer of Certain Themes
Some themes have a special section that allows you to add code to the header or footer. Typically, this is in the WordPress Customizer, but it depends on the specific theme.
To see if your theme allows for modifying the header or footer via the Customizer or another designated area, just read the theme’s documentation.
4. Manually in Your Theme (Header.php / Footer.php)
Note: This method is not recommended, for a few reasons.
One, because any modifications you make will be erased if you update your theme. In this instance, you should create a child theme (see above.)
Two, because you run the risk of messing up your theme. If you aren’t technically-proficient, you may accidentally modify some important code.
Three, because there are much easier ways to add the code.
Having said all that, there are some situations in which you may need to modify the theme directly. For example, if you are just quickly testing a piece of code.
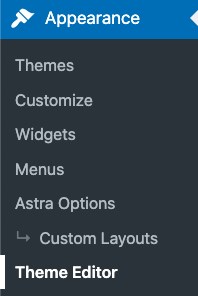
To manually edit the files, go to Appearance > Theme Editor on your WordPress sidebar.
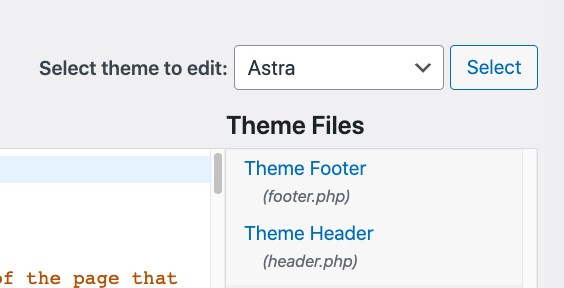
Then, in the top right, make sure that the correct theme is selected. If it is, scroll down to the file you wish to modify. That will be either header.php or footer.php.
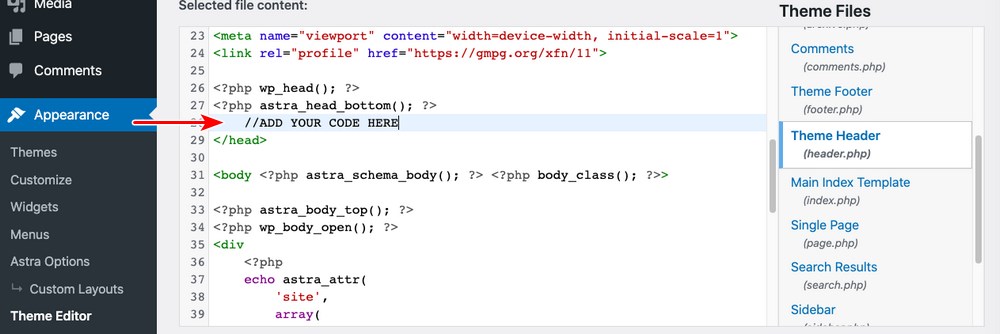
Finally, add the code to the file. You want to add it just before the closing </head> tag, like this:
Save the file and reload the page. Your code should now work!
5. Use a Plugin
Finally, the easiest way to add code to your header or footer is to simply use a plugin. There are many options available. Here are a few of our recommended ones:
Let’s walk through using the first one, Header Footer Code Manager.
Step 1: Download, Install, and Activate the Plugin
First, download the plugin from this link. Install it and activate it on your website.
Step 2: Navigate to the Settings
On your WordPress sidebar, you’ll see an item called HFCM. This stands for Header Footer Code Manager. Click on it.

Now you’ll see the list of all your snippets, or pieces of code. It will be blank at first.
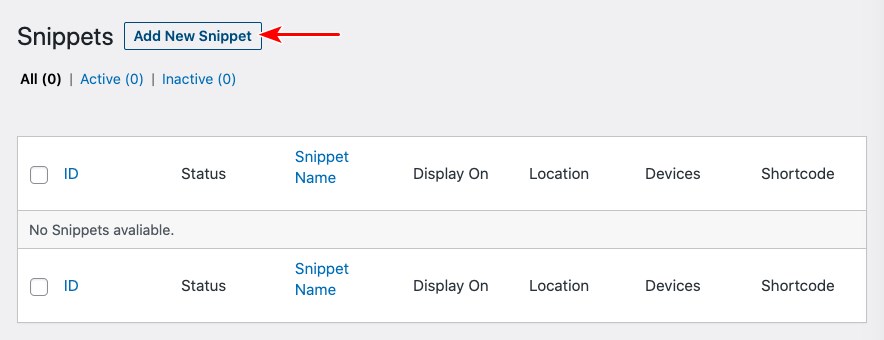
Click Add New Snippet. Now you need to fill out all of the settings:
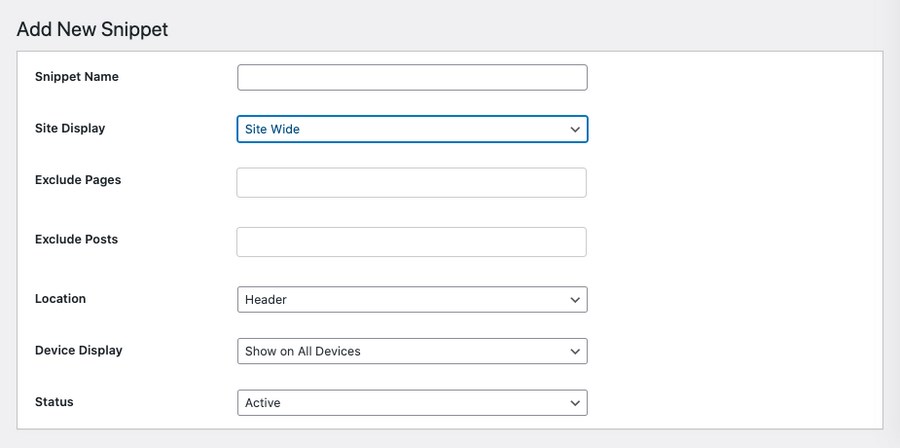
- Snippet Name: The name of your snippet. This doesn’t matter and is only for your own personal use.
- Site Display: Choose where you want this code to be displayed. For example, you can have it only display on certain pages, posts, tags, or only when the shortcode is used.
- Exclude Pages and Exclude Posts: Choose pages where the snippet will not be displayed.
- Location: Choose if you want the code to be added to the header or footer.
- Device Display: Choose if you want the code to be enabled on mobile, desktop, or both.
- Status: Activate or Deactivate the snippet.
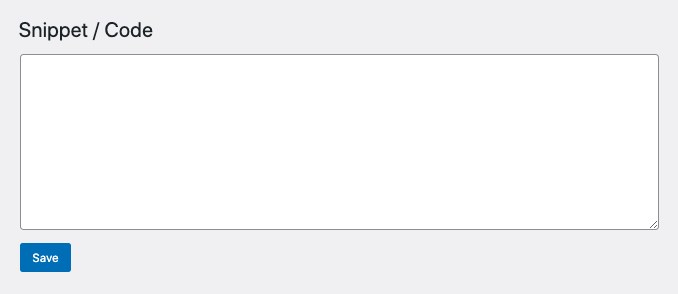
Below the settings panel, you’ll see a text area to add the code itself. Add your code and press Save.
Finally, back on the main page, you’ll see your code snippet:

And that’s it! Your snippets will now be working.
6. Google Amp
As a bonus, we’ll also now show you how to modify the header and footer text that appears in the Google AMP version of your site.
What is Google AMP?
Step 1: Download and Install the AMP Plugin
First, install the AMP plugin from this link. Then install it on your site.
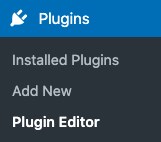
Step 2: Go to Plugin Editor
Now go to Plugin Editor on your WordPress sidebar.
Step 3: Edit the Plugin
Making sure that AMP is selected in the top right corner, click templates and then footer.php. In the file window, you’ll see tags for <footer class=”amp-wp-footer”> and </footer>: this is where you can modify the footer.
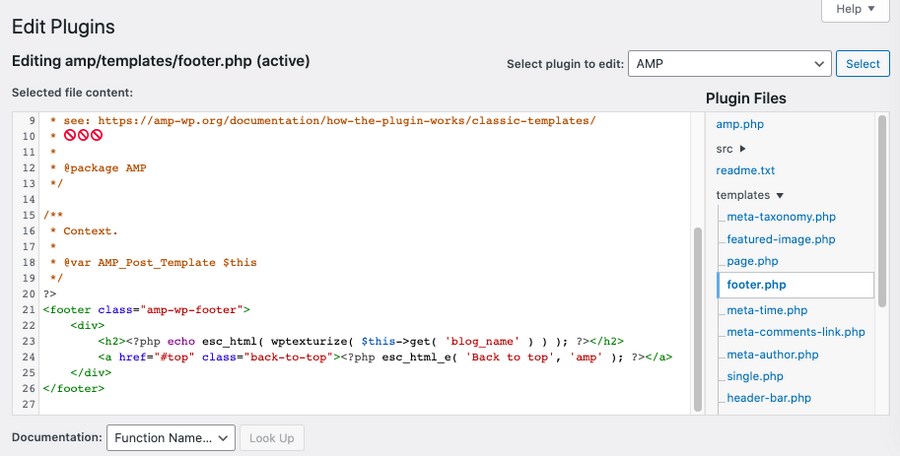
Note that these changes will be erased if you update the plugin. However, you can modify the code to prevent this, but it is beyond the scope of this tutorial.
Conclusion
This post is a pretty straightforward one! In it, we showed you how to add code to the header or footer in a variety of different ways. We also talked about modifying the Google AMP version of your site.
There are other ways you can edit the website header and footer. Check out the below resources to learn more.
If you have any questions, please let us know in the comments!
Disclosure: This blog may contain affiliate links. If you make a purchase through one of these links, we may receive a small commission. Read disclosure. Rest assured that we only recommend products that we have personally used and believe will add value to our readers. Thanks for your support!
