With Astra Site Builder, you can create a custom header and also make it sticky. However, the transparent header effect is currently available only with the default Astra header.
In such a case, if you need to display a custom header on a few pages with a transparency effect, you will need to make some adjustments in the custom header to enable the transparency effect.
This guide explains how to create a transparent custom header using Astra Site Builder. Before moving further, we recommend checking the instructions on how Custom Header with Astra Site Builder works.
How to Create a Transparent Custom Header
To create a transparent custom header, please follow the below steps to create a custom header first.
Before you start using the Site Builder, make sure you’ve installed and activated the Astra Pro plugin. Also, update both the Astra Theme and Astra Addon to the latest versions to access the Site Builder.
After that, go to the WordPress dashboard, click on Astra, then Astra Pro Modules, and switch on the Site Builder toggle.
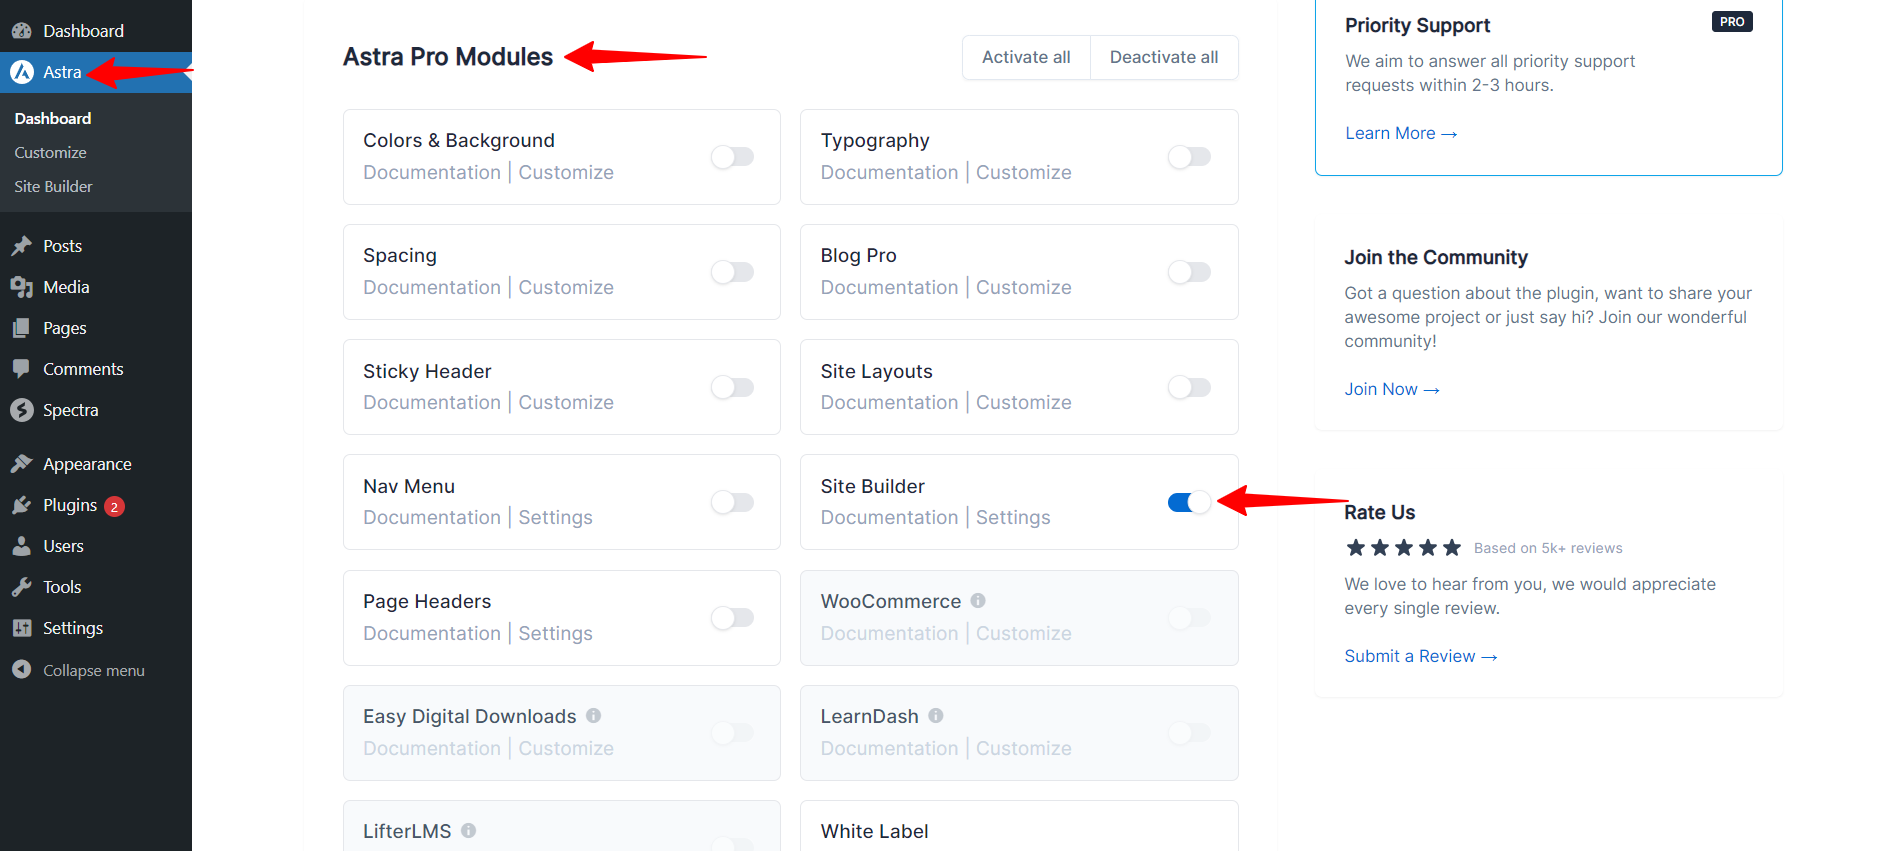
Once you switch on the Site Builder toggle, then you can see the Site Builder under Astra in the wordpress dashboard.
After clicking on the Site Builder, you can explore the revamped Site Builder through the All Layouts Section.
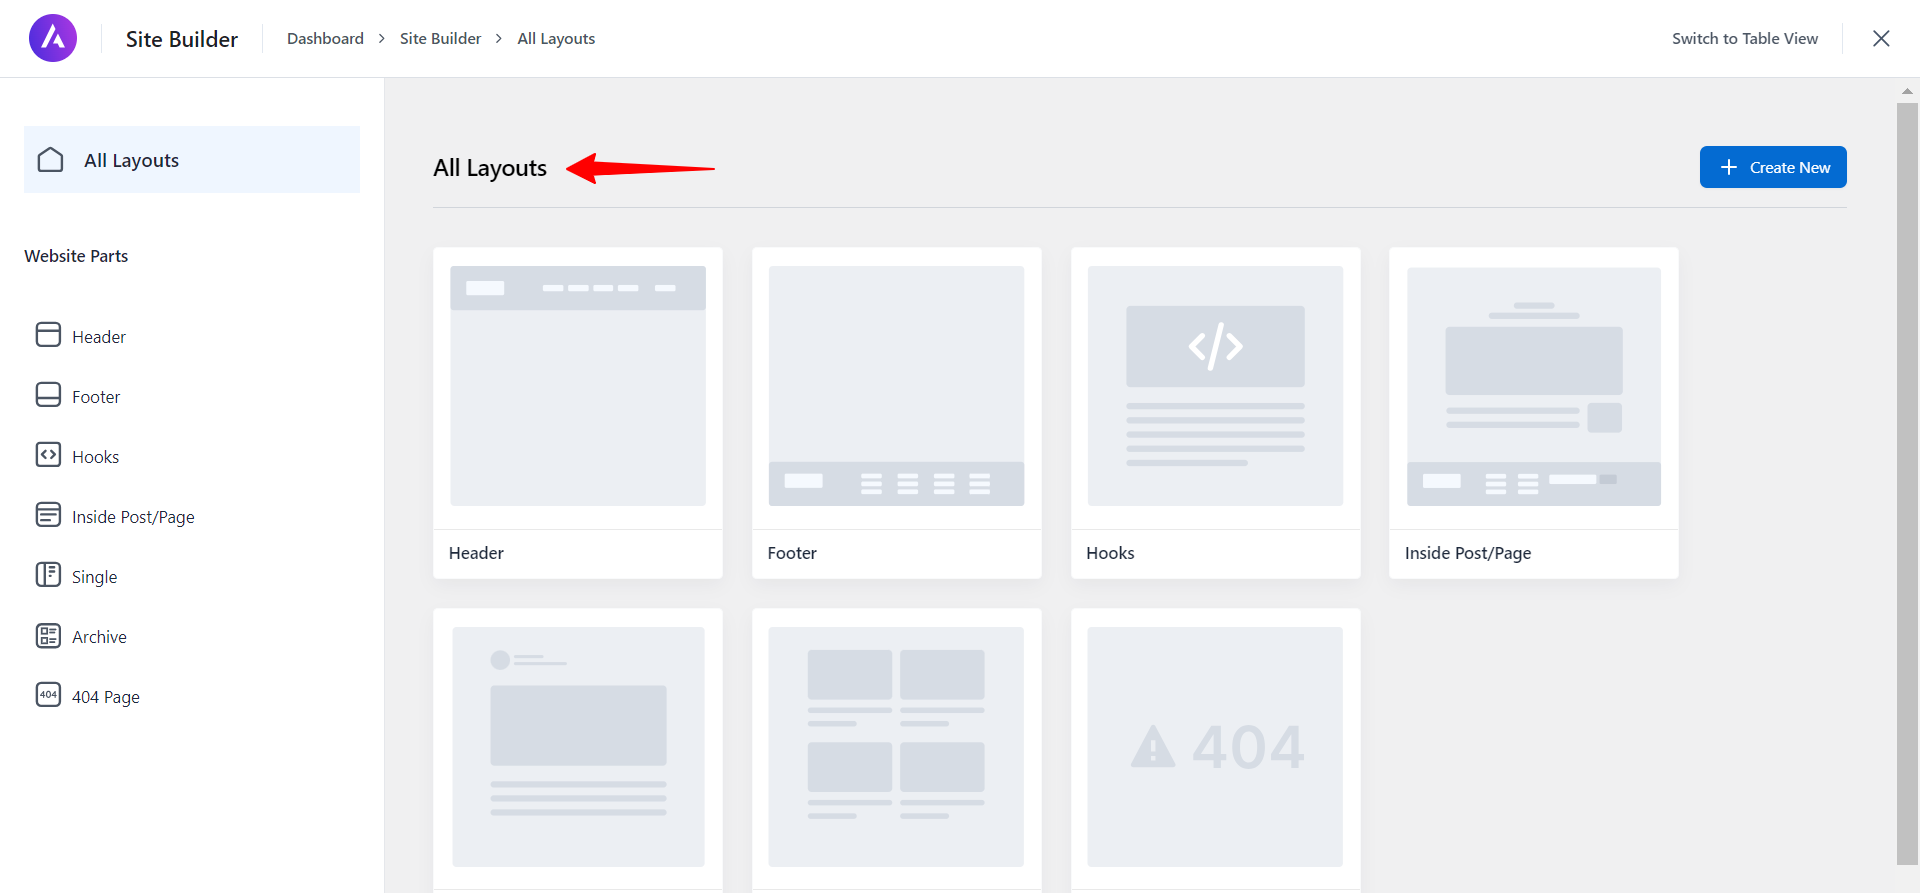
From the site builder dashboard, you can create a header template.
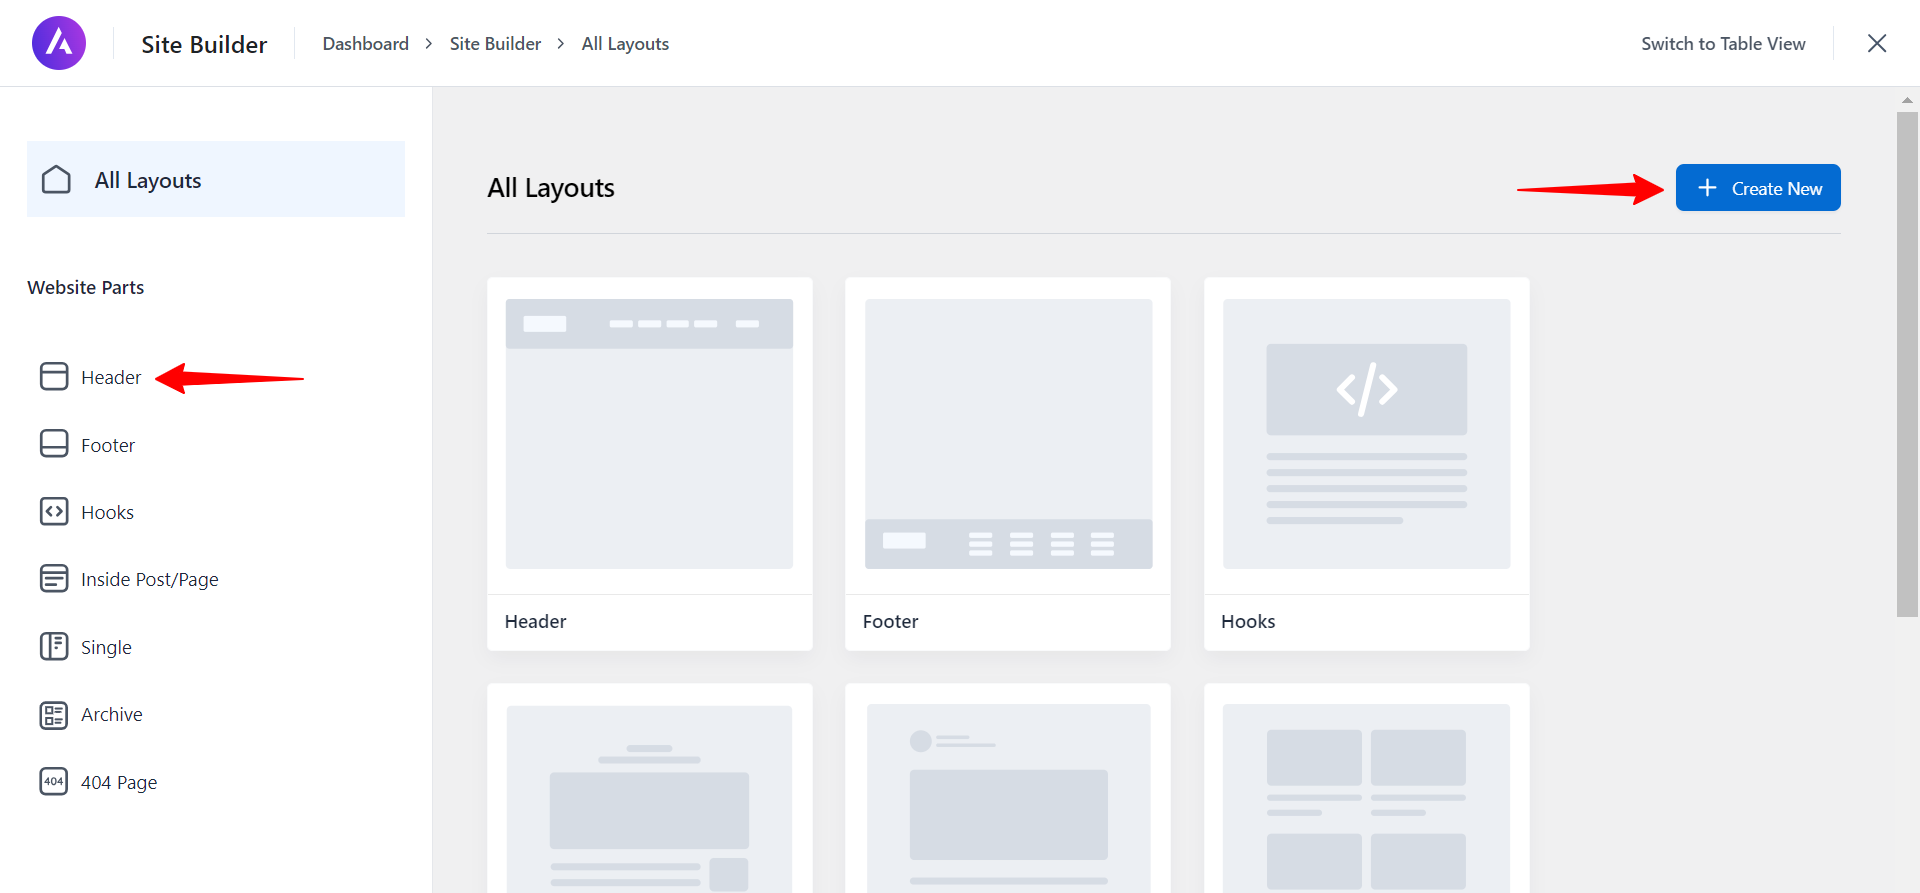
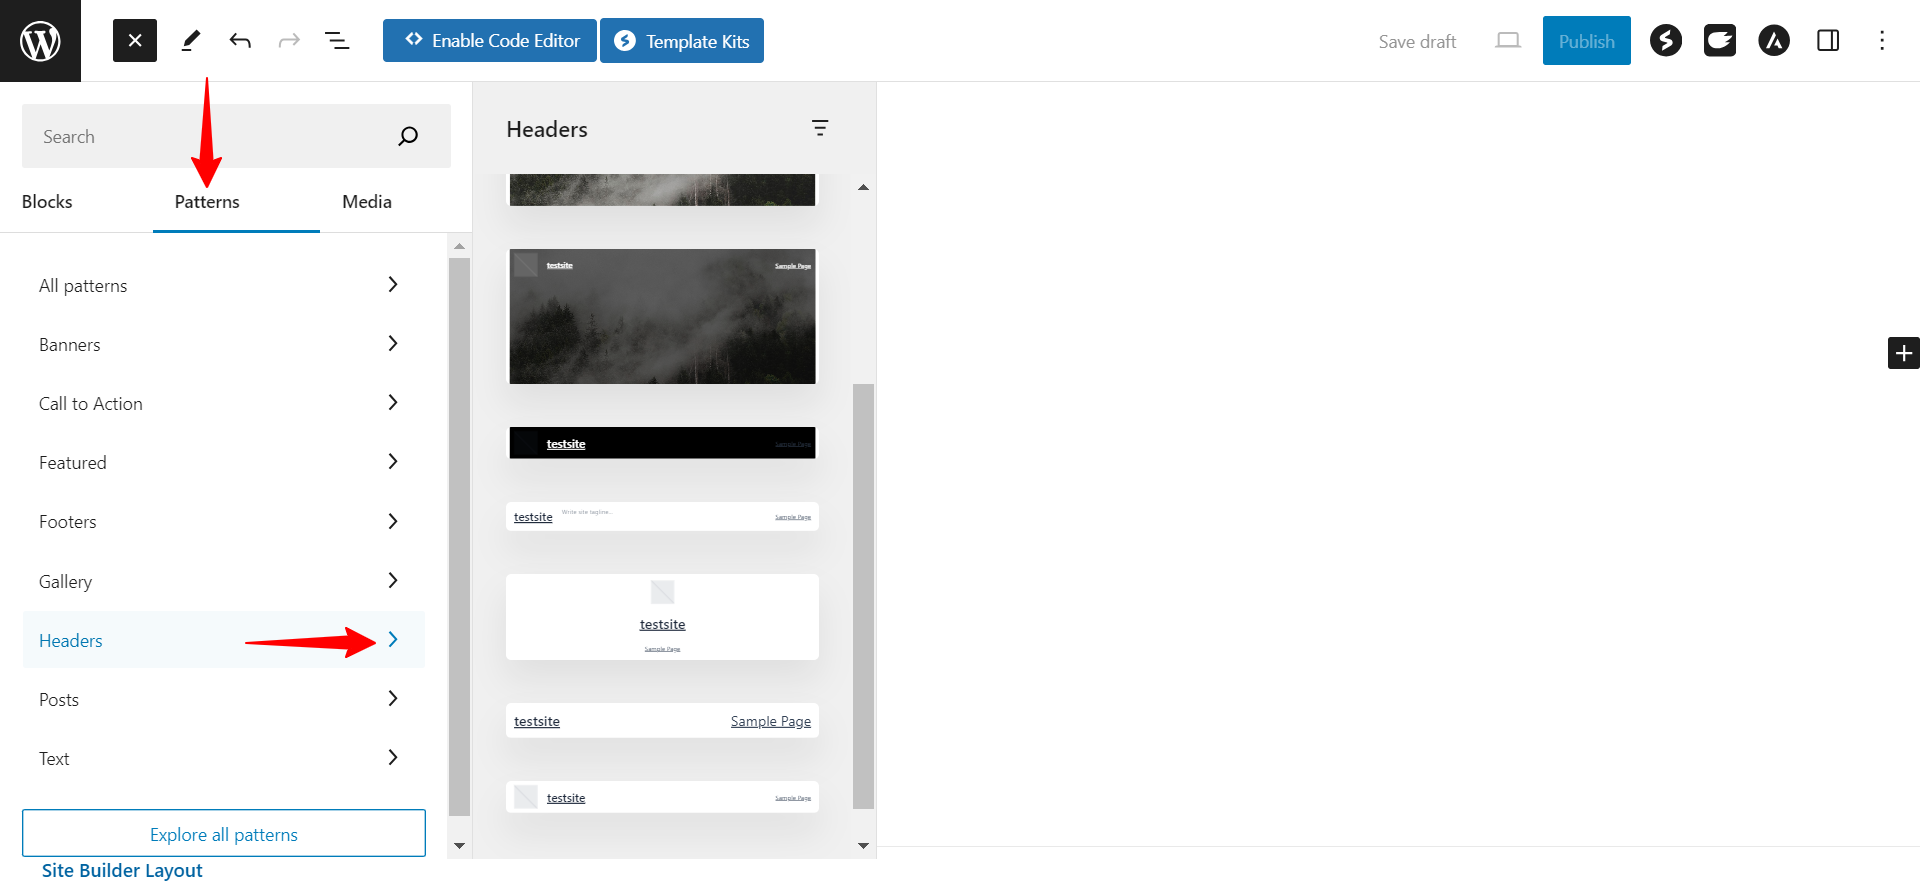
You can create a header layout using columns or select the already created design from the patterns.
Once the header design is added, select the main column or group and clear the background to make it transparent.
For the same block, add the custom class in the additional classes section:
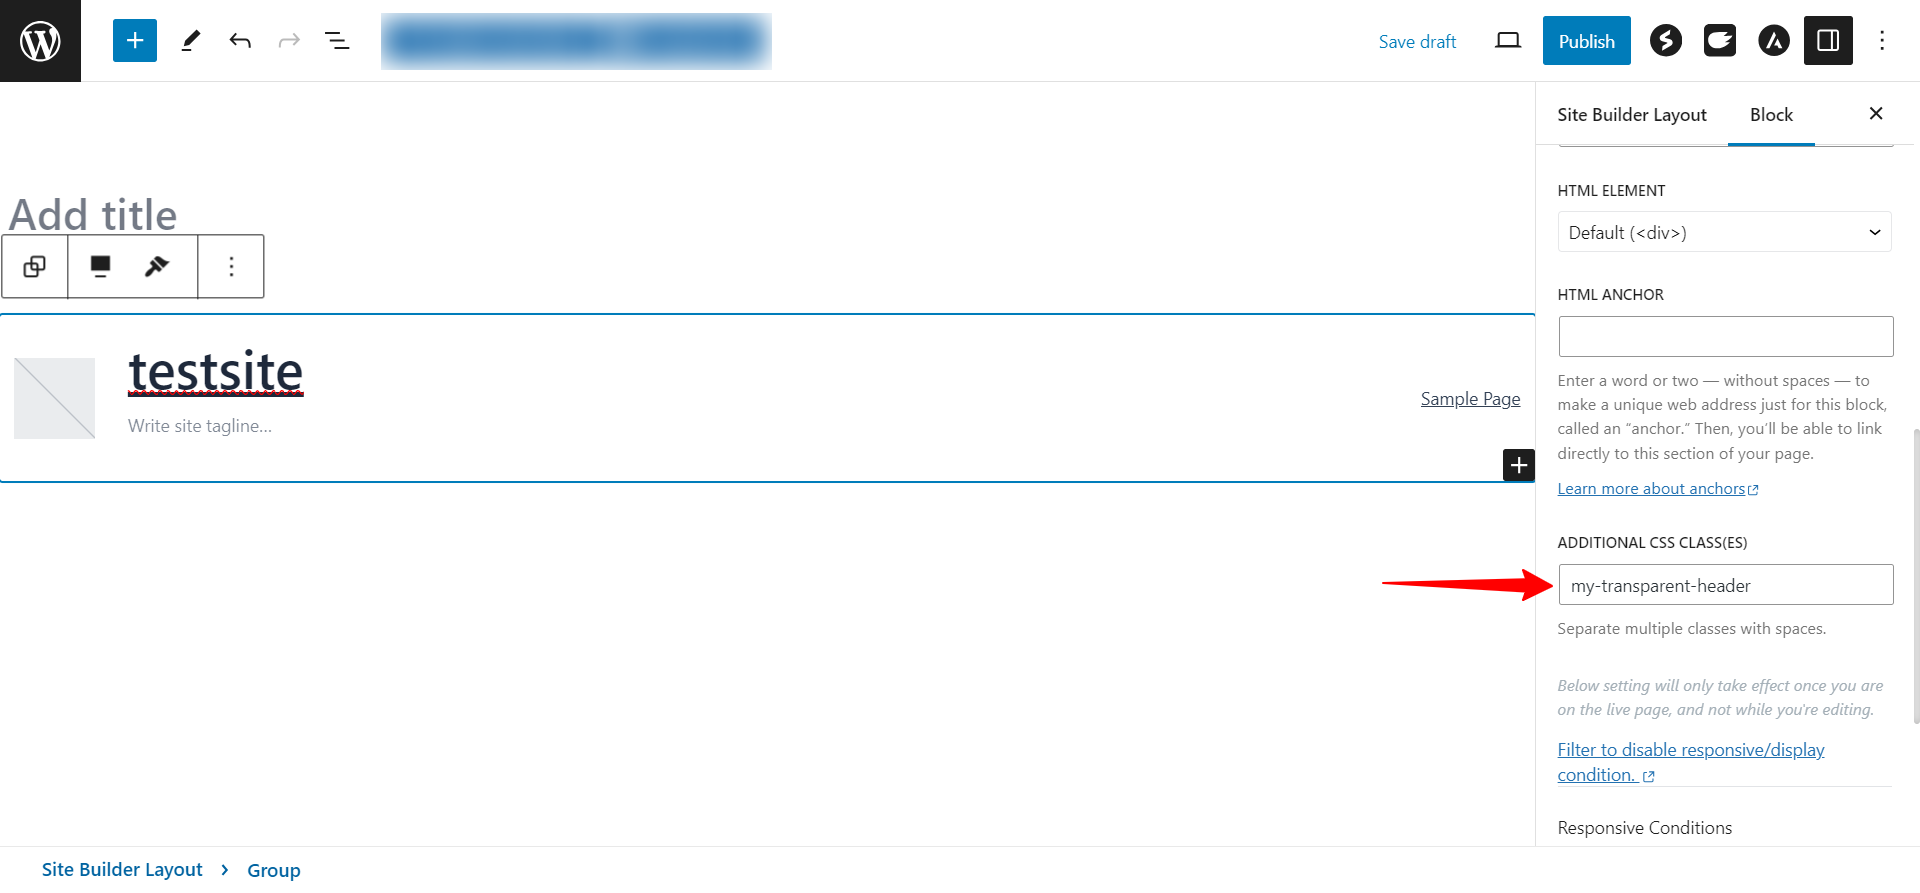
Apply the display conditions to enable the custom header on the website and publish the changes.
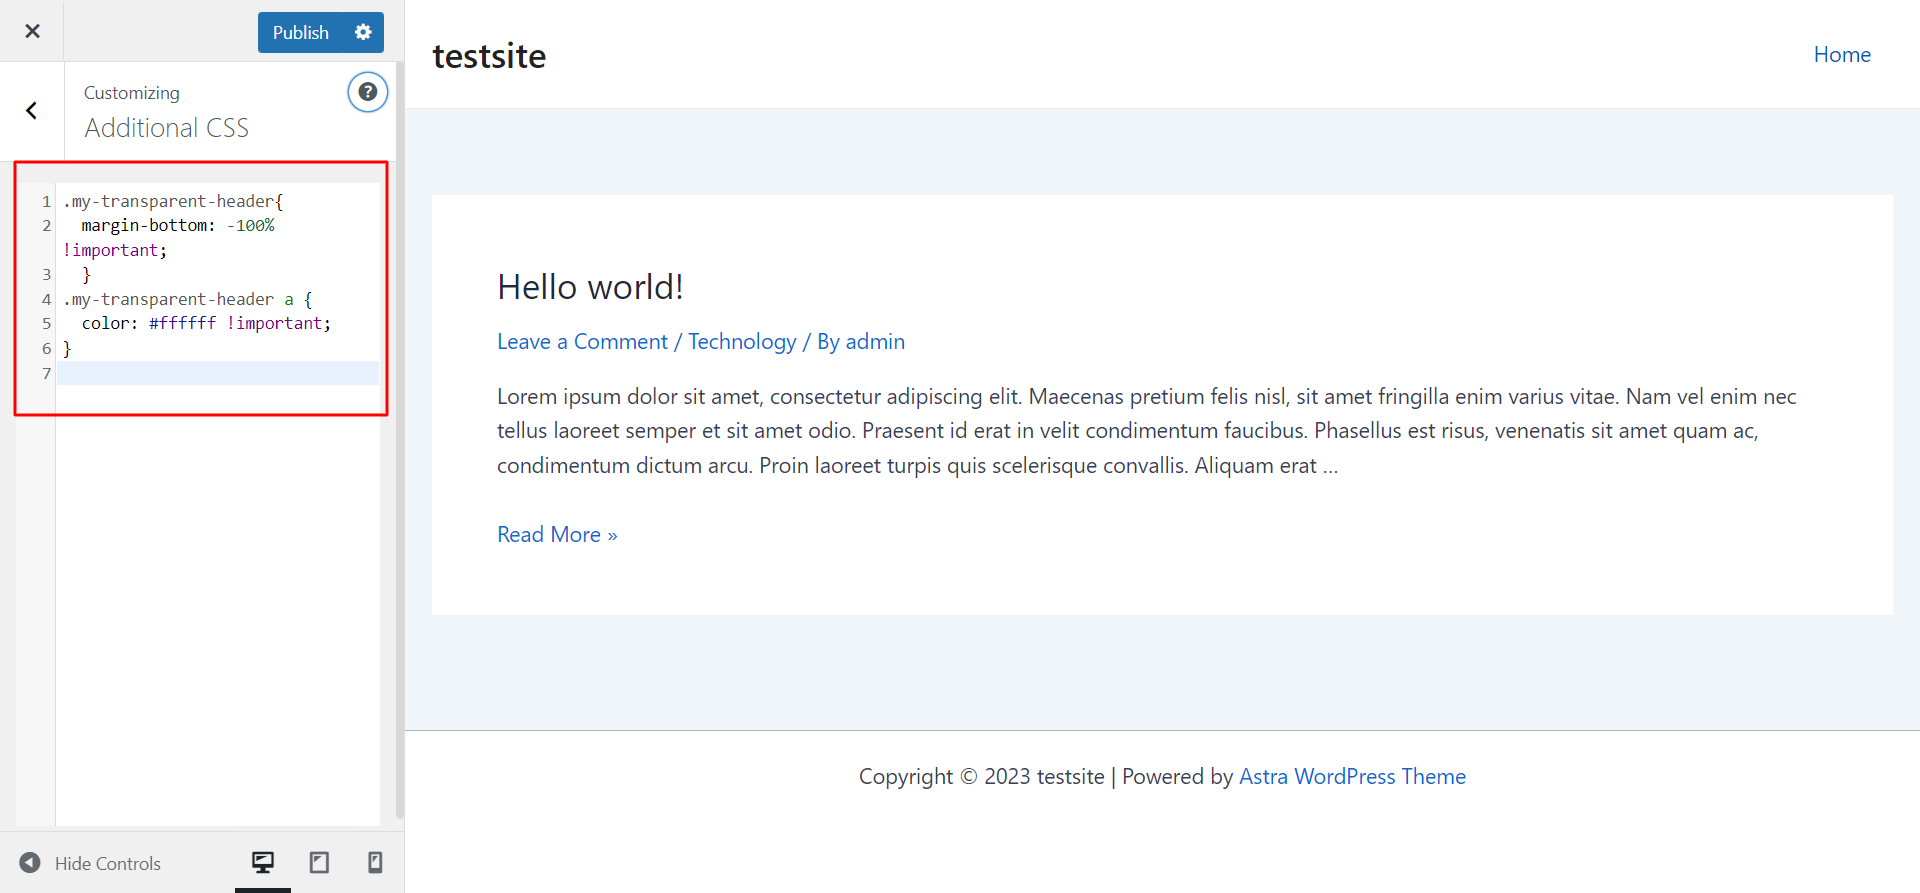
Next, navigate to the Additional CSS section of the customizer and add the following CSS:
.my-transparent-header{

margin-bottom: -100% !important;

}

.my-transparent-header a {

color: #ffffff !important;

}
Note: The class in the above CSS should match with the class added in the custom header block.
Publish the customizer changes, and the transparent custom header should be enabled on the website.
You can further modify it according to your requirements by adding additional design options using the CSS.
We hope this article has been helpful. If you have any questions, please feel free to comment below.
