Have you recently learned about inline frames (iFrames) and how they can help you share content on your website? If you run a blog, or produce any web content, there will be lots of times when you might want to share other peoples’ content.
iFrames make it possible to do this efficiently and safely.
With an iFrame, you will be able to display content like videos and images without having to host them on your website.
In this post, we’re going to outline what iFrames are, what they do and how to use them in WordPress.
We’ll then show you how to embed them manually and using plugins.
Using iFrames in WordPress
You might wonder why you need to use an iFrame to embed content when there are other ways of doing it.
For one, you could simply copy and paste the content into your website, right? Or in the case of video, simply download and upload it into your posts, pages, or media library?
While these methods work, they are not advisable. Firstly, copying and pasting other peoples’ content could be a violation of copyright laws.
The second reason why you should not upload content such as video, is because these files take up significant amounts of disk space and bandwidth and could slow down your website. Consider buying video hosting if you want to host videos locally.
Using an iFrame will avoid both of these concerns.
What are iFrames?

An iFrame is a piece of HTML code that is used to create a HTML page embedded within another HTML page. Essentially, it creates a window for viewing content from external sources from within a webpage.
An iFrame looks like this:
<iframe width="560" height="315" src="https://www.youtube.com/embed/KWFin60lkmw" title="YouTube video player" frameborder="0" allow="accelerometer; autoplay; clipboard-write; encrypted-media; gyroscope; picture-in-picture" allowfullscreen></iframe>In creating an iFrame, there are three important elements that you need.
The first is the short piece of code that actually creates the iFrame. This will be pasted into the HTML code of the page you intend to display the external content on.
<iframe src=”yourdomainname.com”> </iframe>
You will also need to have the URL of the external page embedded within this code.
<iframe width=”560″ height=”315″ src=”https://www.youtube.com/embed/KWFin60lkmw” title=”YouTube video player”
Finally, a set of attributes which will determine how the iFrame will be displayed.
frameborder=”0″ allow=”accelerometer; autoplay; clipboard-write; encrypted-media; gyroscope; picture-in-picture” allowfullscreen></iframe>
These specifications tell your website things like what width, height, style and so on to use in displaying the iFrame.
We’ll go into more detail on this when discussing the manual method of embedding iFrames into your website.
iFrames might be good at providing a way to display heavy content without importing them but that’s not all you can do with them. The full range of things that you can use an iFrame to achieve might surprise you. Take a look at some examples below!
Display Another Webpage
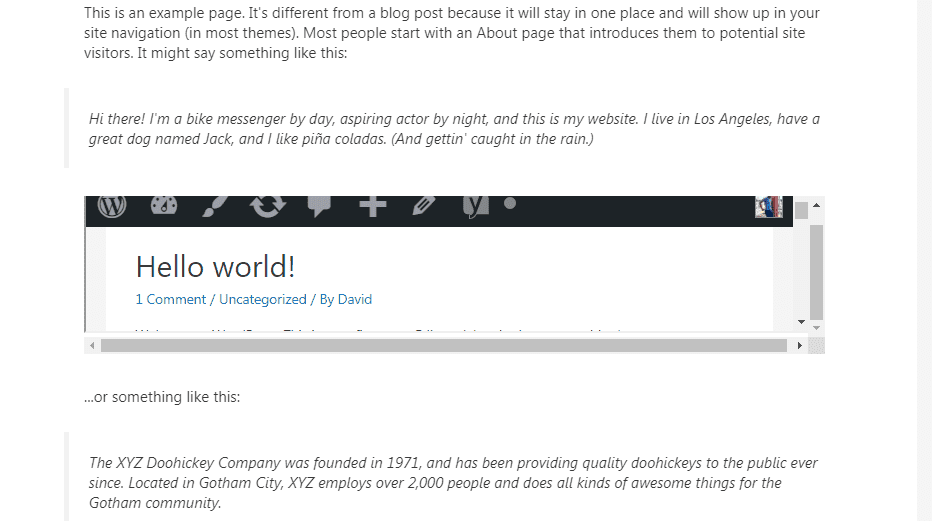
Want to refer your readers to another page without them navigating away? Use an iFrame! This is an excellent way to share interesting or insightful content while keeping readers on your page.
Display Dynamic Social Media Content
You could display social media posts simply by taking screenshots but iFrames offer something extra. They are able to capture dynamic content such as likes and shares as they change in real time.
Host Ads
Most adverts are shown in iFrames. This allows the advertiser to maintain control over their ads, making updates as needed.
These are just a few examples of things you can do with iFrames. Depending on your needs and skillset, there may be so much more that you can do with them.
Things to Know Before You Get Started Using iFrames
Despite the convenience provided by iFrames, there are some things you should know before you get started.
They are:
HTTPS/HTTP Compatibility Issues
You can only embed content from websites or web pages that use the same Hypertext Transfer Protocol (HTTP) as yours. This means if your website uses HTTPS (Hypertext Transfer Protocol Secure), then you can only embed content from other websites with HTTPS. This applies to HTTP too.
HTTPS is recommended by Google, and most reputable websites use it. If yours does too, you should be able to embed high quality web pages with ease.
A far more serious concern is the potential security vulnerability that iFrames can bring to your website. Since iFrames are a window to other pages, whatever happens in those pages can have an impact on yours.
iFrames can also be used to inject malicious code into your website. Remember that your iFrame simply opens a window to another website, and you cannot necessarily prevent malicious code from being used on the source website.
A simple fix for this is to only use iFrames to embed content from reputable websites.
For more advanced security settings, use the sandbox attribute in your iFrame. More on this will be covered when we discuss how to create an iFrame.
Google is Not a Big Fan of iFrames
Google advises that you avoid using iFrames but if you must, simply provide a text-based link to the same content to enable Google bots to crawl this content.
While these warnings may sound alarming, there is no cause for concern if you follow the best practices we will share in this guide.
Not all Websites Allow their Content to be iFramed
In writing this article, we frequently observed that most big websites have disabled the possibility of their content being displayed in an iFrame. If this is the case with a web page you would like to display via an iFrame, there won’t be much you can do about it.
How to Use iFrames in WordPress (3 Methods)
Now that you know what an iFrame is and when you might use one, we’ll show you all the different ways of integrating iFrames in WordPress.
We’ll start by showing you how to use pre-generated embed codes, then we’ll walk through creating iFrames manually, and finally, how to use a plugin.
They’re all easy to learn and apply!
Method 1: Embed iFrame Using Embed Codes
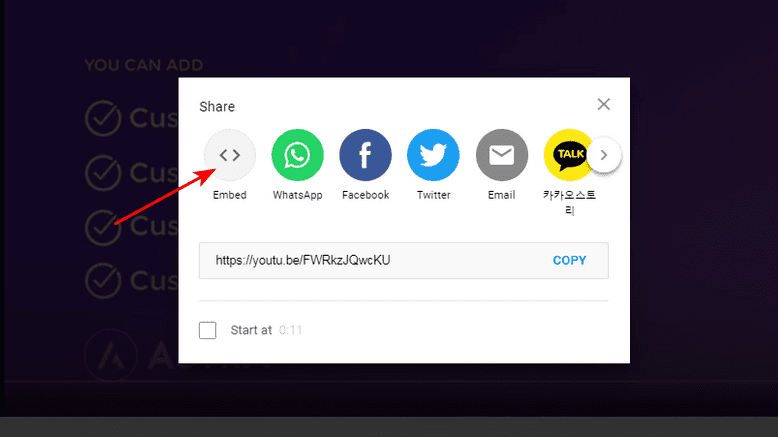
This method is possibly the easiest but typically applies only to websites that provide an embed code for their content.
If a code is provided, you will typically find it under any available sharing options.
In YouTube for example, this code is visible when you click on the share icon under a video. Click on the embed icon to acquire the iFrame code.
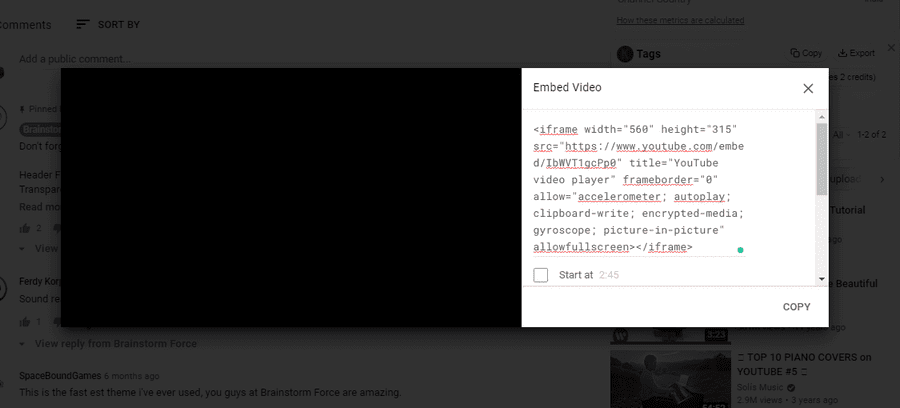
Simply copy this code and paste it into your web page using a HTML block. Blocks are the new way of building WordPress websites using the relatively new Gutenberg builder.
The Gutenberg builder comes with a native suite of blocks which include a HTML block. There is also a specific YouTube block, but you can use either.
You can extend the range of Gutenberg by using an add-on plugin like the Ultimate Add-ons for Gutenberg. You can also use HTML blocks in any of the top page builders for WordPress.

In your new HTML block, paste in the embed code just as in the example above. When the code in the example is previewed, here’s what we get:

To use iFrames without having a native embed code from the source website, simply paste the following line of code into a HTML block:
<iframe src="example.com"></iframe>This is a basic example of what iFrame code might look like. You may have noticed that the code in the previous example is a lot longer. This is because it contains attributes. You can control a lot about an iFrame by adding attributes to the code.
For instance, you can determine what height and width the iFrame should be, along with other attributes.
Those attributes are:
- Width and Height – You’ll see ‘width=’ and ‘height=’ where you size the window – For example width=”250px” height=”300px”
- Frameborder – You can show a border, or not using ‘0’ or ‘1’ – frameborder=”1″
- Align – Set the alignment within the page by using ‘left’ ‘right’ ‘right’ ‘top’ ‘bottom’ within the iFrame code – for example, align=”left”
- Scrolling – Disable or enable scrolling with scrolling=”yes” or scrolling=”no”
Here’s another example:
To modify the height and width to 800 pixels and 500 pixels respectively, you will include height and width attributes like this:
<iframe src="wpastra.com" height=”800px” width=”500px”></iframe>Earlier, we promised to show you how to use the sandbox attribute to prevent malicious external activity from affecting your users.
Simply include the sandbox attribute like this:
<iframe sandbox src="example.com" “height=”800px” width=”500px”></iframe>So the example we shared earlier should now make a lot more sense!
<iframe width="560" height="315" src="https://www.youtube.com/embed/KWFin60lkmw" title="YouTube video player" frameborder="0" allow="accelerometer; autoplay; clipboard-write; encrypted-media; gyroscope; picture-in-picture" allowfullscreen></iframe>Method 2: Use the Text Editor
You can write a bit of code into a web page to create an iFrame. Don’t worry, this method is simple and you won’t even need to use the WordPress editor.
If you still use the WordPress classic editor, you can use this method.
To get started, open the page or post you would like to embed the iFrame in and change the view from the visual editor to the text editor.
Navigate over to the point where you would like to display the iFrame and paste in same code we just showed you:
<iframe src="example.com"></iframe>Replace example.com with the destination URL. Save or update the post or page, and you’re good to go.
Method 3: Add an iFrame Using a Plugin
Plugins are probably the easiest way of inserting an iFrame in WordPress for less experienced users, and there are numerous plugins to consider.
Here are the top two we recommend, and how to use them:
iFrame by Webvitaly

The iFrame plugin by Webvitaly offers the ability to embed content from almost any website in your pages. Download and activate the plugin to get started.
Once this is done, creating an iFrame is quite easy as all you have to do is paste the shortcode into your content at the relevant place.
The plugin is free and works well, however, it is not currently being maintained by its developers.
The most popular alternative would be a paid iFrame plugin such as Advanced iFrame Pro by Michael Dempfle.
Advanced iFrame Pro by Michael Dempfle
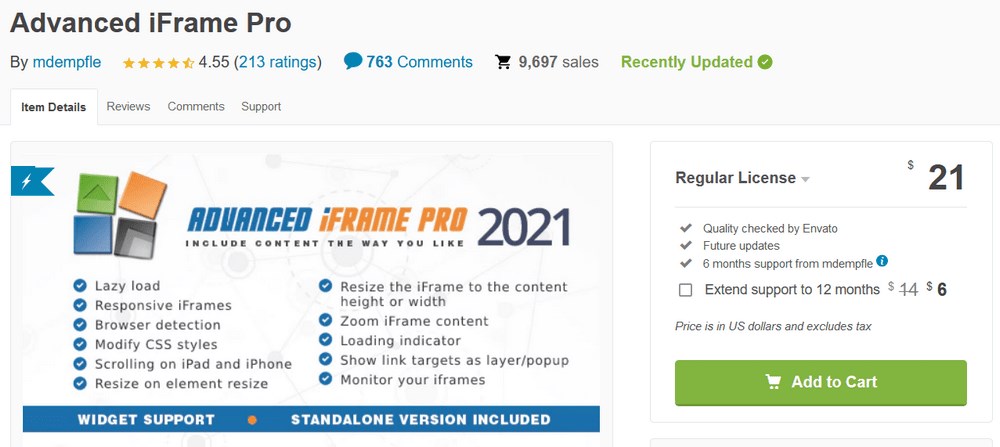
As mentioned, Advanced iFrame Pro provides a few extra security and customization options when compared to the Frame Plugin.
Once the plugin is installed and activated, all you need to do is use the shortcode to insert iFrames at the relevant places.
To get started, download, install and activate the plugin from the WordPress repository.
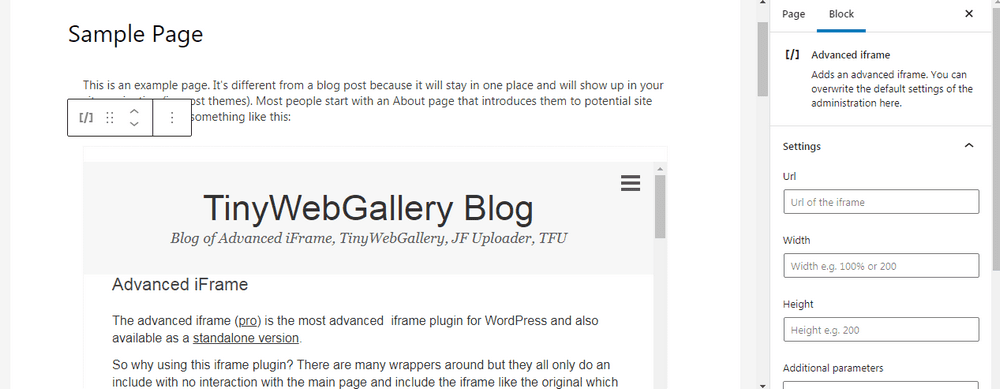
Open the WordPress page or post where you would like to use it, and search for the advanced iFrame block.
Insert this into the content and click on the three dots to reveal more options.
Click on Show More Settings. This will allow you to set the URL of the iFrame as well as its attributes.
Set them to the appropriate values and save or update the page or post. That’s it!
This plugin costs $21 but there’s a free version you can try as well.
You’re Ready to Get Started with Using iFrames in WordPress!
Using iFrames in WordPress can help you achieve many different objectives. From safely and properly sharing copyrighted content to displaying heavy videos, iFrames are a good solution for content sharing.
Using iFrames is one tactic to help optimize your website’s speed. You should also remember to use a fast, lightweight and responsive WordPress theme.
There are some challenges around the usage of iFrames, as we’ve shown, but if you follow the steps we’ve outlined here, you should be perfectly okay.
Have you used iFrames before? We would love to hear what your experience was. Also, don’t forget to share if you know of some other ways to use iFrames in WordPress!
Disclosure: This blog may contain affiliate links. If you make a purchase through one of these links, we may receive a small commission. Read disclosure. Rest assured that we only recommend products that we have personally used and believe will add value to our readers. Thanks for your support!


HELLO AND THANK YOU FOR THE ARTICLE
PLEASE IS IT POSSIBLE TO EMBED A WEB APPLICATION THAT HAVE LOGIN STEP, I’VE TRIED BUT ALWAYS SHOW 419
PAGE EXPIRED
There might be other reasons, this would require further debugging. Do hire a freelancer or developer to assist you with this.